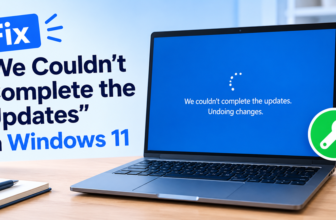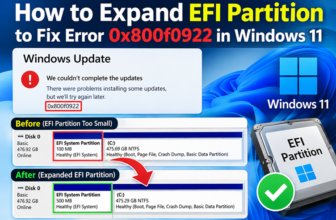

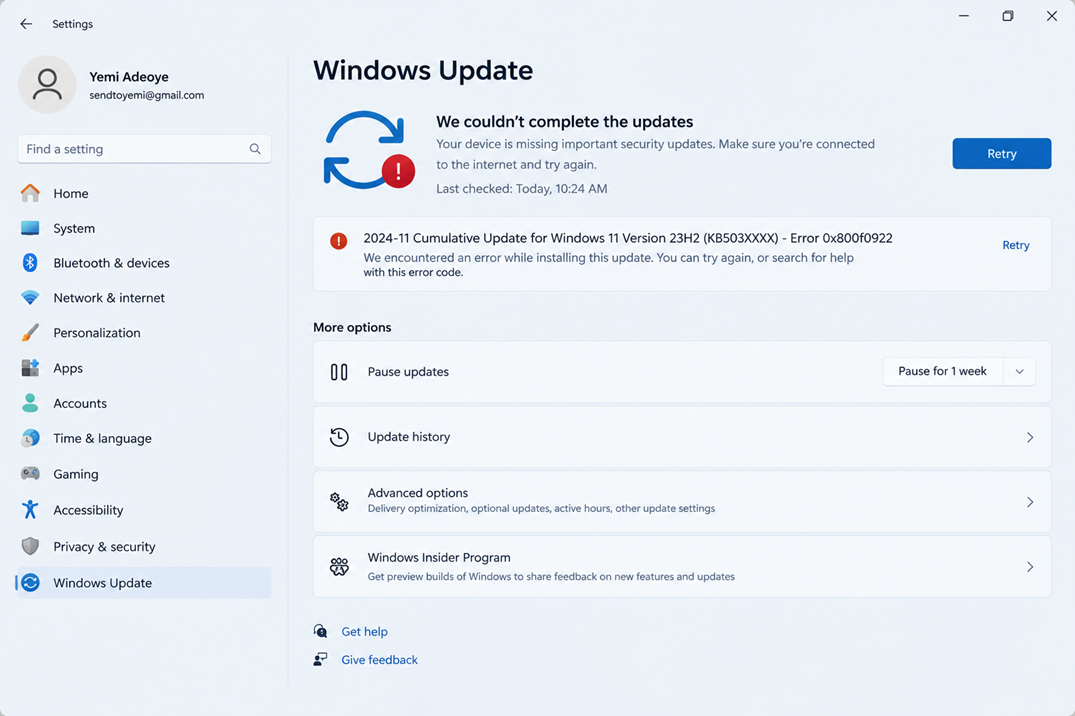
Here’s how it usually goes. Windows Update downloads an update, starts installing, and climbs to 30, 60, sometimes 90 percent. Then the PC restarts and shows “We couldn’t complete the updates. Undoing changes made to your computer.” You land back on your desktop, and a few hours later the same update is waiting to try again. Open the update history and you’ll find the same failure listed with Windows 11 error 0x800f0922.
This error doesn’t point to a single defect. It’s a generic installation failure that Windows raises when something in the servicing process breaks, and the culprit can be a network hiccup, a full recovery partition, a damaged component store, or software getting in the way. That’s why retrying the update over and over rarely helps. If the underlying cause is still there, the update fails the same way each time.
The fixes below run from the least disruptive to the most involved. Work through them in order and stop when the update installs.
What Is Windows 11 Error 0x800f0922?
Error 0x800f0922 is a servicing failure code. It means Windows started installing an update, or enabling a Windows feature, and couldn’t finish the job. It appears mostly with cumulative updates and feature updates, and it also turns up when people try to enable optional components like .NET Framework 3.5.
Because it’s a general-purpose failure, several different problems can produce it. In practice, these are the most common:
- Not enough free space in the system partition. Windows keeps small partitions (the EFI System Partition, sometimes a System Reserved partition) that updates need to write to. If one is nearly full, the installation can fail even when your C: drive has plenty of room.
- Connectivity trouble. A VPN, a proxy, or an unstable connection can interrupt the communication with Windows Update servers, particularly at the point where the update needs to verify or fetch something during installation.
- A damaged Windows Update cache or component store. If the files Windows uses to stage and apply updates are corrupted, installation fails no matter how many times you retry.
Less common, but real:
- Conflicts with third-party security software or system “optimizer” tools
- Outdated or faulty drivers that interfere during the reboot and configuration phase
- A specific update package that fails on your particular configuration
- Broken prerequisites, such as an earlier update that only half-installed
Your PC might have one of these problems or a combination. That’s why you’ll get better results by testing causes than by applying one fix from a forum thread and hoping.
Why Does Windows 11 Keep Rolling Back the Update?
A Windows update happens in stages. Windows downloads the package and prepares it, then stages the new files and begins installing. Much of the real work happens after a restart, when Windows swaps files while nothing else is running and configures the components. Then it checks that everything came up correctly.
If a critical step fails during that process, Windows doesn’t leave you with half-updated system files. It reverses the changes and restores the previous working state, which is the “Undoing changes” screen. It’s an unpleasant experience, but it’s a safety feature. A partially updated operating system is a much worse outcome than a failed update.
The rollback itself is also useful information. When the update fails after the restart, the problem is usually in the servicing stack, the component store, the partition space, or a driver or program that interferes during boot. A failure in the download phase, by contrast, points more toward networking or the update cache. Knowing which stage your update dies at helps you decide where to start.
The loop happens because Windows Update still considers the update “needed.” Once you’re back on your desktop, it sees the update is missing and queues it again. Nothing in the process fixes what caused the failure, so it repeats.
What Causes Windows 11 Error 0x800f0922?
- A Cramped System Reserved Partition:The hidden partition on your hard drive where the boot files live (the EFI partition) is out of space. If an update needs to write files here and finds zero room, the installation fails instantly.
- Broken .NET Framework Services: The background framework Windows uses to run thousands of apps is glitching or turned off.
- Network or VPN Blocks: An active VPN or an overly aggressive firewall is blocking your PC from connecting properly to Microsoft’s update verification servers.
Before You Start: Quick Checks
These take a few minutes and solve more cases than you’d expect.
- Restart normally. Use Start > Power > Restart, not a shutdown followed by a power-on. Fast Startup can leave some system state carried over, and a proper restart clears it.
- Unplug what you don’t need. Disconnect USB drives, external hard disks, printers, docks, and other peripherals. Leave your keyboard and mouse. Odd device drivers occasionally cause trouble during the post-restart configuration phase.
- Disconnect any VPN. If you use one, turn it off before retrying.
- Check free space. Fix 3 explains how.
- Confirm date, time, and time zone. Go to Settings > Time & language > Date & time and turn on automatic time and time zone. An incorrect clock can break certificate checks, which affects update verification.
- Use a stable connection. If you’re on weak Wi-Fi, connect by Ethernet if you can.
- Think about your security software. If you use a third-party antivirus or firewall, it’s worth testing an update with its real-time protection paused, but only for the duration of the test and only while you’re not browsing or opening files. Turn it back on right afterward. Microsoft Defender can stay as it is.
- Back up important files. Nothing on this list should delete your data, but later steps involve system repair and, potentially, partitions. Copy your important files to an external drive or cloud storage before you go beyond Fix 7.
Fix 1: Run the Windows Update Troubleshooter
It’s not glamorous, but it’s the lowest-risk option, and it can reset a stuck update state or fix a service that’s misconfigured.
- Open Settings (Windows key + I).
- Go to System > Troubleshoot > Other troubleshooters.
- Find Windows Update and select Run.
- Let it finish and apply any fixes it suggests, then restart and check for updates again.
The troubleshooter can restart stopped services, clear some pending update state, and detect certain configuration problems. It can’t repair a corrupted component store, free up space on a recovery partition, or fix a driver conflict. If it reports “Troubleshooting couldn’t identify the problem,” don’t read that as meaning nothing is wrong. Move on to the next fix. Also note that Microsoft has been shifting some built-in troubleshooters toward the Get Help app on newer builds, so the menu may look slightly different on your version.
Fix 2: Check Your Internet Connection and VPN/Proxy Settings
Windows Update depends on reaching Microsoft’s servers and receiving intact data. A VPN can reroute or throttle the traffic, a proxy can block it, and a flaky connection can corrupt a download in ways that only show up during installation.
Start simple. Turn off any VPN client entirely (not just “paused”) and check whether a proxy is configured under Settings > Network & internet > Proxy. Unless you’re on a managed work network that requires one, “Automatically detect settings” should be on and manual proxy off.
If you want to look at the proxy Windows uses for its own services, open Command Prompt as administrator (search for cmd, right-click, Run as administrator) and run:
netsh winhttp show proxy
This displays the WinHTTP proxy configuration, which is separate from the browser proxy. If it shows a proxy you don’t recognize and you’re not on a corporate network, you can clear it:
netsh winhttp reset proxy
If you suspect DNS issues (Windows Update can’t resolve Microsoft’s hostnames reliably), flush the resolver cache:
ipconfig /flushdns
That clears cached DNS lookups only. It doesn’t change any settings. If you’re on a work or school PC, stop and check with your IT department before touching proxy settings, because it may be managed by policy.
Fix 3: Make Sure You Have Enough Storage Space
Windows needs working room to download, unpack, and stage an update, and it keeps a copy of the old files so it can roll back. The amount depends on the update. A monthly cumulative update needs far less than a full feature update, and the requirement varies by system, so there’s no single number worth memorizing. As a practical rule, if your system drive is nearly full, fix that first.
To check, open Settings > System > Storage. You’ll see how much of your system drive is used and a breakdown by category.
To free space safely:
- In the same Storage page, turn on Storage Sense, or open Temporary files.
- Review the list. Items like “Temporary files,” “Recycle Bin,” and “Delivery Optimization Files” are generally safe to remove.
- Check “Previous Windows installation(s)” carefully. Clearing it removes your ability to roll back a previous feature upgrade, so only remove it if you’re sure.
- Move large personal files, like videos or old installers, to an external drive.
This addresses the space on C:, though. It doesn’t touch the small system partitions, which Fix 8 covers.
Fix 4: Restart Windows Update Services
Windows Update relies on several background services, and if one is stuck, disabled, or hung, updates can fail. The three that matter most are Windows Update (wuauserv), Background Intelligent Transfer Service or BITS (which handles background downloads), and Cryptographic Services (cryptsvc, which verifies update signatures).
Using the Services app (simplest):
- Press Windows key + R, type msc, and press Enter.
- Find Windows Update, right-click it, and choose Restart (or Start if it’s stopped).
- Do the same for Background Intelligent Transfer Service and Cryptographic Services.
- If any of them is set to Disabled, double-click it and change Startup type to Manual (Windows Update) or Automatic (Cryptographic Services and BITS), then start it.
Using Command Prompt (administrator):
net stop wuauserv
net stop bits
net stop cryptsvc
net start cryptsvc
net start bits
net start wuauserv
The first three commands stop the services; the last three start them again. It’s the same as restarting them from the Services window, only faster. After that, try the update again. If it still fails, move on to a full cache reset.
Don’t Miss This
Fix 5: Reset the Windows Update Cache
Windows stores downloaded update files and metadata in a folder called SoftwareDistribution, and it keeps signature and catalog data for update verification in Catroot2. If either becomes corrupted, Windows Update can fail repeatedly and never fix itself. Resetting these is a standard step in Windows Update repair.
The safer method is to rename the folders rather than delete them. Windows creates fresh copies the next time it needs them, and you keep the originals in case you need to look at them or something goes wrong. Deleting works too, but renaming gives you an undo.
Open Command Prompt as administrator and run these one at a time. First, stop the services that use these folders. The folders can’t be renamed while the services are running:
net stop wuauserv
net stop bits
net stop cryptsvc
net stop msiserver
Now rename the two folders:
ren C:\Windows\SoftwareDistribution SoftwareDistribution.old
ren C:\Windows\System32\catroot2 catroot2.old
Finally, start the services again:
net start cryptsvc
net start bits
net start wuauserv
net start msiserver
If a rename command says access is denied or the folder is in use, one of the services didn’t stop. Rerun the net stop commands and check for errors, or restart the PC and try the rename again before starting the services.
Expect a side effect: your update history may appear to have been reset, and the next “Check for updates” may take longer than usual since Windows rebuilds its data. That’s normal. Once the update installs successfully, you can delete the .old folders to reclaim space.
Fix 6: Repair Corrupted Windows System Files with SFC
System File Checker scans protected Windows system files and replaces damaged ones with clean copies from the local cache. If corrupted system files are behind the failure, this can help.
- Search for cmd, right-click Command Prompt, and select Run as administrator.
- Run the command below.
- Wait for it to finish. It can take 10 to 20 minutes, and it may sit at a percentage for a while. Let it run.
sfc /scannow
You’ll get one of a few results:
- No integrity violations: SFC found nothing wrong with the files it checks. Your problem is probably elsewhere.
- Found corrupt files and repaired them: Restart and try the update again.
- Found corrupt files but was unable to fix some of them: SFC depends on a healthy component store to source its replacement files. If that store is damaged, SFC has nothing good to copy from, and you need DISM (next fix) first.
- Could not perform the requested operation: Try again after restarting, or run it from the Windows Recovery Environment.
SFC won’t fix every update problem. It only checks protected system files, and plenty of update failures have nothing to do with them. A first pass takes only a few minutes, so it’s reasonable to run before moving on.
Fix 7: Run DISM to Repair the Windows Component Store
The component store (the WinSxS folder) is where Windows keeps the files it uses to install, update, and repair itself. SFC repairs live system files using the store as its source, while DISM repairs the store itself. If the store is damaged, servicing operations like cumulative updates can fail, and SFC can’t help.
The simple way to keep them straight: DISM fixes the source, SFC fixes the copies.
In an elevated Command Prompt, run:
DISM /Online /Cleanup-Image /RestoreHealth
This scans the component store and repairs damage, downloading replacement files from Windows Update if needed. That means you need a working connection, and it’s why the VPN and proxy checks came first. The progress bar may sit at 62.3 percent or 84.9 percent for a long time. That’s common, and it doesn’t mean it froze. Give it a good 20 to 30 minutes before worrying.
If you want to check the store’s health before committing to a repair, two lighter commands exist:
DISM /Online /Cleanup-Image /CheckHealth
DISM /Online /Cleanup-Image /ScanHealth
CheckHealth only reports whether corruption has already been flagged. ScanHealth does a deeper scan but makes no repairs. You can skip them and go straight to RestoreHealth.
Recommended order when you need both: run DISM /RestoreHealth first, restart, then run sfc /scannow again. That way SFC has a healthy store to pull from. If DISM finishes with an error, check C:\Windows\Logs\DISM\dism.log for details.
Fix 8: Check Whether the System Reserved or Recovery Partition Is Causing the Problem
Some 0x800f0922 failures come down to a small system partition that’s out of room, not to anything wrong with C:. Microsoft’s own guidance for this error has pointed to insufficient space on the System Reserved partition or EFI System Partition in some cases. Most modern PCs with UEFI firmware use an EFI System Partition (ESP), which holds boot files, and older or upgraded systems may have a System Reserved partition instead. There’s often a separate recovery partition too. Updates sometimes need to write to these, and if one is packed with leftover files, the install can fail.
Before changing the recovery partition, stop and check that it’s actually the problem. Most 0x800f0922 cases aren’t partition-related, and you shouldn’t assume it’s yours because a forum said so. Evidence that points here: the earlier fixes didn’t help, the failure is consistent, and the CBS or setup logs mention space or a boot/system partition.
To look at your partitions, press Windows key + X and select Disk Management (or run diskmgmt.msc). You’ll see your disk laid out with partitions labeled things like “EFI System Partition” or “Recovery Partition.” The important caveat is that Disk Management shows partition size, not how much free space is left in it. Very small ESPs are a warning sign, but you’d need a partition tool or diskpart to check actual usage, which is beyond what most people should be doing.
You can also check the state of the Windows Recovery Environment:
reagentc /info
Run this in an elevated Command Prompt. It tells you whether WinRE is enabled and where it’s located. It’s read-only information, so it’s safe.
If you’re not confident with partitions, stop here. Resizing, moving, or clearing system partitions can leave a PC unbootable, and layouts vary a lot between manufacturers. Deleting a partition through Disk Management because it “looks unused” is one of the more destructive things you can do to a Windows PC.
If you’re an experienced user or technician who decides that partition space is the cause, back up the whole system (a full disk image, not just files), use a reputable partition tool or the vendor’s documentation, and follow Microsoft’s guidance for your specific partition type. If you don’t have that background, take the PC to someone who does. In many cases, a repair install (Fix 12) resolves servicing problems without touching partitions at all.
Fix 9: Temporarily Remove Potential Windows Update Conflicts
Software that hooks into Windows networking or system files can interfere with servicing. The usual suspects:
- Third-party antivirus and firewall suites, which sometimes lock files or block traffic during updates
- VPN clients, including their virtual network adapters, which can linger even when disconnected
- “PC cleaner” and system tweaking tools that alter services, registry entries, or startup behavior
- Utilities that modify the network stack or system components
- Outdated drivers, particularly for storage controllers, graphics, and network adapters
Approach this as a test, not a purge. A clean boot is a good way to check whether third-party software is involved: press Windows key + R, run msconfig, go to the Services tab, tick “Hide all Microsoft services,” click “Disable all,” then disable startup items in Task Manager’s Startup tab and restart. Try the update. If it succeeds, re-enable things in batches to find the offender. (Restore your normal startup afterward, so you don’t leave essential services off.)
For security software, don’t uninstall it permanently just to get an update through. If it turns out to be the issue, check for a newer version, use the vendor’s support channels, or switch to Microsoft Defender, which is built into Windows. For drivers, update through Windows Update’s optional updates or the PC manufacturer’s support page, not random driver-download sites.
Fix 10: Check Windows Update and CBS Logs
This is where things get more technical, but the logs can tell you what’s actually failing instead of leaving you guessing. You don’t need to read every line.
CBS log (Component-Based Servicing) records what happens during installation. It’s located at:
C:\Windows\Logs\CBS\CBS.log
Open it in Notepad, then use Ctrl+F to search for terms like “error”, “failed”, “failed to”, and “HRESULT”. Look for lines near the timestamp of your failed attempt. What you’re hunting for is the specific package name or error code that appears just before the rollback. A package installation failure with a specific KB or component name narrows the problem considerably.
Windows Update log: On Windows 11, the update log is stored in binary format and has to be converted into readable text. In PowerShell (run as administrator):
Get-WindowsUpdateLog
This merges the trace files into a single WindowsUpdate.log on your desktop. Search it for “error,” “fatal,” or the HRESULT code near the failure time.
For feature updates that roll back, the setup logs are often the most informative. They’re generally under C:\$WINDOWS.~BT\Sources\Panther (the folder is hidden, so type the path into File Explorer’s address bar) and C:\$WINDOWS.~BT\Sources\Rollback. The setupact.log and setuperr.log files there frequently name the specific step that triggered the rollback.
If you find a consistent error code or package name, searching Microsoft’s documentation for that exact string will be much more productive than searching for 0x800f0922 alone.
Fix 11: Install the Problematic Update Manually
If Windows Update keeps failing on one specific update, downloading the standalone package and installing it directly can sidestep the normal update workflow. It’s not a magic bypass, because the installer still relies on the servicing stack and component store, but it can succeed when the update client itself is the problem.
- Identify the KB number. Go to Settings > Windows Update > Update history and note the KB number of the failed update (see the section below).
- Confirm your version and architecture. Open Settings > System > About and check “System type” (64-bit or ARM-based) and your Windows version. Getting this wrong is the most common manual-install mistake.
- Go to the Microsoft Update Catalog (catalog.update.microsoft.com) and search for the KB number.
- Pick the entry that matches your Windows 11 version and architecture. For a cumulative update, you’ll typically see several similar listings, so read the titles carefully.
- Download and run the .msu file, or .cab if that’s what’s offered.
- Restart, then check Windows Update again.
Use only the KB number that appears in your own update history. If your failing update is a feature update (a new Windows version), the Update Catalog isn’t the right route, since those are delivered differently. Go to Fix 12.
Fix 12: Use the Windows 11 Installation Assistant or an In-Place Repair
If the servicing stack itself is damaged, more troubleshooting of individual parts may not be worth it. At this point, repairing Windows in place is often faster and less risky than continuing to poke at it.
These terms get mixed up, so here’s how they differ:
- Windows Update: the normal built-in mechanism you’ve been fighting with.
- Windows 11 Installation Assistant: a Microsoft tool that downloads and installs the latest feature update over your current installation. It’s a different route through the same upgrade path, and it sometimes works when Windows Update won’t.
- In-place repair upgrade (repair install): you run Windows 11 setup from an ISO or installation media on top of your existing installation, choosing to keep your files and apps. It replaces the system files and refreshes the component store while leaving your data in place.
- Clean installation: wipes the drive and starts fresh. That’s the last resort.
To do a repair install, download the official Windows 11 ISO from Microsoft’s website, mount it in File Explorer (right-click > Mount), run setup.exe from inside Windows, and choose to keep personal files and apps when prompted. The media generally needs to match or be newer than your installed version, and the same language and edition.
An in-place repair is not risk-free. Something can still go wrong, and occasionally apps need reinstalling or licensing needs reactivating. Back up your documents, photos, browser data, and any license keys you don’t already have, and make a note of your installed programs before you begin.
What If Windows 11 Is Stuck in an Actual Rollback Loop?
If your PC repeatedly starts an update, fails, reboots, reverses changes, returns to Windows, and tries again, the goal is to stop the cycle without making things worse.
- Let the rollback finish. Don’t interrupt “Undoing changes made to your computer,” even if it takes a long time. Force-shutting down during a rollback is one of the few ways to turn a failed update into a broken installation. Only power off if it has been completely frozen for several hours.
- Unplug unneeded peripherals before the next attempt.
- Once you’re back in Windows, open Update history to identify the failing update and its KB number.
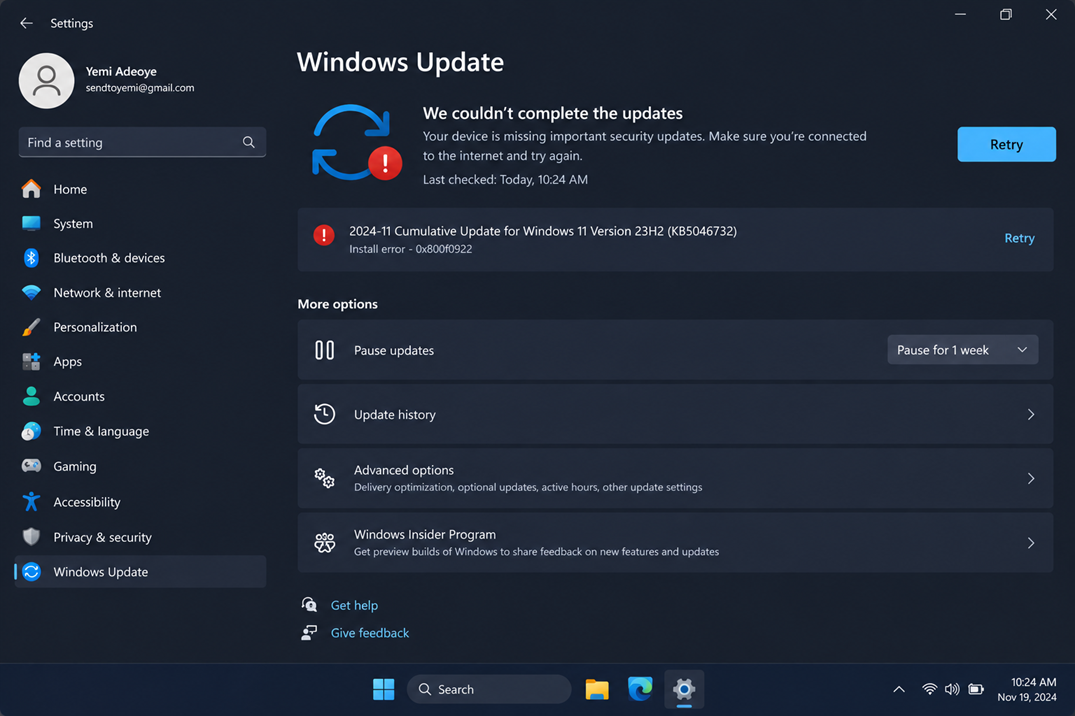
- Pause updates temporarily (Settings > Windows Update > Pause for 1 week) so it stops retrying while you troubleshoot.
- Work through the fixes above, particularly the cache reset, DISM, and SFC.
If Windows can’t start normally, it usually boots into the Windows Recovery Environment on its own after repeated failed starts. You can also get there by holding Shift while clicking Restart from the sign-in screen. From WinRE, go to Troubleshoot > Advanced options, where you can:
- Uninstall Updates: removes the latest quality update or feature update
- System Restore: returns system files to an earlier restore point, if you have one
- Startup Repair: tries to fix boot problems
Uninstalling the most recent update or using System Restore can get you back to a stable system. Once you’re stable, you can retry with the update using the fixes in this guide instead of the same failing route.
How to Find Which Update Is Failing
- Open Settings > Windows Update > Update history.
- Look under Quality Updates and Feature Updates for entries marked Failed to install.
- Note the KB number, the update name, and the error code shown.
Knowing the KB matters because 0x800f0922 is generic, but the update behind it isn’t. With the KB in hand, you can search Microsoft’s documentation for known issues affecting that specific update, download it manually, or look for that package in the logs. If the same KB fails every time, you’re probably dealing with a servicing or partition problem. If different updates fail, look at the component store or a system-wide cause like networking or a conflicting program.
Common Fixes That Don’t Actually Solve 0x800f0922
Some of the advice you’ll find is either incomplete or risky:
- “Just restart your PC.” Fine as a first step, but if the cause is corruption or low partition space, a restart changes nothing.
- Clicking “Check for updates” repeatedly. Each attempt just runs the same failing process again.
- Randomly deleting Windows folders. Removing the wrong system folders can break more than it fixes. If you need to reset update components, rename SoftwareDistribution and Catroot2 as shown above, and leave everything else alone.
- Disabling security software permanently. This leaves you exposed and rarely addresses the real cause. Test with it briefly if needed, then turn it back on.
- Deleting or formatting system partitions. This can make the PC unbootable. Never do it as a “cleanup” step.
- Running registry hacks you don’t understand. Unless a Microsoft document specifically prescribes a change for your situation, skip them.
- Downloading DLL files from random websites. Those files are frequently outdated, mismatched, or malicious, and Windows can restore legitimate system files with SFC and DISM.
When Should You Consider a Windows 11 Repair Install?
A repair install becomes reasonable when the evidence suggests the servicing system itself is broken. Signs include:
- DISM /RestoreHealth fails or reports that it can’t repair the component store
- SFC keeps finding damage it can’t fix
- Multiple different updates fail, not just one
- Windows Update, Microsoft Store, and other built-in tools behave strangely
- You’ve reset the update components and checked for conflicts, and the same rollback still occurs
It’s usually the point where continuing to troubleshoot individual pieces costs more time than it’s worth. A clean reinstall should really be a last resort, reserved for cases where the repair install also fails or the system has deeper problems like disk errors or malware.
Frequently Asked Questions
What does error 0x800f0922 mean on Windows 11?
It’s a generic Windows Update installation failure. Windows started the install but couldn’t complete it, often because of a network problem, a full system partition, a corrupted update cache, or damaged system files.
How do I fix Windows Update error 0x800f0922?
Start with basic checks (free space, VPN off, stable connection), then run the Windows Update troubleshooter, restart the update services, reset the SoftwareDistribution and Catroot2 folders, and run DISM and SFC. If those fail, install the update manually or do a repair install.
Why does Windows 11 keep rolling back updates?
Windows reverses the update whenever a critical step fails during installation or after the restart. It does this to avoid leaving the system half-updated. The update then gets queued again, which creates the loop.
Can a VPN cause 0x800f0922?
Yes, it can. VPNs and proxies sometimes interfere with communication between your PC and Microsoft’s update servers. Disconnect it and retry before trying anything more involved.
Can low disk space cause 0x800f0922?
It can, both on your main drive and in the small system partitions Windows uses during updates. Check free space in Settings > System > Storage first.
Does SFC fix Windows Update errors?
Sometimes, when the cause is damaged protected system files. It won’t fix problems with the update cache, network, or a damaged component store.
Should I run DISM before SFC?
When you need both, yes. DISM repairs the component store that SFC relies on for replacement files, so run DISM /Online /Cleanup-Image /RestoreHealth first, restart, then run sfc /scannow.
How do I reset Windows Update components?
Stop the Windows Update, BITS, and Cryptographic Services, rename the SoftwareDistribution and Catroot2 folders, then start the services again. The exact steps are in Fix 5.
How do I manually install a failed Windows update?
Find the KB number in Update history, search for it in the Microsoft Update Catalog, download the package matching your Windows version and architecture, run it, and restart.
Can I fix 0x800f0922 without reinstalling Windows?
Usually, yes. Most cases are resolved by fixing connectivity, resetting the update cache, or repairing system files. A repair install keeps your files and, depending on your choices, your apps.
What if Windows keeps saying “Undoing changes made to your computer”?
Let the rollback finish rather than forcing a shutdown. Then identify the failing KB in Update history, pause updates while you troubleshoot, and work through the fixes here. If Windows won’t start, use the Windows Recovery Environment to uninstall the latest update or run System Restore.
When should I perform a Windows 11 repair install?
When DISM and SFC can’t repair the system, multiple updates fail, or the rollback continues after you’ve reset the update components and checked for conflicts.
Final Takeaway
The right fix for Windows 11 error 0x800f0922 depends on what’s actually causing it, and the fastest way to find out is to go from cheap and safe to more involved. Here’s the sequence I’d follow:
- Check storage, network, and VPN settings.
- Run the Windows Update troubleshooter.
- Restart the Windows Update, BITS, and Cryptographic services.
- Reset the Windows Update cache by renaming SoftwareDistribution and Catroot2.
- Run DISM, then SFC.
- Identify the failing KB in Update history.
- Install the update manually from the Microsoft Update Catalog if it’s a standard cumulative update.
- Look at recovery or system partition space if the logs or symptoms point there, and only with a backup and care.
- Use a repair install if standard servicing repairs don’t work.
Most people get through this without a reinstall. If you’ve been through everything above and the rollback persists, the logs and the failing KB are your best evidence for what to try next.