

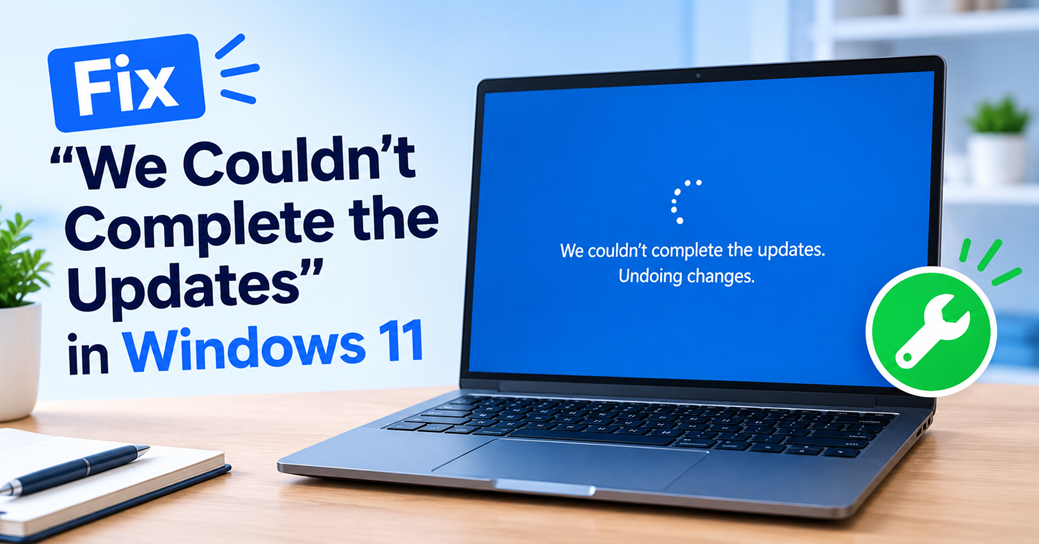
Quick Answer: If Windows 11 displays “We couldn’t complete the updates,” restart the PC, check your internet connection and free storage, run the Windows Update Troubleshooter, and repair system files with DISM and SFC. If the update still fails, reset the Windows Update components or install the failed update manually from the Microsoft Update Catalog. No single fix works for every PC, so work through the methods in order.
Introduction
“We couldn’t complete the updates. Undoing changes. Don’t turn off your computer” means Windows 11 started installing an update, hit a problem partway through, and is now reversing the changes so the PC stays usable. The rollback is a safety feature, not a sign that Windows is permanently damaged.
In most cases the cause is fixable: a corrupted update download, a missing system file, low storage, a driver conflict, or a stalled background service. Some PCs show the message once and then update fine on the next attempt. Others repeat the cycle every time, which means something underlying needs attention.
This guide goes from the safest, easiest fixes to the more advanced ones. You’ll also learn how to read error codes and when a repair or reset is the better choice.
Screenshot suggestion: The “We couldn’t complete the updates. Undoing changes” screen. Alt text: Windows 11 screen showing “We couldn’t complete the updates. Undoing changes” during a failed update.
Quick Fixes at a Glance
- Restart the computer.
- Check your internet connection.
- Disconnect unnecessary USB devices.
- Make sure you have enough free storage.
- Run the Windows Update Troubleshooter.
- Restart Windows Update services.
- Reset the Windows Update components (cache folders).
- Repair system files with DISM and SFC.
- Install the update manually from the Microsoft Update Catalog.
- Use advanced recovery (System Restore, in-place repair, reset) if nothing else works.
Not every fix applies to every PC. Often the first few steps are enough, and the later ones are for stubborn cases.
Why Does Windows 11 Say “We Couldn’t Complete the Updates”?
Windows updates involve several stages: downloading, staging files, installing, restarting, and finalizing. A failure at any stage can trigger the message. Common causes:
- Corrupted Windows Update cache: Downloaded update files are stored in a temporary folder. If they are incomplete or damaged, installation fails.
- Damaged or missing system files: Updates replace system files, and if existing ones are broken, the process can fail.
- Component Store corruption: The Component Store (WinSxS) holds the files Windows uses to install and repair itself. Damage here is a classic cause of repeated failures.
- Insufficient storage space: Updates need room for the download, extracted files, and rollback data.
- Problems with Windows Update services: Services such as Windows Update, BITS, and Cryptographic Services must run properly.
- Driver conflicts: An outdated or incompatible driver can break an update during restart.
- Incompatible software: Older utilities, system tweakers, or low-level tools can interfere.
- Interrupted updates: Power loss, a forced shutdown, or a dropped connection can leave an update half-installed.
- Failed update packages: Sometimes a specific update package fails on certain hardware or configurations.
- Pending restart requirements: An earlier installation may be waiting for a restart before the next can proceed.
- Security software interference: Third-party antivirus programs can occasionally block or slow update files.
- Hardware or compatibility issues: Failing storage drives, unstable memory, or unsupported configurations can cause repeated failures.
- Network problems: An unstable connection can produce incomplete downloads.
“We Couldn’t Complete the Updates” vs. “Undoing Changes”
These are two parts of the same event, not separate errors.
- Windows tries to install the update, usually during a restart.
- Something goes wrong, such as a file that can’t be replaced or a driver that fails to load.
- Windows shows “We couldn’t complete the updates” and starts “Undoing changes made to your computer.”
- Windows reverses the partial installation to return the PC to its last working state.
The rollback protects you from a half-updated system that might not boot. But if you see the messages repeatedly, the update is failing for the same reason each time, and retrying alone won’t help.
If your PC seems stuck on “Undoing changes,” give it time first. Rollbacks can take a long time on slower PCs or hard drives, sometimes well over an hour. If the drive activity light is flickering or the PC shows signs of progress, wait.
Solution 1: Restart Windows 11
What it does: Clears temporary glitches, finishes any pending operations, and reloads services. When to use it: Always try this first.
- Save your work.
- Select Start.
- Select Power.
- Select Restart. Don’t choose Shut down, because Fast Startup can keep some system state between sessions.
- After signing in, go to Settings → Windows Update and select Check for updates.
If Windows is stuck: Wait a good while first, since rollbacks can be slow. If the screen is clearly frozen with no disk activity for a long time, press and hold the power button until the PC turns off, then turn it on again. Treat this as a last resort and don’t repeat it, because repeated forced shutdowns during updates can cause file system problems.
Expected result: Sometimes the update installs on the next attempt. If the same message returns, continue.
Solution 2: Check Your Internet Connection
What it does: Ensures update files download completely. An unstable connection can leave damaged or partial files. When to use it: If updates fail during download or you’re on Wi-Fi with poor signal.
- Open a browser and confirm other websites load normally.
- Restart your router and modem. Unplug for 30 seconds, then plug back in.
- Disconnect and reconnect to Wi-Fi: Settings → Network & internet → Wi-Fi.
- If possible, connect with an Ethernet cable.
- Turn off any VPN temporarily. VPNs can interfere with update connections.
- Avoid downloading large files or streaming while updates download.
Expected result: Downloads complete reliably. This helps most when failures happen at the download stage.
Solution 3: Check Available Storage
What it does: Windows needs free space to download, unpack, and install updates, and to keep rollback data. When to use it: If your drive is nearly full.
- Open Settings → System → Storage.
- Review how much space is used on drive C:.
- Select Temporary files to see what Windows can clear.
- Review the categories. Typical safe options include Temporary files, Recycle Bin, and Delivery Optimization Files. Check the list carefully, and note that Downloads is a personal folder, so don’t tick it unless you’ve reviewed it.
- Select Remove files.
- Optionally turn on Storage Sense to clean up automatically.
How much space is enough? Monthly cumulative updates usually need a few gigabytes. Feature updates need considerably more, and many guides suggest keeping at least 20 GB free to be safe. Check Microsoft’s current system requirements for exact figures.
Warning: Don’t delete files from system folders or personal folders (Documents, Pictures) without knowing what they are. Move large personal files to an external drive instead.
Screenshot suggestion: Settings → System → Storage. Alt text: Windows 11 Storage settings showing disk usage and the Temporary files option.
Solution 4: Run the Windows Update Troubleshooter
What it does: Checks for common problems such as stopped services, corrupted cache entries, and configuration issues, and attempts automatic repairs. When to use it: After the basic checks, as your first built-in repair tool.
- Open Settings → System → Troubleshoot → Other troubleshooters.
- Find Windows Update and select Run.
- Follow the prompts and let it finish.
- If it reports fixes, restart your PC.
- Go to Settings → Windows Update and select Check for updates.
Expected result: The troubleshooter reports what it found and fixed, or says it couldn’t identify the problem. Either way, continue if the update still fails.
Note: Microsoft has been gradually changing how some troubleshooters are presented, and menu labels can vary slightly between Windows 11 versions. If you don’t see it, search “troubleshoot” in the Start menu.
Screenshot suggestion: The Other troubleshooters page with Windows Update highlighted. Alt text: Windows 11 Other troubleshooters page with the Windows Update troubleshooter Run button.
Solution 5: Restart Windows Update Services
What it does: Windows Update relies on background services. If one is stuck, updates fail. Restarting them can clear the problem. Key services:
- Windows Update (wuauserv)
- Background Intelligent Transfer Service (BITS)
- Cryptographic Services (CryptSvc)
Using the Services app
- Press Windows + R, type msc, and press Enter.
- Find Windows Update, right-click it, and select Restart (or Start if stopped).
- Repeat for Background Intelligent Transfer Service and Cryptographic Services.
- Close Services and check for updates.
Using Windows Terminal (as Administrator)
Right-click Start, choose <strong>Terminal (Admin)</strong>, and run each line, pressing <strong>Enter after each:</p>
<p>net stop
wua</p>
userv<
/p></p>
net stop bi
t
<p>s<p>net stop cryptsvc
net</p>
start wuauserv</p></p>
net start bits
net start cryptsvc
Each net stop stops a service and each net start starts it again.
Expected result: Each command confirms the service stopped or started. If a service won’t start, this may point to deeper issues addressed later.
Solution 6: Reset Windows Update Components (Advanced)
What it does: Stops update services and renames the folders where Windows keeps its update cache. Windows then creates fresh folders automatically. This removes corrupted download data and is one of the most effective fixes for repeated failures.
When to use it: After Solutions 1–5 have failed. Risk level: Low to moderate. Renaming (not deleting) the folders means you can restore them if needed. Your update history display may appear empty, but installed updates are not removed.
-
- Right-click Start and select Terminal (Admin). If prompted by User Account Control, select Yes.
- Stop the services. These commands stop the Windows Update, Cryptographic, BITS, and Windows Installer services:</li></li&gt;
</li>
<p&
gt;net stop wuauserv<p>net stop cryptSvc</p>
net st
op bits
net stop msiserver
Rename the cache folders. SoftwareDistribution stores downloaded updates and catroot2 stores update signature data. Renaming them forces Windows to rebuild both. Run these in Command Prompt (if your Terminal opens in PowerShell, ren also works as an alias for Rename-Item):
ren C:\Windows\SoftwareDistribution SoftwareDistribution.old
<p>ren C:\Windows\System32\catroot2 catroot2.old
Res</stron</strong>g></p>
<p>tar
t the services:</strong>
net start wuauserv
<p>net start cryptSvc
net start bits
net start msiserver
Then restart your PC, open Settings → Windows Update, and select Check for updates.
Expected result: Windows re-downloads update files from scratch. This may take longer than usual, and Update history may appear empty at first.
If a rename fails with “Access is denied,” a service is probably still running. Re-run the stop commands and try again.
Tip: Once updates work reliably again, you can delete the .old folders to reclaim space. This is optional.
Screenshot suggestion: Terminal (Admin) showing the stop commands. Alt text: Windows Terminal running as administrator with commands to reset Windows Update components.
Solution 7: Run DISM and System File Checker (Advanced)
What they do:
- DISM (Deployment Image Servicing and Management) repairs the Windows Component Store, the source Windows uses to fix itself.
- SFC (System File Checker) scans protected system files and replaces damaged ones using the Component Store.
Why DISM first? If the Component Store is damaged, SFC may not be able to repair files correctly. Repairing the source first gives SFC good material to work with.
- Make sure you have a working internet connection, because DISM may download replacement files from Windows Update.
- Right-click Start and select Terminal (Admin).
- Run:
DISM /Online /Cleanup-Image /RestoreHealth
- Wait until it finishes. It can take 10–30 minutes or more, and it may appear stuck at certain percentages. This is normal. Don’t close the window or turn off the PC while it runs.
- When DISM completes, run:
sfc /scannow
- Wait for the scan to reach 100%. Don’t interrupt it.
- Restart your PC and check for updates.
What the results mean:
| Message | Meaning | What to do |
| “The restore operation completed successfully” (DISM) | Component Store repaired | Run SFC next |
| “Windows Resource Protection did not find any integrity violations” | No corruption found | Move on to other fixes |
| “…found corrupt files and successfully repaired them” | Problem fixed | Restart and retry the update |
| “…found corrupt files but was unable to fix some of them” | Some damage remains | Run DISM again, then SFC again; if it persists, consider Solutions 10, 14, or 15 |
| DISM error message | Source files unavailable or damaged | Try again after a restart; check your connection |
Screenshot suggestion: Terminal running DISM, and the SFC completion message. Alt text: Windows Terminal running DISM /Online /Cleanup-Image /RestoreHealth; SFC scan completed in Windows 11 Terminal.
Solution 8: Check Device Drivers
What it does: Outdated or faulty drivers (graphics, storage, network, and others) can cause an update to fail when the system restarts. When to use it: If the failure occurs at restart, or you recently changed hardware.
- Open Settings → Windows Update → Advanced options → Optional updates.
- Expand Driver updates. If drivers are listed, select those relevant to your hardware and choose Download & install.
- Restart your PC.
Using Device Manager
- Right-click Start and select Device Manager.
- Look for devices with a yellow warning icon.
- Right-click a problem device and select Update driver, or use Properties → Driver → Roll Back Driver if a recent driver change started the problem.
Warning: Download drivers only from Windows Update or your PC or hardware manufacturer’s official support site. Avoid “driver updater” tools and random driver download websites, which can bundle malware or install incompatible files.
Solution 9: Check Third-Party Antivirus or Security Software
What it does: Some third-party security suites can interfere with update files or system changes. When to use it: If you use a non-Microsoft antivirus and the problem persists. Safer approaches first:
- Make sure your security software is fully updated.
- Check the vendor’s support page for known Windows 11 update issues.
- Look for a vendor-recommended update-compatibility mode or exclusion.
- If the vendor advises, temporarily pause protection following their instructions, and only while you retry the update.
- Re-enable protection immediately afterward.
Important: Windows Security (Microsoft Defender) is built in and generally doesn’t need to be disabled. Don’t leave your PC unprotected longer than necessary, and don’t disable security software on a PC you suspect is infected.
Solution 10: Install the Failed Update Manually
What it does: Downloads the specific update package directly instead of relying on the Windows Update client. When to use it: When one specific update keeps failing but others install.
- Identify the KB number in Settings → Windows Update → Update history (see Solution 11). It looks like “KB” followed by digits. Copy it exactly as shown on your PC.
- Visit the official Microsoft Update Catalog at update.microsoft.com.
- Search for the KB number.
- Choose the package that matches your Windows 11 version and system architecture. To check, go to Settings → System → About. Most PCs are x64; ARM-based devices need the ARM64 package.
- Select Download, then open the downloaded file and follow the prompts.
- Restart your PC.
Important: Use only Microsoft’s official catalog. Never download Windows updates from third-party websites. Manual installation may not work for every update, especially large feature updates, which are better handled with Microsoft’s official installation tools (see Solution 14).
Screenshot suggestion: Microsoft Update Catalog search results. Alt text: Microsoft Update Catalog website showing search results for a Windows 11 update by KB number.
Solution 11: Check Windows Update History
What it does: Shows which updates failed, their KB numbers, and often an error code, which helps you choose the right fix.
- Open Settings → Windows Update → Update history.
- Expand Quality Updates, Driver Updates, Other Updates, and similar categories.
- Look for entries marked Failed to install.
- Note the update name, KB number, date, and any error code.
- Check whether the same update fails repeatedly.
Repeated failure of the same update points to a package-specific or system-level issue, while varied failures suggest broader problems such as storage, cache, or drivers.
Screenshot suggestion: Update history page with a failed update. Alt text: Windows 11 Update history page listing a failed update with its KB number.
Solution 12: Boot Into Safe Mode (Only When Necessary)
What it does: Starts Windows with minimal drivers and services, helping you work around software or driver conflicts. When to use it: If Windows loops or you suspect a driver or third-party program is interfering. It isn’t needed for ordinary update failures.
If you can reach the desktop
- Open Settings → System → Recovery.
- Next to Advanced startup, select Restart now.
- After the blue screen appears, choose Troubleshoot → Advanced options → Startup Settings → Restart.
- Press 4 or F4 for Safe Mode, or 5 or F5 for Safe Mode with Networking.
If Windows won’t start normally
After repeated failed boots, Windows usually opens the Recovery Environment automatically. From there, follow the same path: Troubleshoot → Advanced options → Startup Settings.
In Safe Mode you can uninstall a problem driver or recently installed software. Then restart normally and retry the update.
Solution 13: Use System Restore (If Appropriate)
What it does: Returns system files, drivers, installed programs, and settings to an earlier restore point. It does not normally remove personal documents, photos, or other files, though apps installed after the restore point may be removed. When to use it: If problems began after a driver, program, or earlier update change, and you have a restore point.
Requirement: System Restore only works if a restore point exists. It’s not always enabled by default, so check first.
- Search for Create a restore point in the Start menu and open it.
- Select System Restore….
- Choose a restore point from before the problem began and select Scan for affected programs to see what will change.
- Follow the prompts and let the PC restart.
If none are listed or the feature is off, skip this step. You can enable protection for future use under System Protection in the same dialog.
Solution 14: Perform an In-Place Windows 11 Repair (Advanced)
What it is: Reinstalling Windows 11 over the existing installation using official Microsoft tools. It replaces system files while keeping your files, settings, and installed apps. It’s more advanced than normal troubleshooting, but it often resolves deep corruption without wiping the PC. When to use it: After DISM, SFC, and component reset have failed.
Before you start:
- Back up important files to an external drive or cloud storage.
- Make sure you have enough free storage.
- Use only official Microsoft sources.
- Match your current Windows 11 edition and language. Check at Settings → System → About.
Steps (using the official ISO):
- On Microsoft’s official Download Windows 11 page, download the Windows 11 Disk Image (ISO).
- Double-click the ISO to mount it in File Explorer.
- Run exe from the mounted drive.
- When prompted, choose to download updates if offered, then accept the license terms.
- On the Ready to install screen, confirm it says Keep personal files and apps. If not, select Change what to keep and choose it.
- Select Install and let the process complete. Your PC will restart several times.
In some Windows 11 versions, Settings → System → Recovery also offers an option to fix problems using Windows Update (reinstall now). If it’s available, it provides a simpler built-in version of the same idea.
Solution 15: Reset or Reinstall Windows 11 (Last Resort)
Use these only when every other method has failed. Back up everything important first.
| Option | What happens | Personal files |
| Reset this PC → Keep my files | Reinstalls Windows and removes apps and settings | Kept |
| Reset this PC → Remove everything | Reinstalls Windows and erases everything | Deleted |
| Clean installation | Wipes the drive and installs fresh from Microsoft installation media | Deleted unless backed up separately |
To reset: Go to Settings → System → Recovery → Reset this PC and follow the prompts. You can choose Cloud download (downloads fresh files from Microsoft) or Local reinstall (uses files on your PC).
Warning: “Keep my files” is not a substitute for a backup. Always back up first.
Troubleshooting Table
| Problem | Likely cause | Recommended fix |
| Update repeatedly fails | Corrupted update cache | Reset Windows Update components |
| Update downloads but won’t install | System file corruption | DISM + SFC |
| PC says “Undoing changes” | Update installation failed | Troubleshooter, then reset components |
| Not enough storage | Low disk space | Free up storage |
| Specific KB keeps failing | Package-specific issue | Microsoft Update Catalog |
| Driver-related error | Incompatible driver | Update or roll back driver |
| Failure after security software update | Antivirus interference | Follow vendor guidance |
| Unknown error code | Multiple possible causes | Research the exact code on Microsoft’s site |
What If Windows 11 Shows an Error Code?
Error codes make diagnosis more precise. Check Settings → Windows Update → Update history for a code beside the failed update.
- Write down the exact code, including the letters and digits (for example, it starts with “0x”).
- Search Microsoft’s official documentation first, such as Microsoft Learn or Microsoft Support, using the exact code and “Windows 11”.
- Apply the fix that matches your code.
Some commonly discussed codes include 0x80070002 (often a missing or corrupted file), 0x80073712 (often related to Component Store problems), and 0x800f0922 (often related to insufficient space or other installation issues). The right fix depends on the exact code and your PC, so always confirm against Microsoft’s current documentation.
What NOT to Do
- Don’t repeatedly force shutdowns during an update, as it can worsen file corruption.
- Don’t download Windows update files from unofficial websites.
- Don’t delete system folders randomly, such as WinSxS or System32.
- Don’t run unknown registry-cleaning tools.
- Don’t use cracked “repair” utilities, which are a common malware source.
- Don’t disable security software unnecessarily.
- Don’t delete personal files to free space without knowing what they are.
- Don’t paste commands from untrusted websites without understanding them.
When to Contact Microsoft Support
Consider professional help if:
- Windows repeatedly fails to update after multiple methods.
- The PC is stuck in a boot loop.
- Important system files appear damaged and can’t be repaired.
- BitLocker recovery is unexpectedly triggered.
- Windows cannot boot normally.
- You see persistent hardware errors, such as drive or memory warnings.
- You encounter unusual recovery or activation problems.
Have your Windows version, the failed update’s KB number, and any error codes ready.
Frequently Asked Questions
1. Why does Windows 11 say “We couldn’t complete the updates”?
Windows hit a problem while installing an update. Common causes include a corrupted update cache, damaged system files, low storage, driver conflicts, or interrupted installation. Windows then rolls back the changes.
2. How do I fix “We couldn’t complete the updates” in Windows 11?
Restart the PC, check storage and internet, run the Windows Update Troubleshooter, run DISM and SFC, and reset Windows Update components. If one update keeps failing, install it manually from the Microsoft Update Catalog.
3. Why is Windows 11 stuck on “Undoing changes”?
Windows is reversing a failed update, which can take a long time. Wait first. If there is no activity for a long period, a forced restart may be needed. Afterward, investigate the cause using the steps above.
4. How do I reset Windows Update in Windows 11?
Open Terminal as administrator, stop the update services, rename the SoftwareDistribution and catroot2 folders, restart the services, and reboot. See Solution 6 for the exact commands.
5. Can corrupted system files cause Windows Update to fail?
Yes. Damaged system files or a corrupted Component Store can prevent updates from installing. DISM and SFC can often repair them.
6. How much free space does Windows 11 need for an update?
It varies. Monthly updates typically need a few gigabytes, while feature updates need more. Many guides suggest at least 20 GB free as a safe margin.
7. Can I manually install a failed Windows 11 update?
Yes, for many updates. Find the KB number in Update history and download the matching package from the Microsoft Update Catalog.
8. How do I find which Windows update failed?
Go to Settings → Windows Update → Update history and look for entries marked Failed to install.
9. Will resetting Windows 11 delete my files?
Not if you choose Keep my files, but apps and settings are removed. Remove everything erases your files. Back up first either way.
10. When should I contact Microsoft Support about a failed update?
When multiple fixes fail, the PC won’t boot normally, you’re in a boot loop, BitLocker recovery appears unexpectedly, or you suspect hardware problems.
Final Thoughts
“We couldn’t complete the updates” is frustrating, but it’s usually fixable with a methodical approach. Start with restarts, storage checks, and the troubleshooter. Move to DISM, SFC, and component resets if needed, and keep repair installs and resets for last. No single fix works for every PC, so note any error codes and follow the evidence.