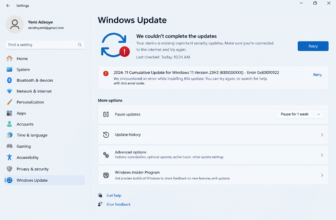


Windows 11 shows error 0x800f0922 when an update fails during installation. The usual message is: “There were some problems installing updates. We’ll try again later… (0x800f0922)”. The code is generic. It has been tied to VPN and connection problems, broken update components, damaged system files, .NET Framework installs, and a full or undersized EFI System Partition (ESP).
The ESP is the small hidden partition your PC boots from. If it is nearly full, an update that needs to write new boot files can fail and roll back. In that case, freeing space in it or enlarging it can fix the problem. This guide shows how to check whether that is your situation, how to enlarge the partition safely, and what to try if it isn’t.
What Is Windows 11 Error 0x800f0922?
0x800f0922 is a servicing error. Windows Update downloaded the update but couldn’t finish installing it. Installation usually gets partway through, often after a restart, and then Windows undoes the changes. You’ll see “Something didn’t go as planned. Undoing changes,” and the failure is logged in Settings > Windows Update > Update history.
The code doesn’t say why the install failed. It covers several unrelated problems:
- The PC couldn’t reach the update servers, sometimes because of a VPN or proxy
- Windows Update components or the component store are damaged
- A required service is disabled or security software interferes
- A .NET Framework install or update fails
- The ESP or another system partition lacks free space
Treat the error as a symptom. The cause has to be identified from the logs and the partition state, which is why the diagnosis section comes before the resizing steps.
A documented case from May 2026
Microsoft confirmed that the May 2026 security update (KB5089549) could fail with 0x800f0922 on Windows 11 24H2 and 25H2. The problem occurs on devices with limited free space in the EFI System Partition, and systems with 10 MB or less available are the most likely to fail. Affected devices may show CBS.log entries such as “SpaceCheck: Insufficient free space” and “ServicingBootFiles failed. Error = 0x70”. Reports said the failure typically appeared during the restart phase at roughly 35–36% completion.
Microsoft mitigated it with a Known Issue Rollback for consumer and unmanaged devices, and reportedly planned a permanent fix for the June 9 Patch Tuesday release. If your PC is fully up to date, that specific bug shouldn’t be what you’re hitting. The underlying weakness is still real: a crowded ESP can break a servicing operation that needs space, whichever update triggers it.
Can a Small EFI Partition Cause Error 0x800f0922?
Yes, it can. On a UEFI PC, the firmware doesn’t start Windows directly. It looks for the ESP, a FAT32 partition, and launches Windows Boot Manager from there. The ESP holds the boot manager, the boot configuration data (BCD), and supporting files such as boot fonts and language resources.
Some updates change those boot files. While it does that, Windows may need room for old and new copies at the same time, plus some working headroom. If the ESP can’t hold them, the servicing step fails and Windows rolls the update back.
Several things can fill a small ESP:
- The partition was small to begin with. Microsoft’s older deployment guidance lists a 100 MB minimum, and some PCs shipped or were installed with roughly that.
- OEM tools, firmware-update utilities, or another operating system’s boot files live on the ESP. In the May 2026 case, Microsoft’s log messages pointed to files used by third-party or OEM software outside Microsoft’s boot directories.
- Old boot entries and leftovers from earlier upgrades or dual-boot setups remain.
A small ESP doesn’t cause every 0x800f0922 error. Older troubleshooting write-ups list a disabled App Readiness service, a missing or misidentified EFI partition, an uninstalled Microsoft Edge, and third-party antivirus interference as other causes. So look for evidence before resizing anything.
Check Your EFI Partition Before Resizing It
You want two facts: which partition is the ESP, and how much free space it has. Disk Management answers the first question, and you need a different tool for the second.
Method 1: Disk Management
- Right-click Start and choose Disk Management (or press Win + R, type msc, and press Enter).
- Find the disk that holds Windows. It has your C:
- Look for a small partition, usually 100 MB to a few hundred MB, labeled EFI System Partition.
Disk Management shows the ESP’s size, but it doesn’t reliably show its free space. It also offers almost no actions on it. Right-clicking it typically gives you only Help. This limitation matters later.
Also note the order of the partitions on the disk. A common layout is EFI, then MSR, then C:, then Recovery, but yours may differ.
Method 2: DiskPart and command-line checks
Open Windows Terminal (Admin) or Command Prompt (Admin).
Inspection commands (read-only):
diskpart
list disk
select disk 0
list partition
list volume
exit
- list disk shows your disks. A star in the Gpt column means the disk uses GPT, which UEFI Windows installs require.
- select disk 0 focuses the disk that holds Windows. Use the number that matches your system disk.
- list partition shows each partition’s type (System is the ESP, Reserved is the MSR, Recovery is the recovery partition), its size, and its offset. The offsets show the physical order, which decides what can be extended.
- list volume shows the ESP as a small FAT32 volume with System in the Info column.
Now check free space. mountvol can temporarily assign a drive letter to the ESP:
Inspection command with a temporary letter:
mountvol S: /S
fsutil volume diskfree S:
dir S:\EFI
mountvol S: /D
- mountvol S: /S mounts the ESP as drive S:. Pick another letter if S: is taken.
- fsutil volume diskfree S: reports total and free bytes.
- dir S:\EFI lists the folders. A healthy Windows-only ESP mainly contains Microsoft and Boot, and possibly a few vendor folders.
- mountvol S: /D removes the temporary letter. Do this when you finish. Don’t leave the ESP mounted.
You can also confirm UEFI mode by running msinfo32 and checking that BIOS Mode says UEFI. To check whether the disk uses 4K sectors, run fsutil fsinfo sectorinfo C: and look at the bytes-per-sector values.
Confirm the ESP is really the cause
Free space alone doesn’t prove cause. Look for supporting evidence in the servicing log:
findstr /i “SpaceCheck ServicingBootFiles” C:\Windows\Logs\CBS\CBS.log
Lines mentioning insufficient space or a failed ServicingBootFiles step point at the ESP. If the log shows connection errors, service errors, or corruption instead, skip ahead to the other fixes below. The log can be large, and Windows may hold it open. If findstr complains, copy it to your Desktop first and search the copy.
| What you find | What it suggests |
| ESP has only a few MB free, and CBS.log mentions ESP space | ESP is a likely cause |
| ESP has plenty of free space (tens of MB or more) | ESP is unlikely to be the cause |
| CBS.log shows service, network, or corruption errors | Look at other causes first |
The “few MB” line comes from Microsoft’s May 2026 issue, where devices with 10 MB or less were most at risk. It isn’t a universal threshold.
How Large Should the EFI Partition Be?
Three sources give different numbers, so it helps to separate them.
Microsoft’s documented requirements. Microsoft’s UEFI/GPT partition guidance has changed over the years. An older version says the minimum is 100 MB, formatted FAT32, and 260 MB for Advanced Format 4K native drives, because of a FAT32 limitation. Current Windows deployment documentation lists a 200 MB minimum, and it also lists a 16 MB MSR. Check Microsoft’s current page before you rely on any figure.
Common real-world configurations. Many Windows installs, especially older or upgraded ones, have an ESP close to the 100 MB figure. Some OEM machines ship with larger ones. Systems that were installed years ago may carry a small ESP into a Windows 11 update that needs more room.
Practical recommendation. Partition-management guides often suggest 300–500 MB when you’re resizing anyway, to leave headroom. That comes from general practice, not Microsoft, and it is not a requirement. Whatever size you choose, stay above Microsoft’s minimum for your disk’s sector size.
Back Up Your PC Before Resizing the EFI Partition
Partition changes are dependable when they finish and risky when they don’t. An interrupted move can leave a PC that won’t boot. Before you touch anything:
- Back up personal files to an external drive or cloud storage.
- Create a system image if the PC holds anything you can’t replace. Windows still includes the older Backup and Restore (Windows 7) tool for this, and third-party imaging tools work too.
- Make Windows recovery media on a USB drive, and confirm it boots on this PC.
- Save your BitLocker recovery key if BitLocker or Device Encryption is on.
- Use reliable power. Plug a laptop in, and avoid resizing during storms or unstable power. A desktop on a UPS is better.
None of this is alarmist. It is the cheap insurance you want before anyone moves boot-critical partitions.
How to Expand the EFI Partition in Windows 11
The hard part is partition order. To grow a partition, the free space must sit directly after it on the disk. A typical Windows 11 GPT layout looks like this:
| Order | Partition | Typical role |
| 1 | EFI System Partition (FAT32) | Boot manager and boot files |
| 2 | Microsoft Reserved (MSR) | Reserved, not used for user data |
| 3 | C: (NTFS) | Windows and your files |
| 4 | Recovery (NTFS) | Windows RE |
Some OEM layouts put a recovery partition first, then the ESP, MSR, and C:. Yours may differ, which is why you should read the offsets from list partition.
When you shrink C: in Disk Management, the freed space appears after C:, not next to the ESP. In the layout above, the free space lands between C: and Recovery. The ESP can’t use it, because the MSR and the rest of C: are in the way.
Option 1: Windows built-in tools
Disk Management and DiskPart can’t do this job. Three documented limits explain why:
- Disk Management gives you no resize actions on the ESP.
- DiskPart’s extend command requires the free space to immediately follow the partition, on the same disk.
- If the partition uses any file system other than NTFS, the command fails with no change to the partition. The ESP is FAT32, and Microsoft’s volume-extension documentation also says you cannot extend volumes formatted using FAT or FAT32.
Built-in tools can still help in two ways: inspecting the layout (see above) and shrinking C: to create free space. They can’t extend the ESP itself.
Option 2: Use a reputable partition manager
Third-party partition managers can move partitions and resize FAT32. Use software from a vendor you can identify, downloaded from its official site. Avoid cracked or “free full version” downloads, since a tool with write access to your boot partitions is the wrong place to take chances.
I’m not naming commercial products, because feature support changes between versions. GParted, a free open-source partition editor that runs from a bootable USB drive, is a well-known option. Whatever you choose, read its current documentation for GPT, FAT32, and BitLocker support before starting.
The general process:
- Finish the backup steps
- Suspend BitLocker if it is on (see the BitLocker item below).
- Create unallocated space by shrinking C:, or by shrinking a neighboring partition if the tool supports it. Take only what you need, such as 300–400 MB.
- Arrange the free space directly after the ESP. In the typical layout, the MSR sits in the way, so the tool must move the MSR to the right and place the free space beside the ESP. Some tools handle this in one operation, others in several. Some can’t move the MSR at all.
- Extend the ESP into the unallocated space.
- Review the pending operations, confirm they match your plan, and apply them. Some tools need a reboot and run the changes before Windows loads.
- Don’t interrupt it. Let the tool finish, even if it seems slow.
- Restart Windows and confirm it boots normally.
- Re-enable BitLocker protection if you suspended it.
- Check free space again with the mountvol commands above, then run Windows Update.
If you see the tool rearranging a large chunk of C: data, that is normal for this operation. It is also why the backup matters.
How to Expand the EFI Partition Using DiskPart
The short version is that you can’t expand it with DiskPart, at least not with extend. DiskPart is still useful for the surrounding work. Here is what each command class does.
Inspection commands are safe and change nothing:
diskpart
list disk
select disk 0
list partition
list volume
detail partition
detail partition gives details on the selected partition, including its type GUID. The ESP’s type GUID is c12a7328-f81f-11d2-ba4b-00a0c93ec93b.
Partition modification commands change your disk. This example shrinks C: by 400 MB and only makes sense if a partition manager will then use that space:
select volume C
shrink desired=400
shrink desired=400 requests 400 MB from the end of C:. Windows may shrink less if immovable files sit near the end of the volume.
Potentially destructive commands exist, and I’m not giving you a routine walkthrough of them. Commands like delete partition override and format on the ESP can leave Windows unbootable. They aren’t a standard fix for 0x800f0922, and this article doesn’t recommend them.
One more DiskPart fact is worth knowing. The command extend on the ESP will fail with no change, because it is FAT32. You won’t damage anything by trying, but you won’t gain anything either.
What If the EFI Partition Cannot Be Extended?
Some common situations and what to do about each:
- Unallocated space isn’t adjacent to the ESP. This is the usual case after shrinking C:. Use a partition manager that can move the partitions in between. Windows tools can’t.
- A recovery partition sits between the free space and the ESP. Some OEM layouts put recovery first. The tool has to move it, or you may choose a different fix. Don’t delete the recovery partition to make room.
- The MSR is in the way. The MSR holds no user data, but some tools treat it as hidden and won’t move it. If yours won’t, try a different tool rather than deleting the MSR.
- Disk Management refuses to extend. That’s expected, because it doesn’t offer resize actions for the ESP. It isn’t a sign that anything is wrong.
- The ESP is already large enough. If the ESP has plenty of free space, resizing won’t help. Return to the diagnosis and look at the other causes below.
- The disk isn’t GPT or Windows isn’t booting in UEFI mode. On an MBR/Legacy BIOS install there is no ESP. There is a System Reserved partition, which is a different partition with different rules. Don’t apply this guide to it.
- BitLocker is enabled. Suspend protection before resizing (manage-bde -protectors -disable C:, then manage-bde -protectors -enable C: afterward). Some tools can’t move an encrypted volume. If yours can’t, decrypt first or use a different approach.
- The layout is complicated. Multiple disks, several ESPs, dual-boot setups, or vendor-specific partitions raise the risk considerably. Get help from someone experienced or consider a repair or reinstall with a clean partition layout, after backing up.
Another option: free space inside the ESP. If the ESP has leftovers from another operating system or vendor tool, cleaning them out may free enough room. Mount the ESP as shown earlier and review what is there. Don’t delete anything under EFI\Microsoft\Boot or EFI\Boot, and remove only folders you positively identify as unused leftovers, after a backup.
Microsoft’s guidance is that a PC should have one system partition, so creating a second ESP is not a fix I’d suggest for ordinary users.
Other Ways to Fix Windows 11 Error 0x800f0922
If the ESP looks fine, or the fix didn’t help, work through these in roughly this order. You don’t need all of them.
- Restart and retry Windows Update. Microsoft said that in the May 2026 case, restarting and checking again might resolve it for many devices.
- Check your connection and any VPN. Disconnect the VPN or proxy and try again. The error is commonly associated with update-server connectivity.
- Run the Windows Update troubleshooter. Go to Settings > System > Troubleshoot > Other troubleshooters > Windows Update.
- Check the services. Open msc and confirm that Windows Update, Background Intelligent Transfer Service, and Cryptographic Services aren’t disabled. Older reports also link the App Readiness service to this error, which is why it is worth a look.
- Check free disk space on C:. Updates need working room on the system drive too.
- Check for a pending restart in Windows Update. Restart if it asks.
- Temporarily disable third-party security software, or check that it isn’t blocking the install, then turn it back on.
- Reset Windows Update components, covered below.
- Run DISM and SFC, covered in the next section.
- Check WinRE status, covered after that.
- Install manually. Download the update from the Microsoft Update Catalog and install it. If it fails the same way, that points to a local cause rather than a download problem.
- Look at .NET. If the error appears while enabling .NET Framework 3.5 or installing a .NET update, focus on that component and its logs.
- Read the logs. C:\Windows\Logs\CBS\CBS.log is the servicing log. To produce a readable Windows Update log, run Get-WindowsUpdateLog in PowerShell. It writes a log file to your Desktop.
Resetting Windows Update components is a modification, so use it when simpler steps have failed. Run these in an elevated Command Prompt:
net stop wuauserv
net stop cryptSvc
net stop bits
net stop msiserver
ren C:\Windows\SoftwareDistribution SoftwareDistribution.old
ren C:\Windows\System32\catroot2 catroot2.old
net start wuauserv
net start cryptSvc
net start bits
net start msiserver
The net stop lines pause the services that hold the update cache. The two ren lines rename the cache folders so Windows rebuilds them. The net start lines bring the services back. Nothing is deleted, and you can rename the folders back if needed.
Microsoft’s registry workaround (May 2026 issue only). For the specific KB5089549 problem, reports said Microsoft recommended changing a registry value that reduces the reserved padding Windows uses inside the ESP during servicing. The command, from an elevated Command Prompt, was:
reg add “HKLM\SYSTEM\CurrentControlSet\Control\Bfsvc” /v EspPaddingPercent /t REG_DWORD /d 0 /f
This modifies the registry, and it addressed one specific bug. If your system is current and your update is a different one, you probably don’t need it. To undo it:
reg delete “HKLM\SYSTEM\CurrentControlSet\Control\Bfsvc” /v EspPaddingPercent /f
Fix 0x800f0922 With DISM and System File Checker
If servicing files are damaged, an update can fail with the same error code. Two built-in tools repair the Windows component store and protected system files. Run them in an elevated terminal.
DISM repairs the component store, which is where Windows keeps the files it uses for servicing. It can download replacements from Windows Update, so you need a working connection:
DISM /Online /Cleanup-Image /CheckHealth
DISM /Online /Cleanup-Image /ScanHealth
DISM /Online /Cleanup-Image /RestoreHealth
- CheckHealth quickly reports whether corruption has already been flagged.
- ScanHealth scans the component store, which takes longer.
- RestoreHealth repairs what it finds. It can sit at a percentage for a long time, which is normal.
SFC checks protected system files and replaces damaged ones from the component store:
sfc /scannow
Run DISM first if you suspect the component store is damaged, then SFC, because SFC uses that store as its source. If SFC reports it fixed files, restart and try the update again. If both tools report no problems, corruption probably isn’t your cause.
Check Whether Windows Recovery Environment Is Working
WinRE lives in its own recovery partition, separate from the ESP, and it is a different problem from ESP space. Update failures can involve either partition, and people often confuse them. Windows 10 users hit a well-known case in early 2024 when the recovery partition was too small for a WinRE update, which produced a different error code.
Check WinRE’s state with:
reagentc /info
Look for:
- Windows RE status: should say Enabled.
- Windows RE location: should point to a harddisk and partition path, ending in Recovery\WindowsRE.
- Recovery image location and BCD identifier: should not be blank when WinRE is enabled.
If WinRE shows Disabled with no location, that can be worth fixing before retrying the update. This command changes configuration, so use it only in that case:
reagentc /enable
If it fails, or the recovery partition has no free space, don’t start deleting partitions. Note the error and treat the recovery partition as its own repair job.
How to Tell If the EFI Partition Was Actually the Problem
Check your work with evidence:
- Compare free space in the ESP before and after, using fsutil volume diskfree.
- Retry the same update that failed. It should install without the 0x800f0922 rollback.
- Restart normally and confirm Windows boots without a recovery screen.
- Check the CBS.log for the earlier SpaceCheck or ServicingBootFiles They shouldn’t reappear.
- Try a later update when one arrives, to confirm the fix holds.
A successful resize doesn’t prove the ESP was the cause. If the update installs afterward, and you had ESP-related log entries before, the case is strong. If the same update still fails, other causes are still on the table, and you should move through the fixes above.
Common Mistakes When Resizing the EFI Partition
- Deleting the EFI partition. This can leave Windows unable to boot.
- Formatting the EFI partition. This erases the boot files.
- Shrinking the wrong partition. Confirm disk and partition numbers before applying anything.
- Assuming Disk Management can move partitions. It can’t.
- Creating unallocated space in the wrong place. Space after C: doesn’t help the ESP.
- Interrupting the operation. Let it finish, and keep the power on.
- Ignoring BitLocker. Suspend it first and keep the recovery key handy.
- Skipping the backup.
- Following commands written for another layout. MBR systems, OEM recovery-first layouts, and dual-boot machines behave differently.
Frequently Asked Questions
What is error 0x800f0922 in Windows 11?
It’s a general Windows Update failure code that appears when an update can’t finish installing. Causes include connection problems, corrupted servicing files, .NET issues, and insufficient ESP space.
Can a small EFI partition cause 0x800f0922?
Yes. Microsoft documented this for the May 2026 update, where devices with limited ESP free space, especially 10 MB or less, could fail. It isn’t the only cause.
How do I increase the EFI partition size in Windows 11?
Back up, check the layout, and use a reputable partition manager to place unallocated space directly after the ESP and extend it. Windows’ built-in tools can’t do this.
Can I extend the EFI partition using Disk Management?
No. Disk Management offers no resize actions for the ESP, and Microsoft’s documentation says FAT and FAT32 volumes can’t be extended.
How much space should the EFI partition have?
Current Microsoft deployment documentation lists a 200 MB minimum, and older guidance lists 100 MB, or 260 MB on 4K native drives. Many guides suggest 300–500 MB for headroom. That is common practice, not a Microsoft requirement.
Is it safe to resize the EFI partition?
It is reasonably safe with a backup, stable power, and a tool you trust. It carries real risk if interrupted or done on an unusual layout.
Why can’t I extend my EFI partition?
Usually because the free space isn’t directly after it, or because you’re using a tool that can’t resize FAT32. DiskPart’s extend requires NTFS and contiguous space.
Will resizing the EFI partition delete my files?
It shouldn’t when done correctly. The risk comes from interrupted operations or mistakes, which is why a backup comes first.
What should I do if expanding the EFI partition doesn’t fix 0x800f0922?
Go back to the logs. Then try Windows Update component reset, DISM and SFC, a WinRE check, a manual install, and a review of security software and VPNs.
Can I fix 0x800f0922 without reinstalling Windows?
In most cases, yes. The fixes above are all repairs, and a reinstall is a last resort.
Final Troubleshooting Checklist
- Confirm the error is 0x800f0922 and note which update fails.
- Check the CBS.log for ESP-related entries.
- Identify the ESP and check its free space.
- Back up your data and create recovery media.
- Verify the partition layout and offsets.
- Resize only if the ESP is short on space and the layout allows it.
- Suspend BitLocker first if needed.
- Restart Windows and confirm normal boot.
- Run Windows Update again.
- Run DISM and SFC if the error remains.
- Check WinRE with reagentc /info.
- Investigate connection, services, .NET, and security software if the error still appears.