Key Takeaways
- The Wi-Fi option may be missing from your Windows PC due to a temporary glitch, misconfigured services, or a recently installed Windows update.
- Before engaging in intensive troubleshooting, reboot your Windows PC to rule out a simple temporary glitch.
- If restarting the computer doesn’t work, you can move on to other troubleshooting steps, such as disabling and enabling the Wi-Fi driver, running the built-in troubleshooter, updating drivers, changing the status of key services, or rolling back a Windows update.
Few computer issues are as frustrating as sitting down to use your computer, and you can’t get online. If the source of your trouble is a missing or malfunctioning Windows Wi-Fi interface, we’re here to help.
Do note that the following troubleshooting steps are centered around troubleshooting the Wi-Fi interface on your Windows PC and not issues between your laptop or PC and the local network. If you can open the Wi-Fi menu on your PC, successfully select a network, and enter the password, but you are unable connect, we recommend moving on to these Wi-Fi troubleshooting tips.
1. Restart Your Computer
If your Windows PC’s Wi-Fi option goes missing, your first port of action should be to restart your computer. Doing this will eliminate the issue if it results from a temporary bug or glitch.
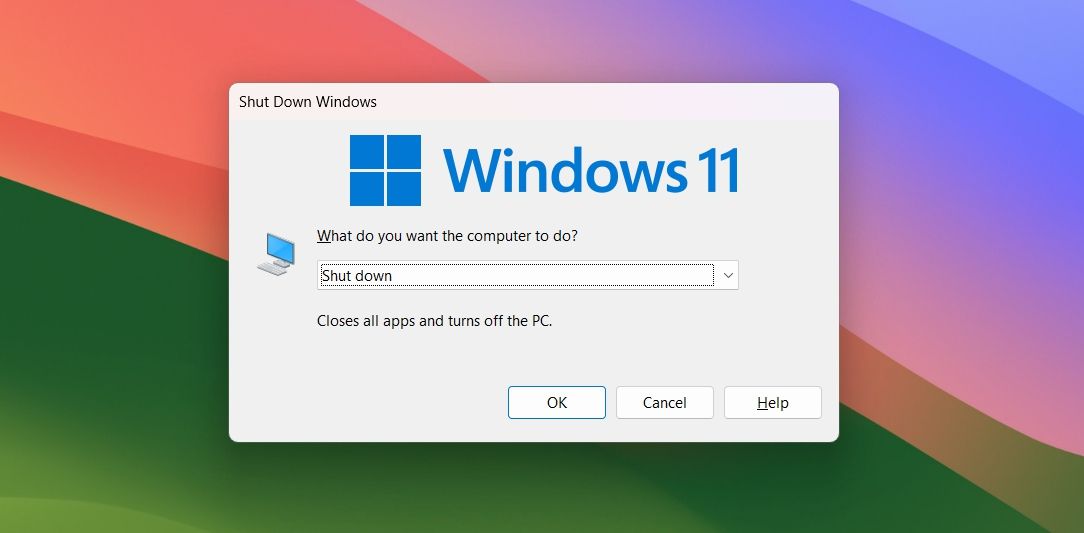
To restart your computer, press the Alt+F4 key together, choose “Restart” from the drop-down menu and click “OK.”
After restart, check if the Wi-Fi option appears. If not, try the next solution.
2. Check for a Physical Switch
Not all laptops have a physical switch, but some laptops, especially those designed for government and corporate use, have a small physical switch for the Wi-Fi connection. Most of us wouldn’t use such a switch in our day-to-day lives, but the switch offers a hard network disconnect for people working in environments where the Wi-Fi has to be turned off at a hardware level instead of a software level.
If the Wi-Fi isn’t working and no other troubleshooting trick seems to work, check your laptop’s surfaces and edges for such a kill switch and ensure it hasn’t been accidentally enabled.
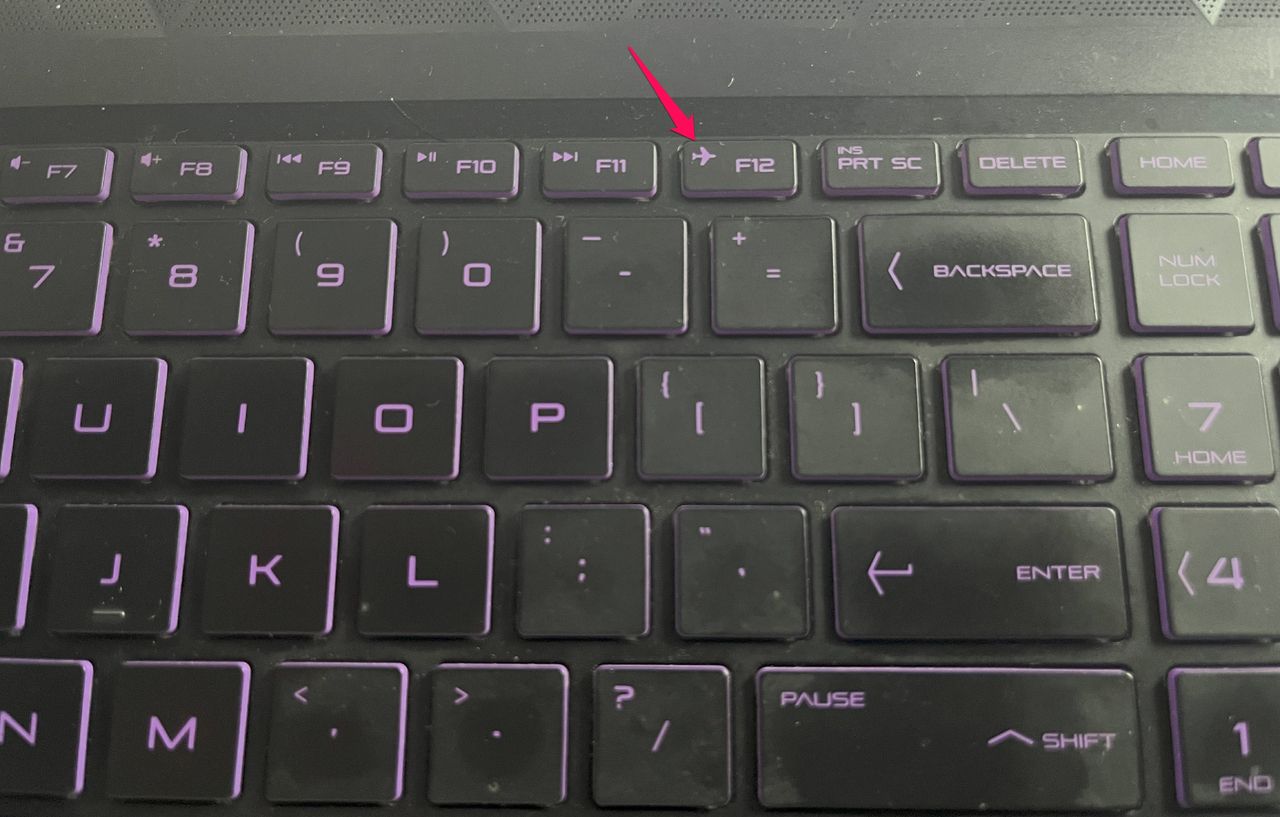
Laptops may also have a dedicated key to manage Wi-Fi. While this shouldn’t cause your Wi-Fi access to be inaccessible, if you accidentally the key it can certainly be confusing as to why your Wi-Fi isn’t working. There is no standard key for this, as it varies from brand to brand. If you are unsure which key to press, start by looking for a key with an “airplane” or “Wi-Fi” logo on it.
If that doesn’t work, press that key in combination with the “Fn” key on your laptop.
3. Run the Network and Internet Troubleshooter
When troubleshooting Windows Wi-Fi issues, you can always call upon the built-in troubleshooting tool to quickly rule out things Windows can detect and repair.
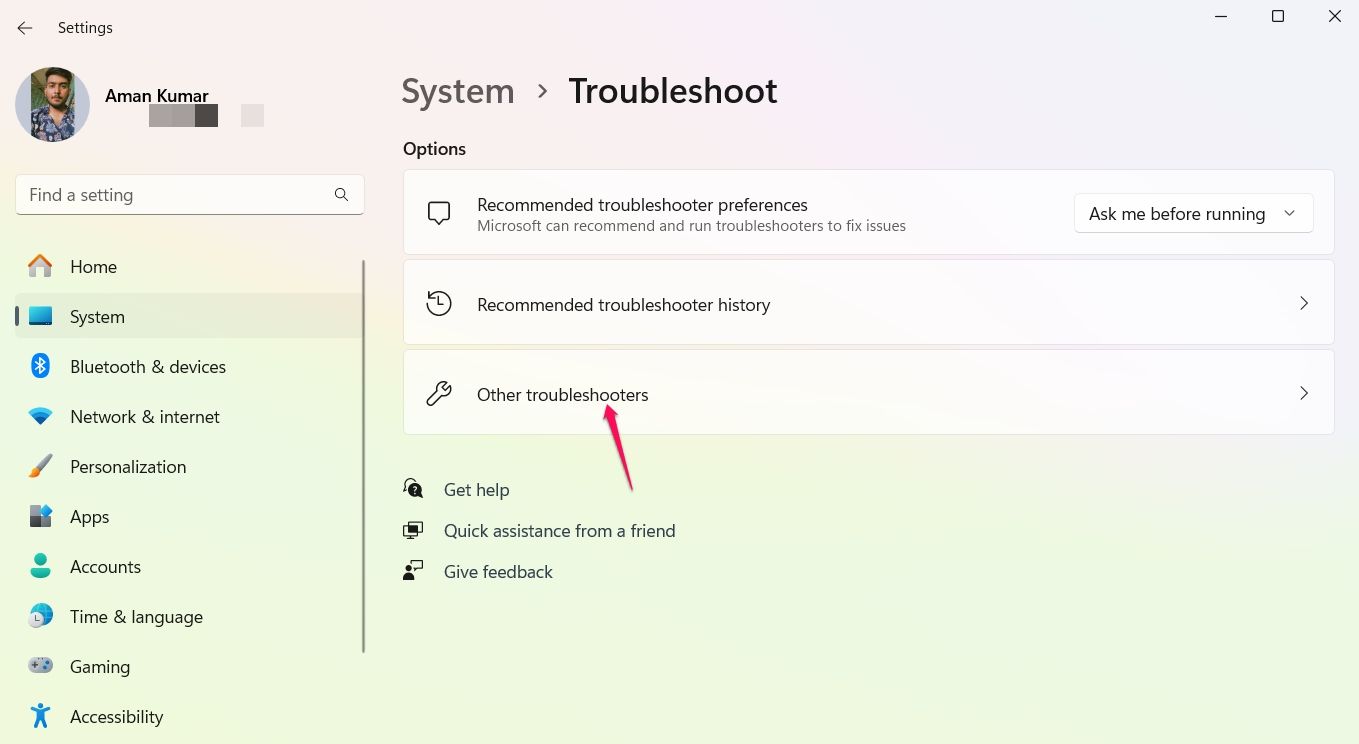
To run this troubleshooter, press Windows+i to open “Settings,” select “System” from the left sidebar, and then click “Troubleshoot” in the right pane. Click “Other troubleshooters.”
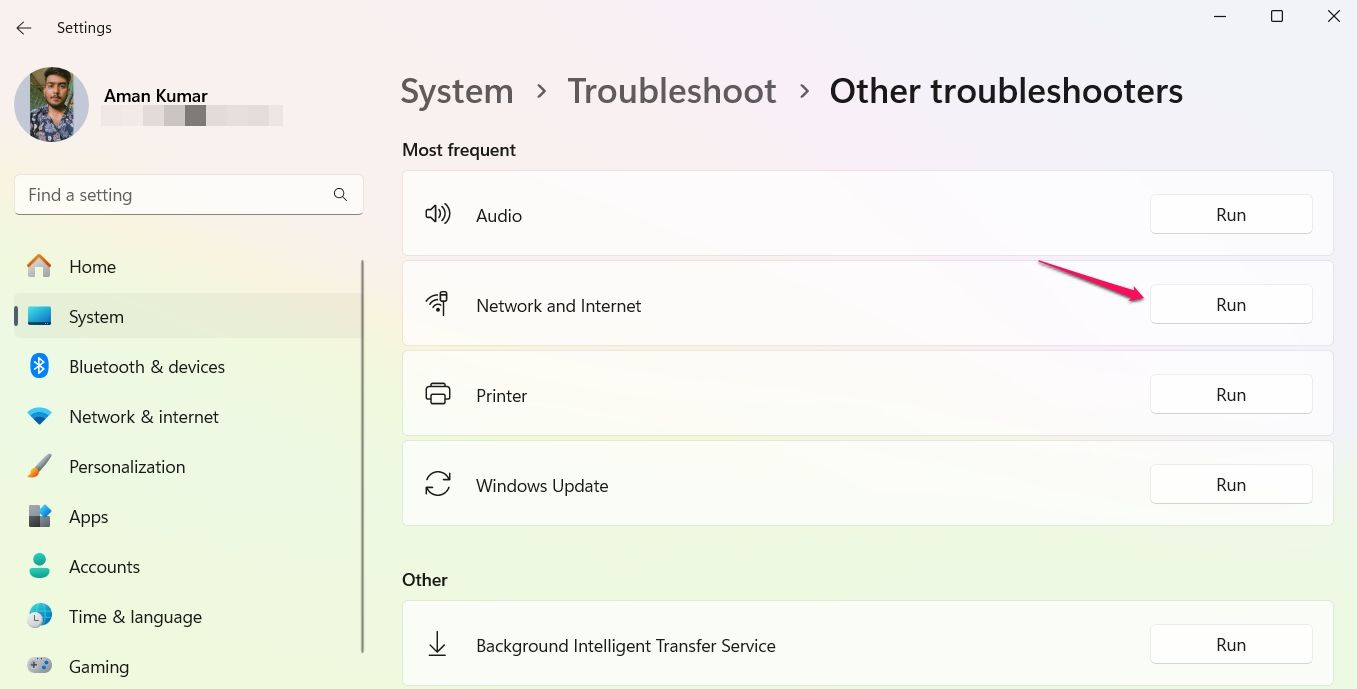
In the Other troubleshooters window, you’ll see a list of troubleshooters that can be helpful in different situations. Since you’re facing a connection issue, click “Run” next to “Network and Internet.”
The troubleshooter window will appear and scan your system for network issues. If it finds any, it will try to fix them automatically. If it can’t find anything wrong, well, no worries, we’ve got plenty of tips here to continue the process.
4. Disable and Enable the Wi-Fi Driver
The Wi-Fi driver is software that allows you to connect your device to a wireless connection. If it gets affected by a temporary bug or glitch, it could end up the reason why the Wi-Fi option is missing from your computer.
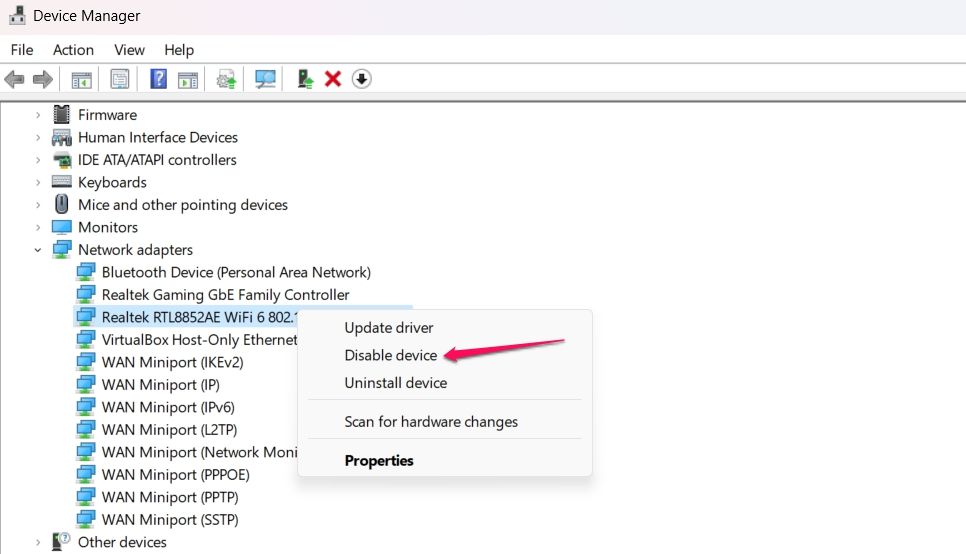
In this situation, the best thing you can do is disable and re-enable the Wi-Fi driver. To do this, open the “Start” menu, type “Device Manager” in the search bar and press “Enter.”
In the Device Manager, double-click the “Network adapters” node, right-click your Wi-Fi driver and choose “Disable device.”
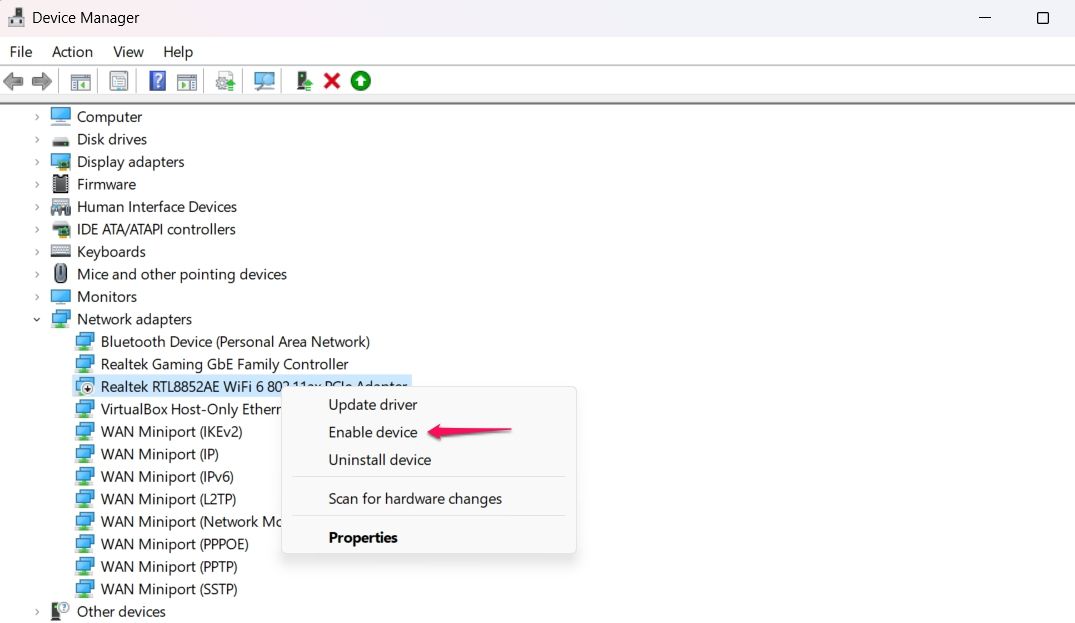
Wait for a few seconds, and then right-click your Wi-Fi driver again and choose “Enable device.”
Now, check if the Wi-Fi option appears. If not, continue with the guide.
5. Scan for Hardware Changes
Has the Wi-Fi option gone missing after updating the network driver or resetting your computer? If yes, it’s likely that Windows failed to detect the changes or restore the proper settings.
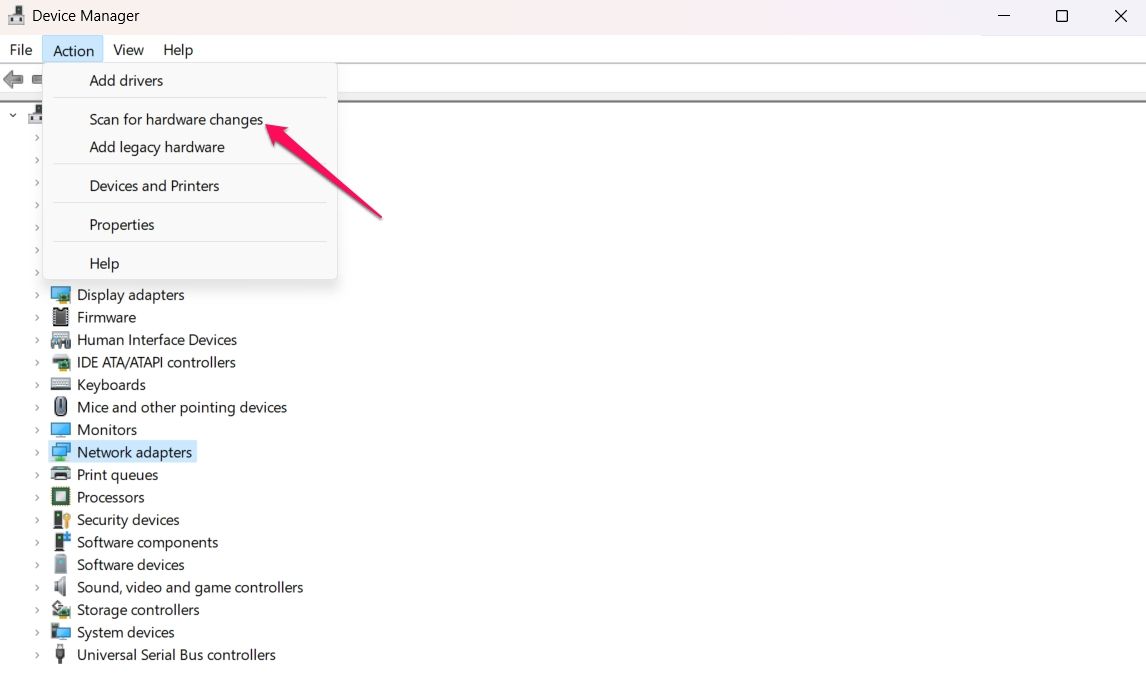
In this case, you’ll have to use the Device Manager to scan for the changes made to your network adapter. To do this, open the “Device Manager” and click “Network adapters.” Then, click “Action” in the top bar and select “Scan for hardware changes.”
The Device Manager will search for and install updated drivers. Once it’s finished, restart your computer and check if the Wi-Fi option is back.
Windows is far more reliable with drive updates than it was in the past. But you may still wish to manually download updated drivers from your PC or wireless card manufacturer to ensure optimal performance.
6. Change the Startup Type of the WLAN AutoConfig Service
The WLAN AutoConfig service is essential for connecting your device to the internet. If this service is not running, you may experience various connection problems.
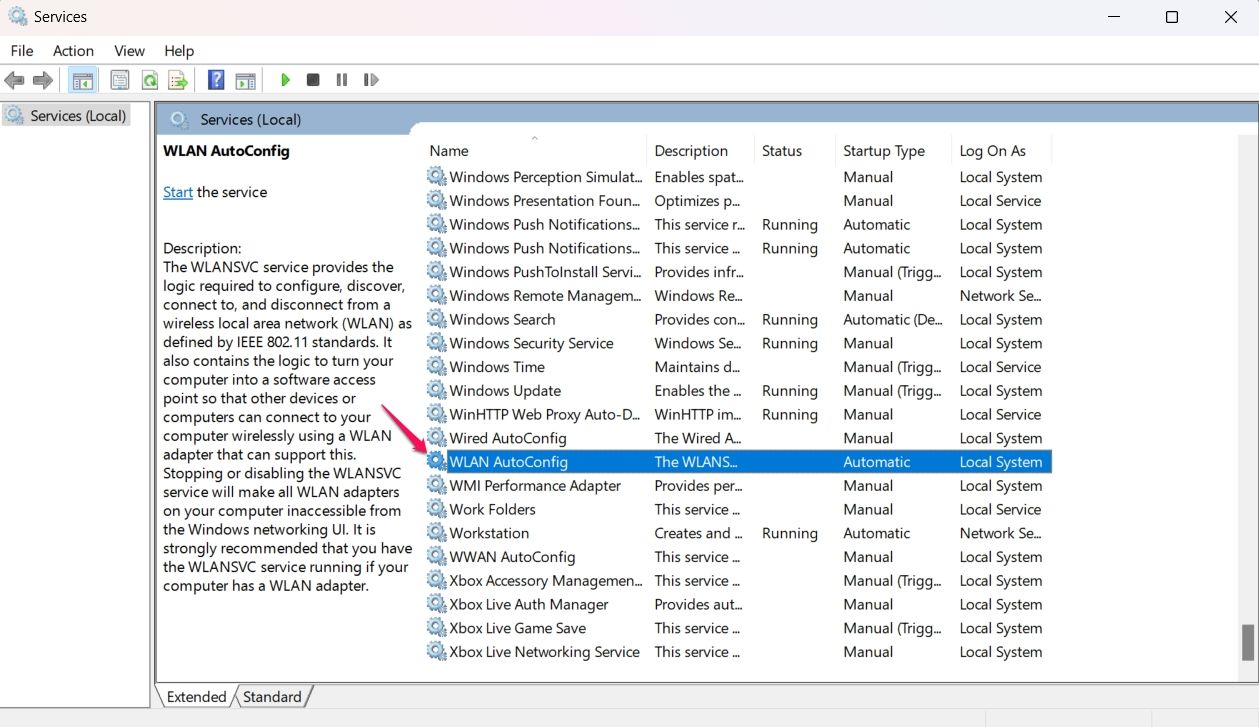
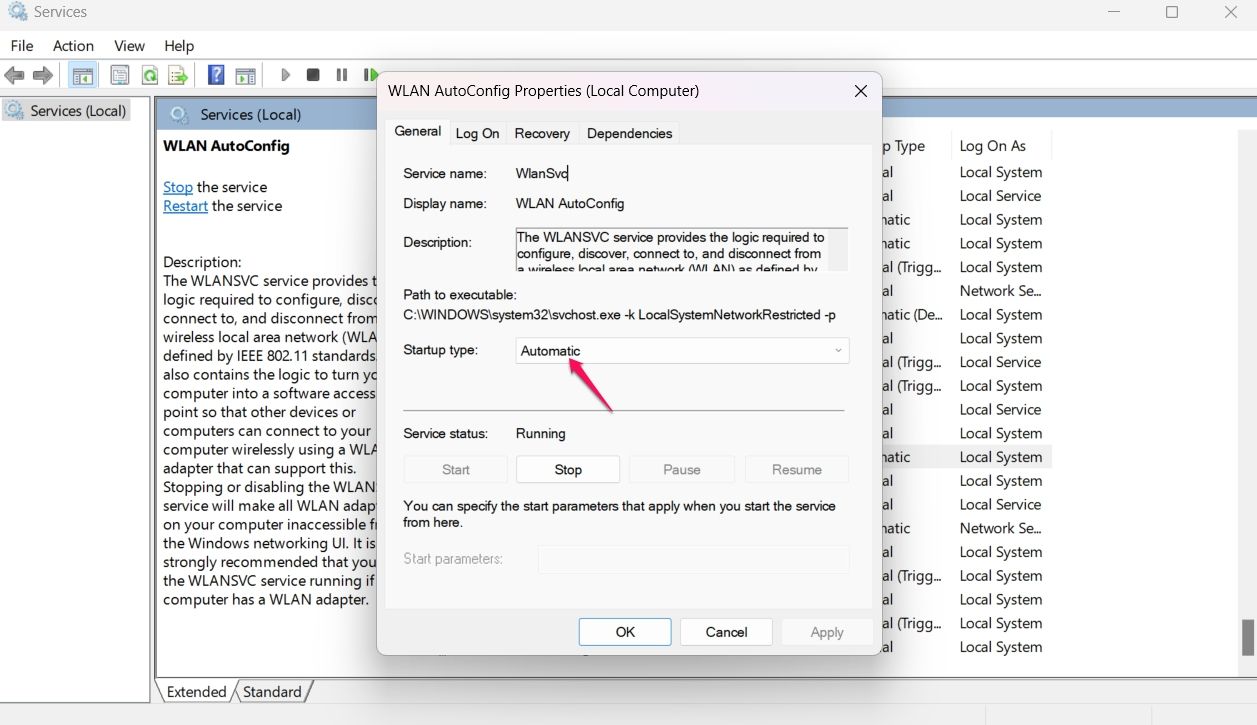
To start the WLAN AutoConfig service, open the “Start” menu, type “Services” in the search bar, and press “Enter.” In the Services window, locate and double-click the “WLAN AutoConfig” service.
Change the “Startup type” to “Automatic” and click “Start.” Then, click “Apply” and “OK.”
If the Startup type was already set to “Automatic,” change it to “Disabled” and click “Stop” under “Service status.” Then, restart your computer. Once your computer has restarted, open the “Services” window again, change the “Startup type” of the “WLAN AutoConfig” service back to “Automatic,” and click “Start.”
In addition to the WLAN AutoConfig service, you must check the status of some other services. Make sure that the Startup type is set to Automatic for the following services:
- Network List Service
- Network Location Awareness
- Network Store Interface Service
- Network Connection Broker
After changing the startup type of these services, restart your device and see if the problem is still there. If it is, a recent Windows update you downloaded may be causing the issue.
7. Uninstall a Recent Windows Update
It’s always recommended to keep Windows updated and, fortunately, serious update-related issues are much rarer than they have been in the past. But if you just updated your computer, and now you’re experiencing Wi-Fi issues after downloading a Windows update, the update you installed probably contains a bug.
This usually happens if you’re enrolled in the Windows Insider, as its updates are unstable and may contain bugs but it can happen even on more stable releases. To fix the problem, you’ll have to uninstall the update. We do recommend attempting other fixes first and always striving to keep your computer properly updated, though, so treat this fix as a last resort.
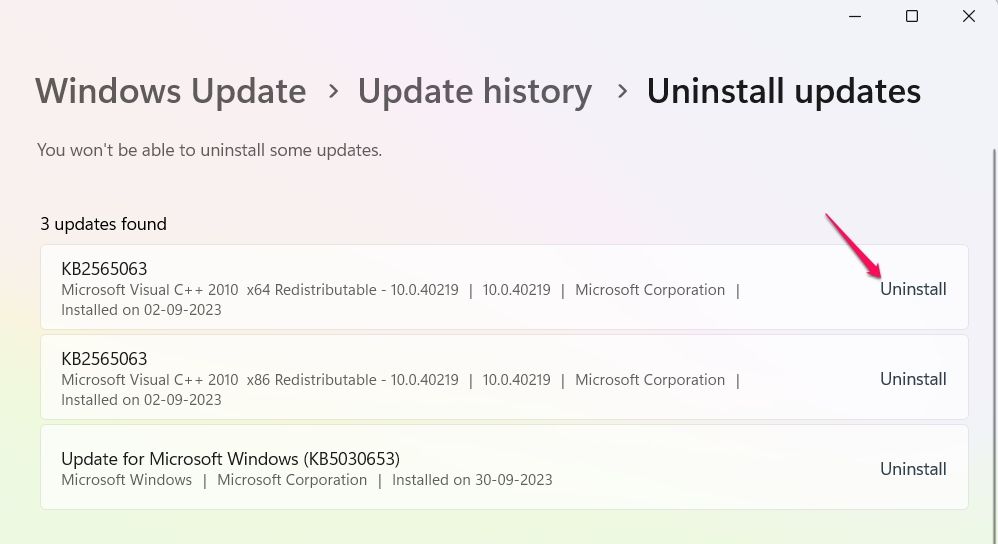
To uninstall a recent Windows update, open “Settings” and go to Windows Update > Update history > Uninstall updates. Click “Uninstall” next to the last update you installed. Now, wait for Windows to release another update that fixes the bug.
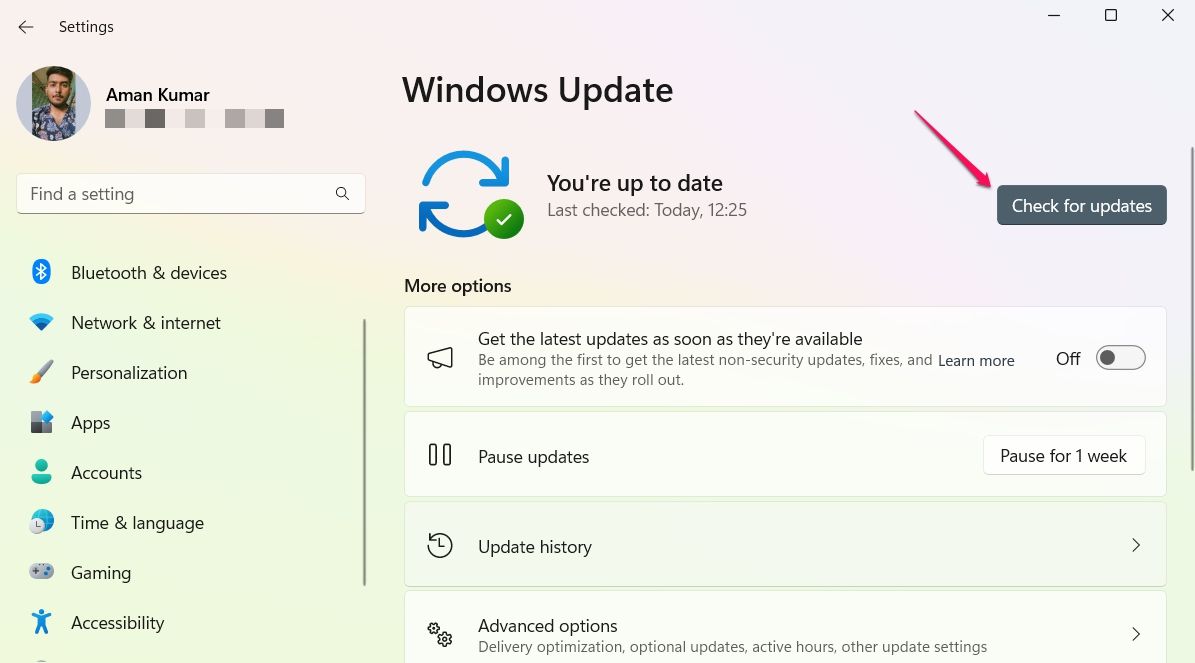
In addition to rolling back an update, it’s important to update Windows, especially if you haven’t done so in a while. This may fix the Wi-Fi issue and introduce you to new features.
Hopefully, after following these troubleshooting steps you can now connect to the internet without any issues. And if you’re in the mood to further optimize your connection, here are some great tips to help you speed up your internet connection.

