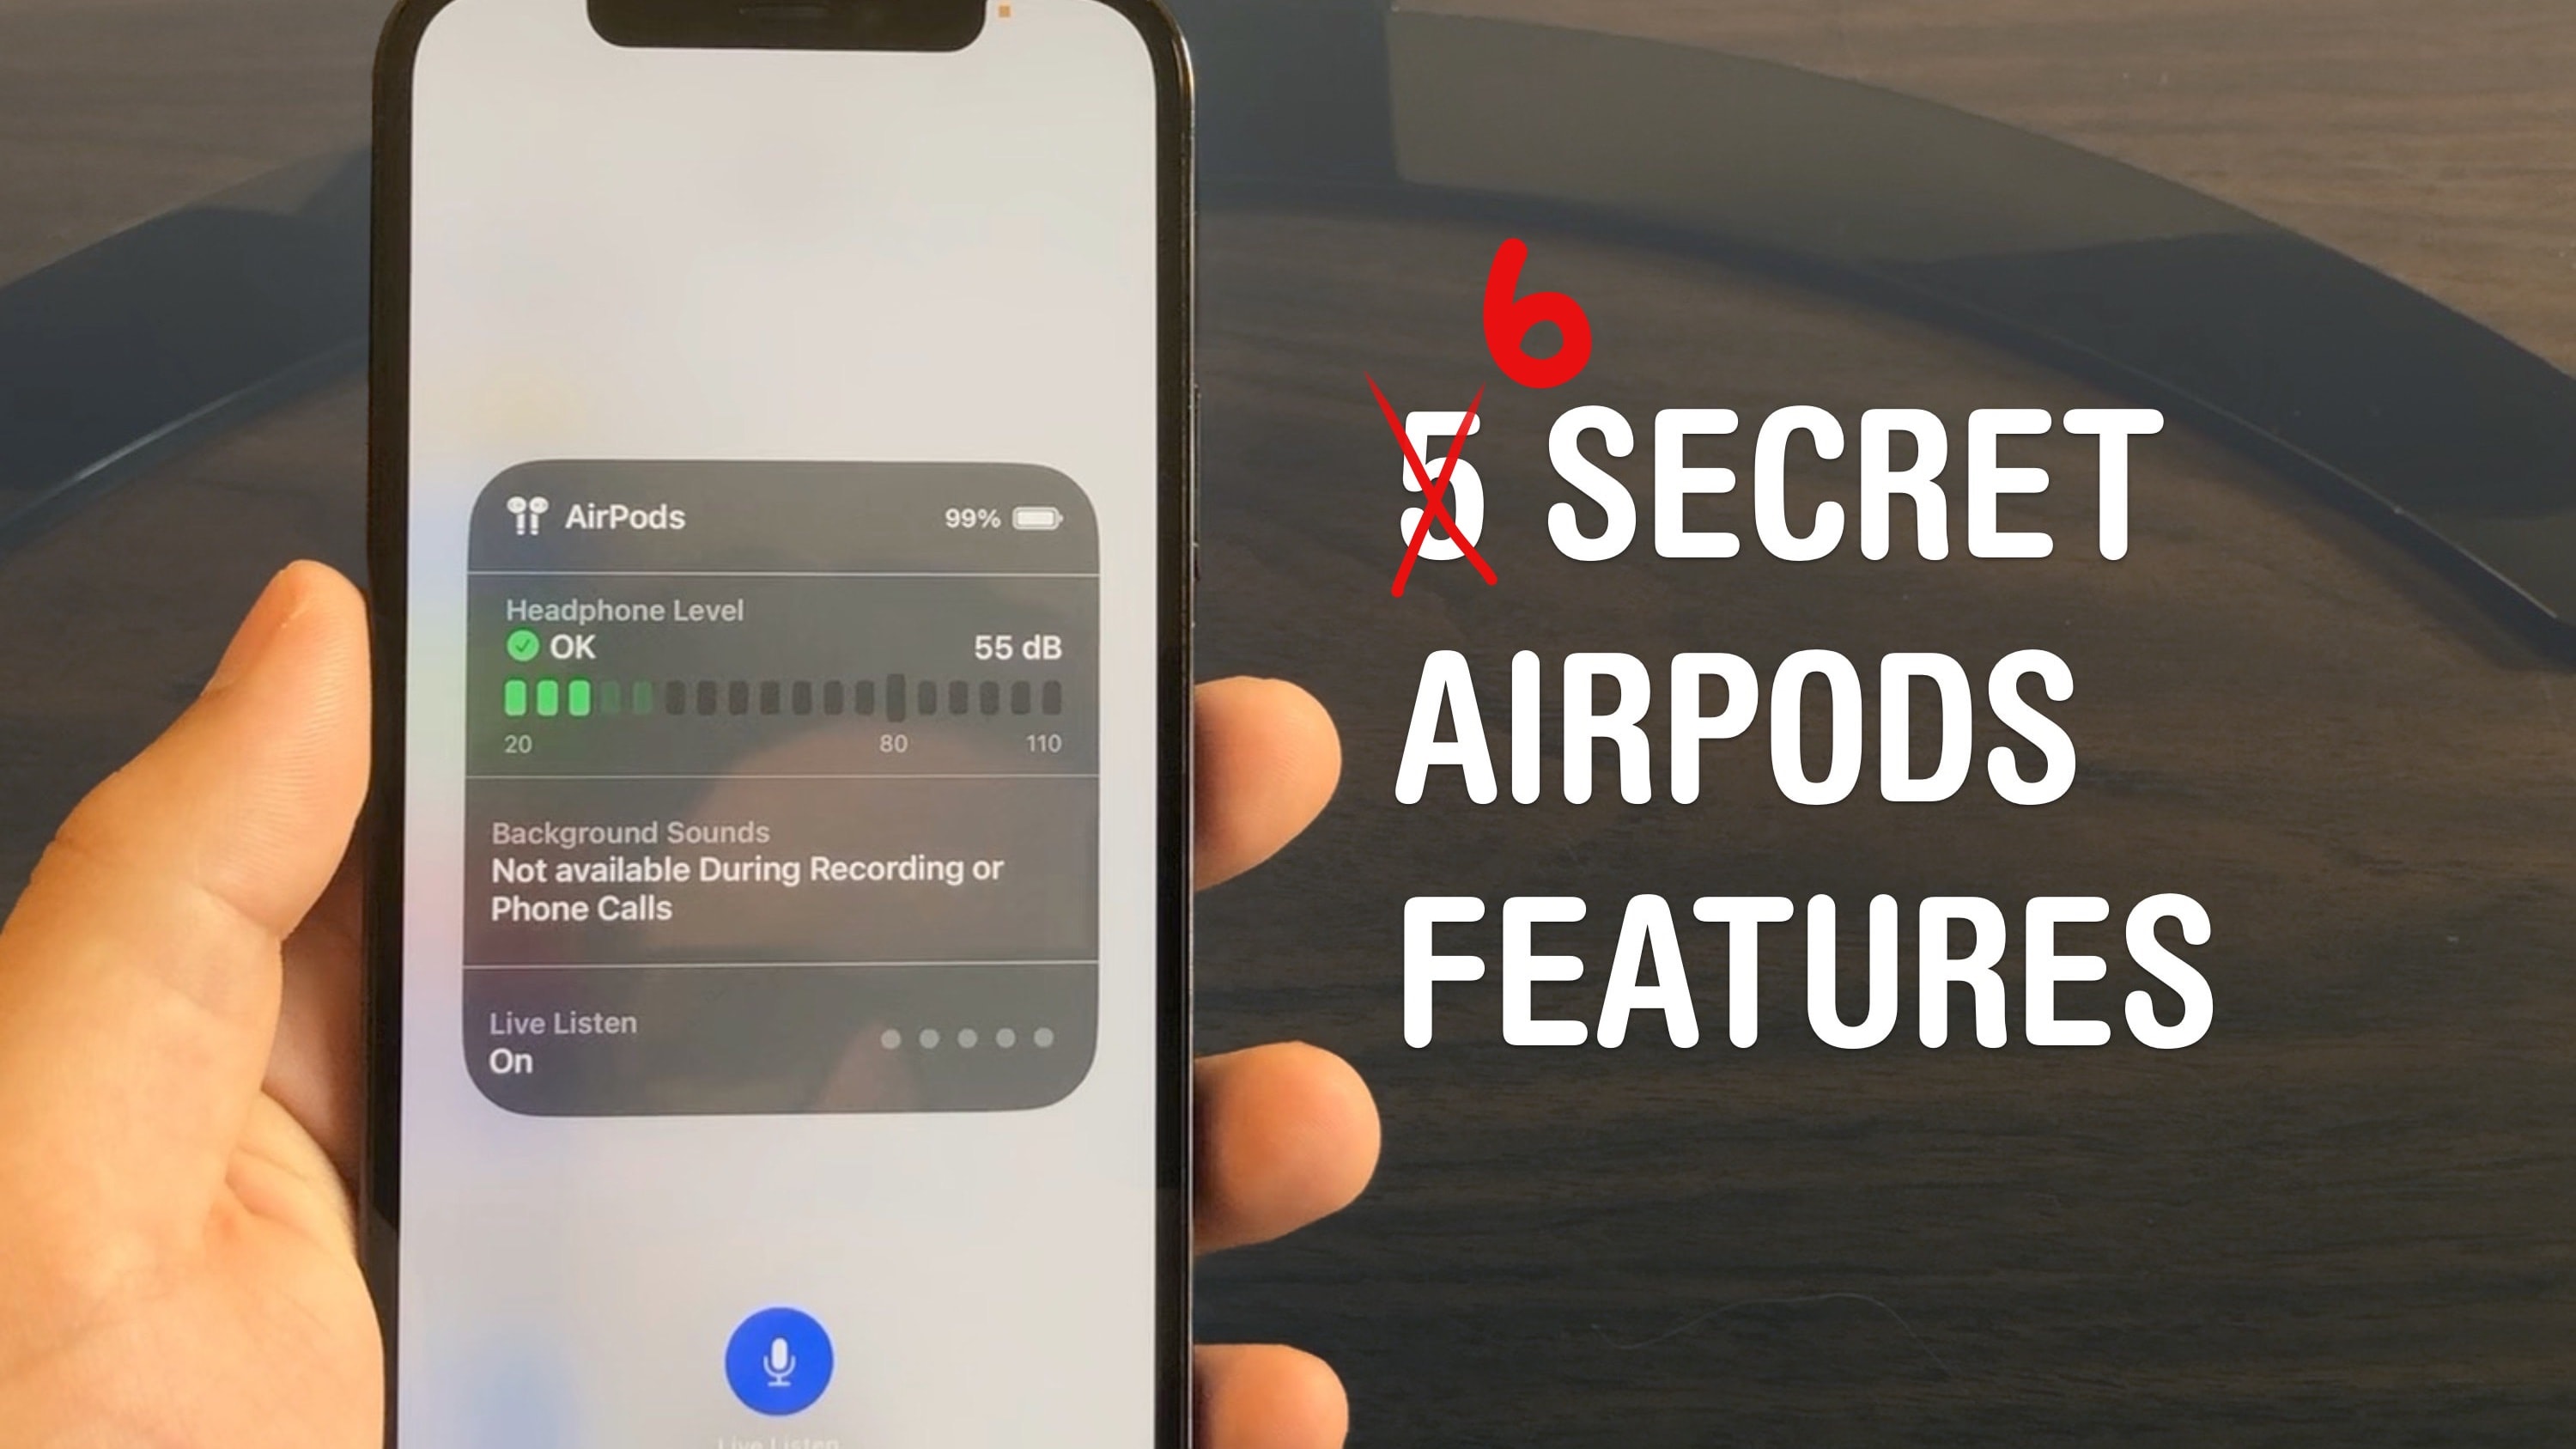
eAirPods are the wireless earbuds that ordinary Bluetooth headphones want to be when they grow up. They’re seamlessly integrated with your iPhone, Apple Watch, iPad and Mac. They’re deceptively simple — but if you want to get more out of them, you need to dig through Settings. These AirPods tips will show you where to look to unlock maximum functionality.
I did some spelunking and found six super-handy hidden features you might not know about.
6 secret AirPods tips and tricks
You can watch all most of these in action in this video:
No. 1: Share audio between two pairs of AirPods
You want to listen to a song or watch a video with a close friend, so you each take a single earbud and press play. Who hasn’t done that?
Germophobes, probably. But if your friend has their own pair of AirPods (or newer Beats headphones*) you can play music to both simultaneously.
Screenshot: D. Griffin Jones/Cult of Mac
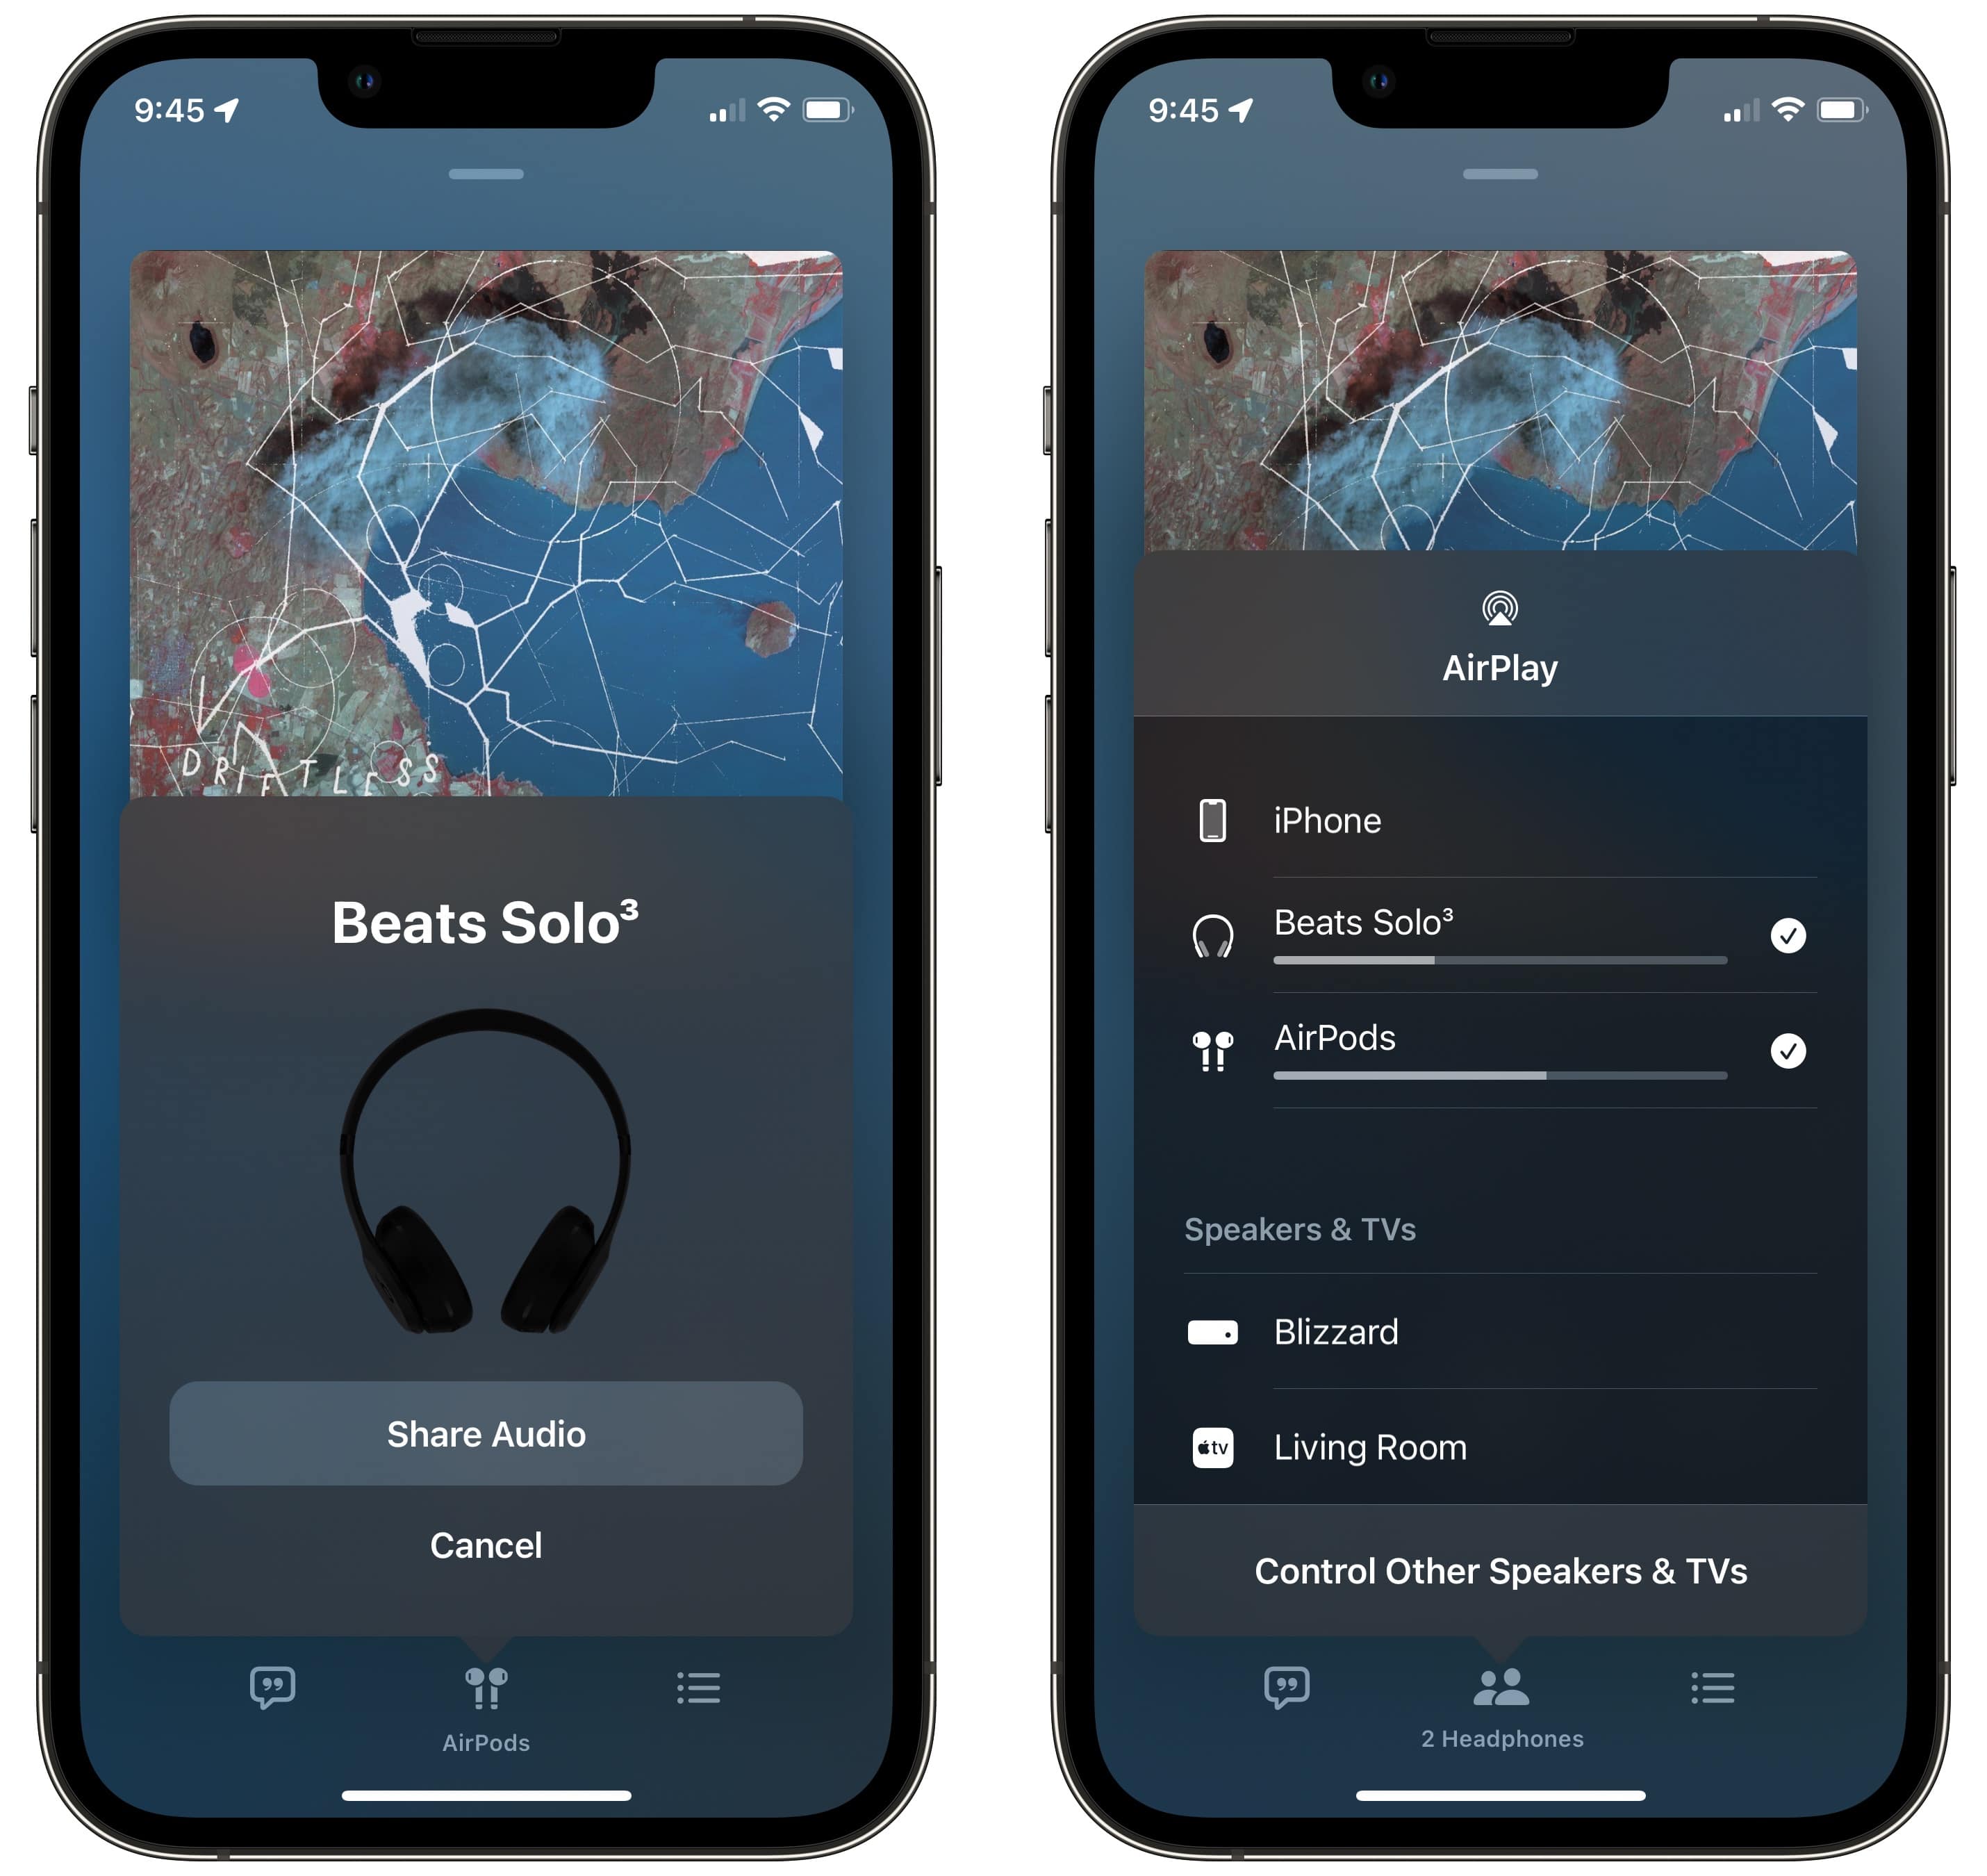
To take advantage of this great AirPods audio-sharing feature, first tap the AirPlay button. Then tap Share Audio, make sure your friends’ headphones are nearby, and tap Share Audio. Your friend might have to tap Join on their iPhone. Then, just check the other device in the list. Uncheck it to stop.
Screenshot: D. Griffin Jones/Cult of Mac
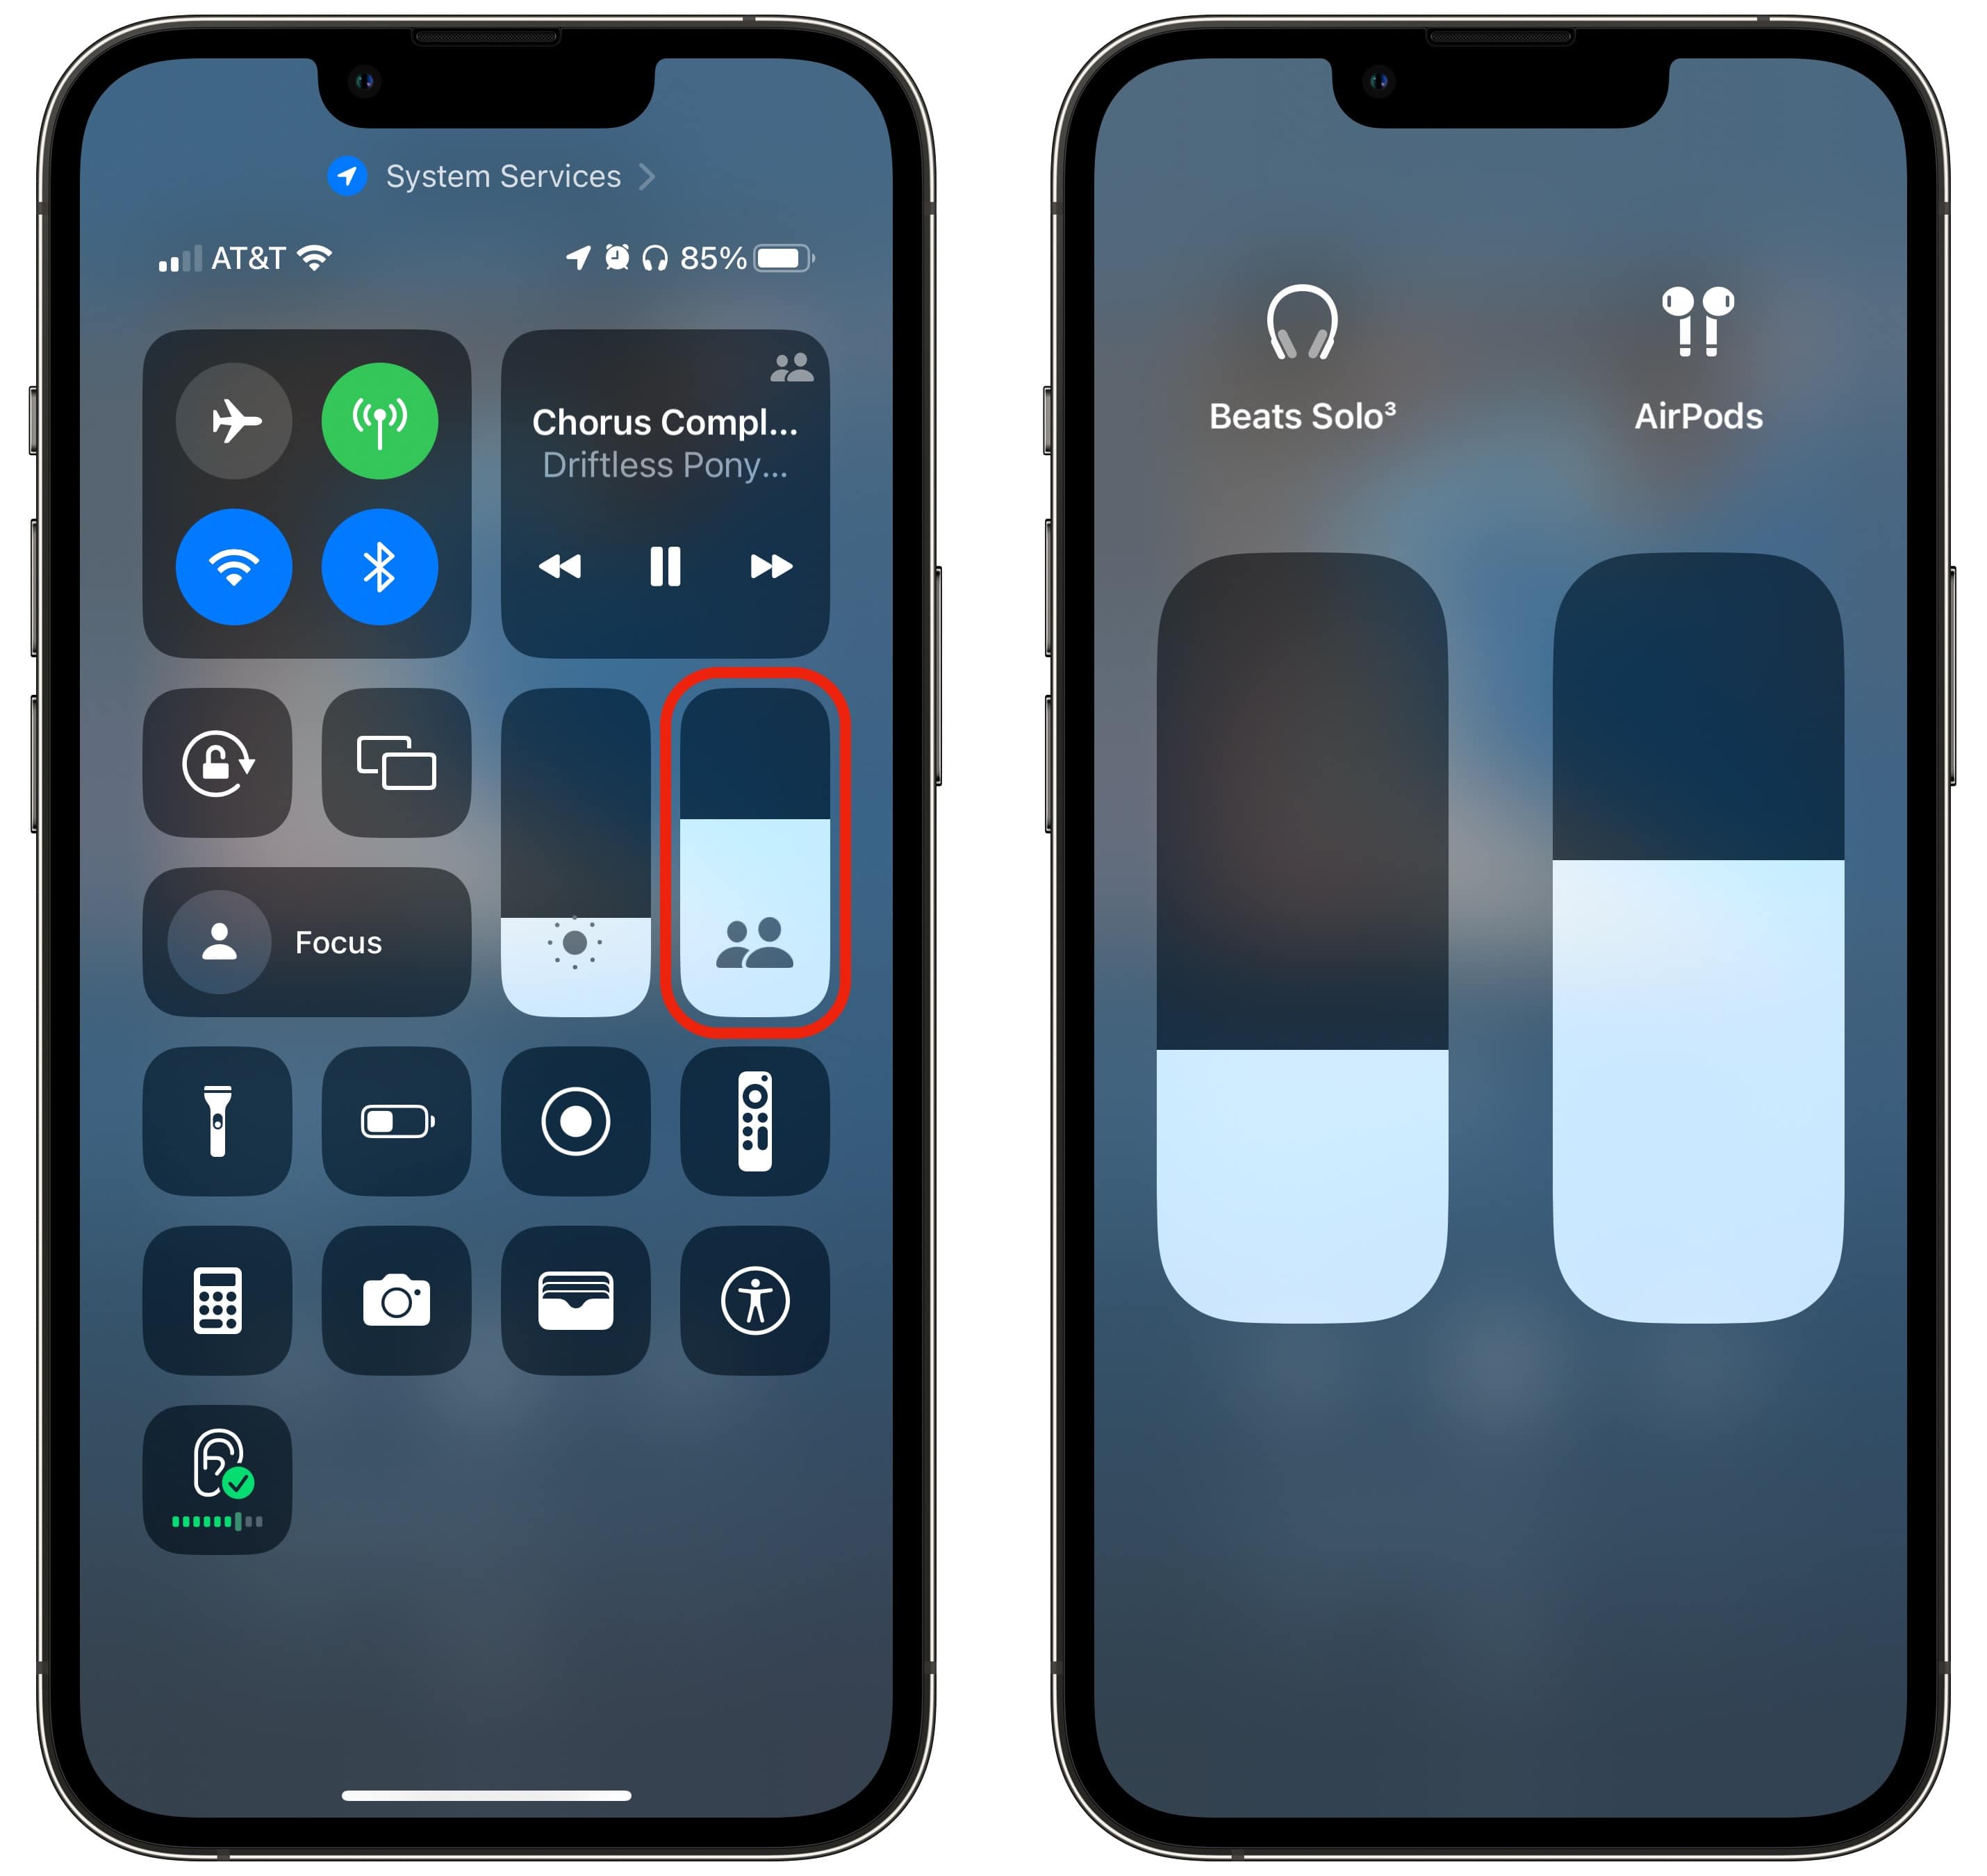
You can each set different volume levels for your own AirPods, too. Open Control Center and hold down on the volume slider. You’ll see it expand into two sliders you can adjust.
* This works with AirPods (all models and versions), Beats Fit Pro, Beats Flex, Beats Solo Pro, Beats Solo³ Wireless, Beats Studio³ Wireless, BeatsX, Powerbeats, Powerbeats Pro and Powerbeats³ Wireless.
No. 2: Spy on a conversation with Live Listen
Next up on our list of AirPods tips: a way to use them as a spy tool. Apple’s Live Listen feature uses the microphone on your iPhone, iPad or iPod touch as an audio source, then transmits the sound to your AirPods. If you’re hard of hearing, or taking part in a noisy meeting, you can pick up on a conversation easier.
But AirPods have a really long range. That means you can leave your phone on a cluttered coffee table or bookshelf where people are talking and sit casually in an adjacent room to hear their conversation. Of course, you should always use this power for good, not for evil.
Screenshot: D. Griffin Jones/Cult of Mac
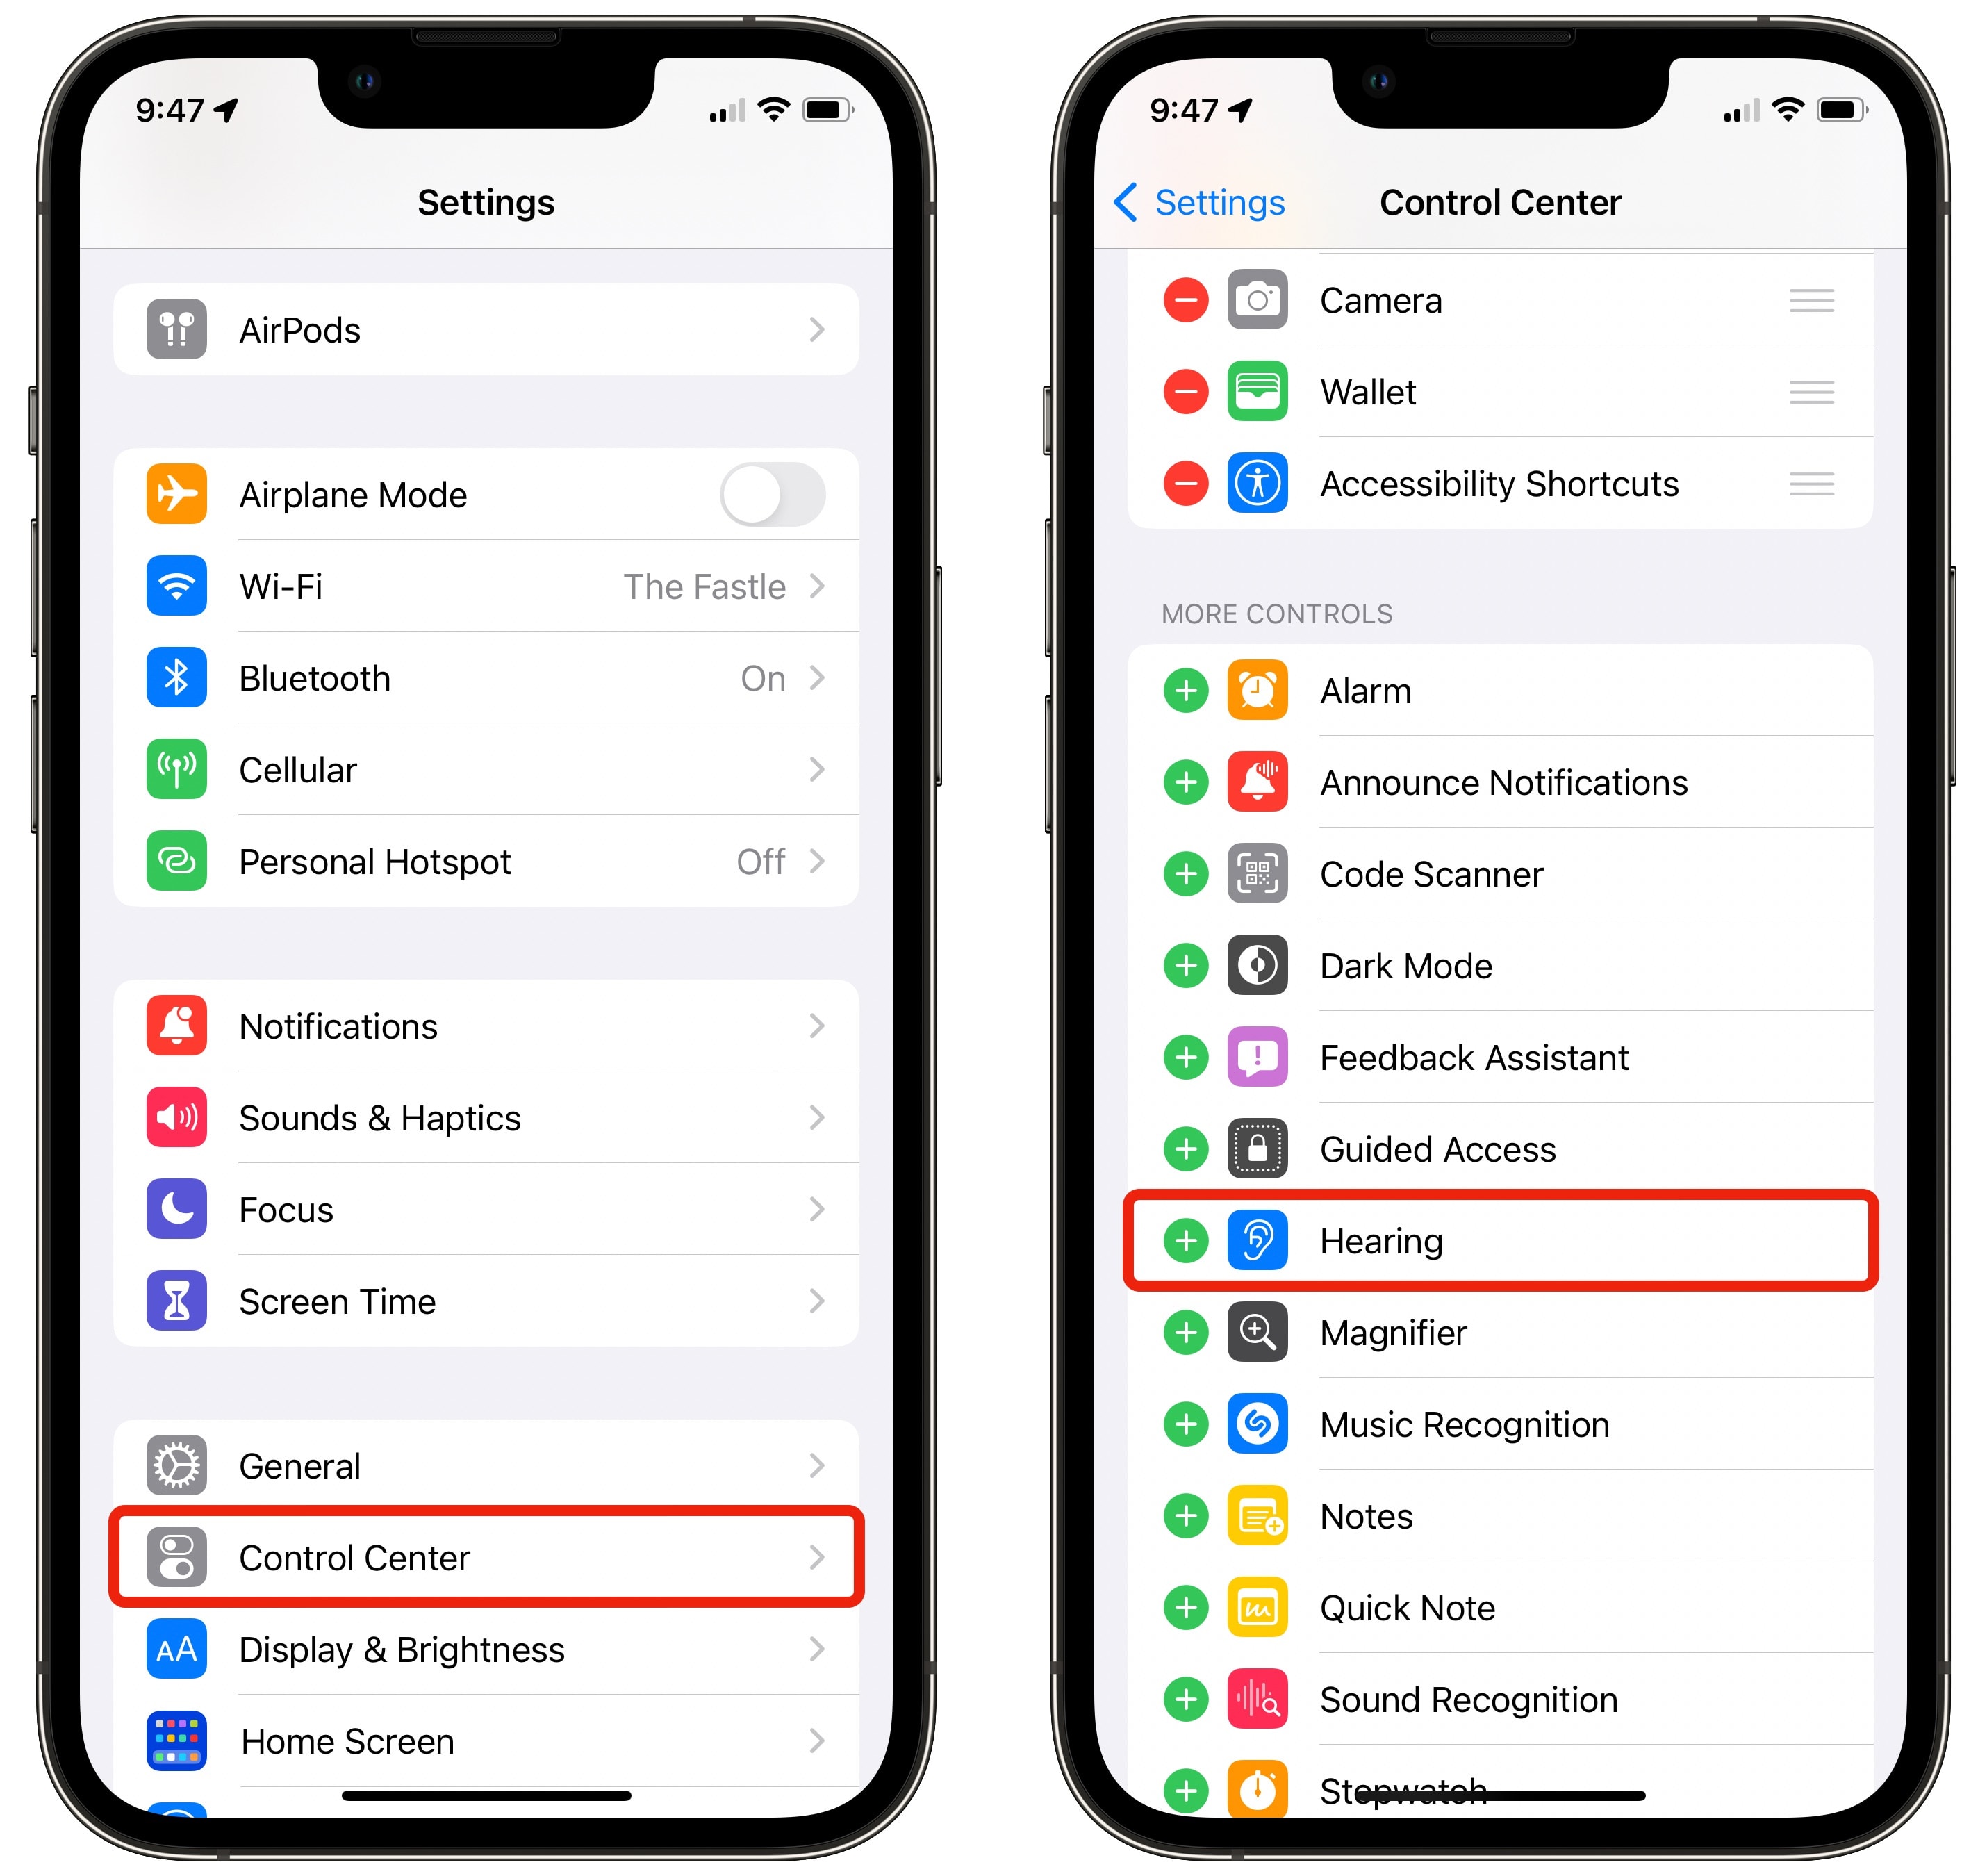
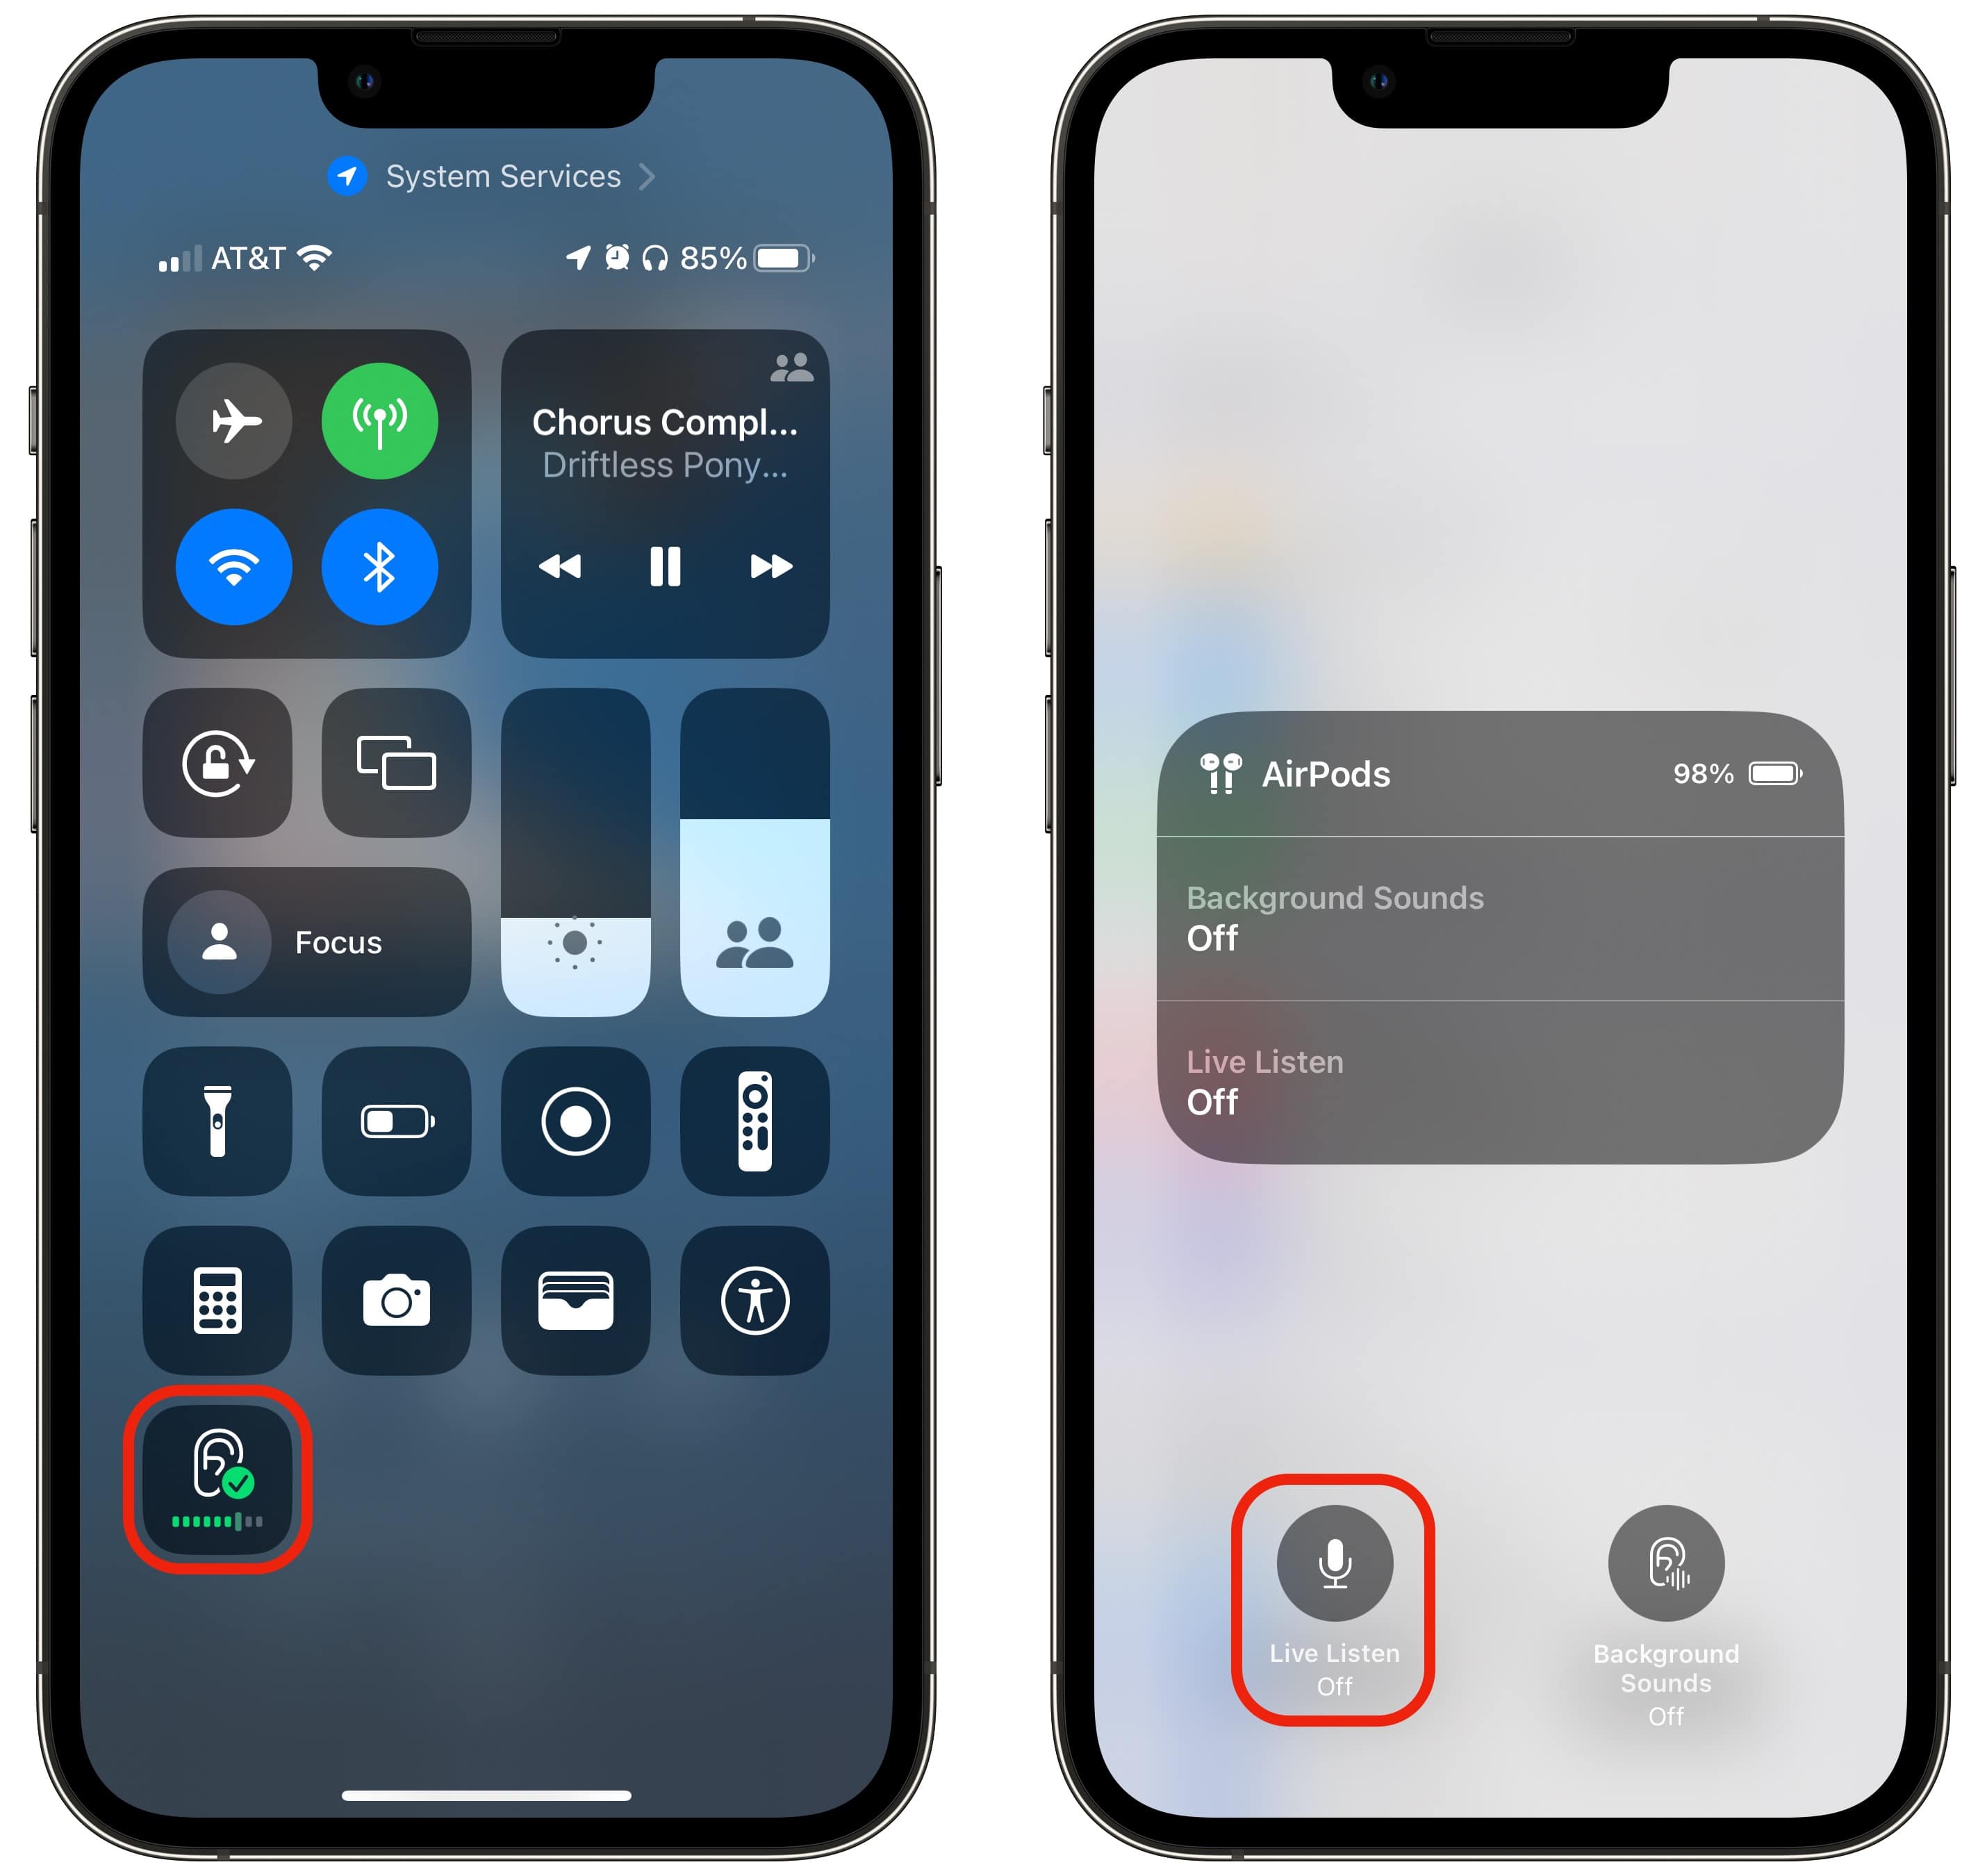
To use Live Listen, first go to Settings > Control Center and scroll down to tap + Hearing. This adds the Hearing accessibility controls to your iPhone’s Control Center.
Screenshot: D. Griffin Jones/Cult of Mac
With your AirPods paired, just tap this button and tap Live Listen to start.
No. 3: Create a custom transparency mode
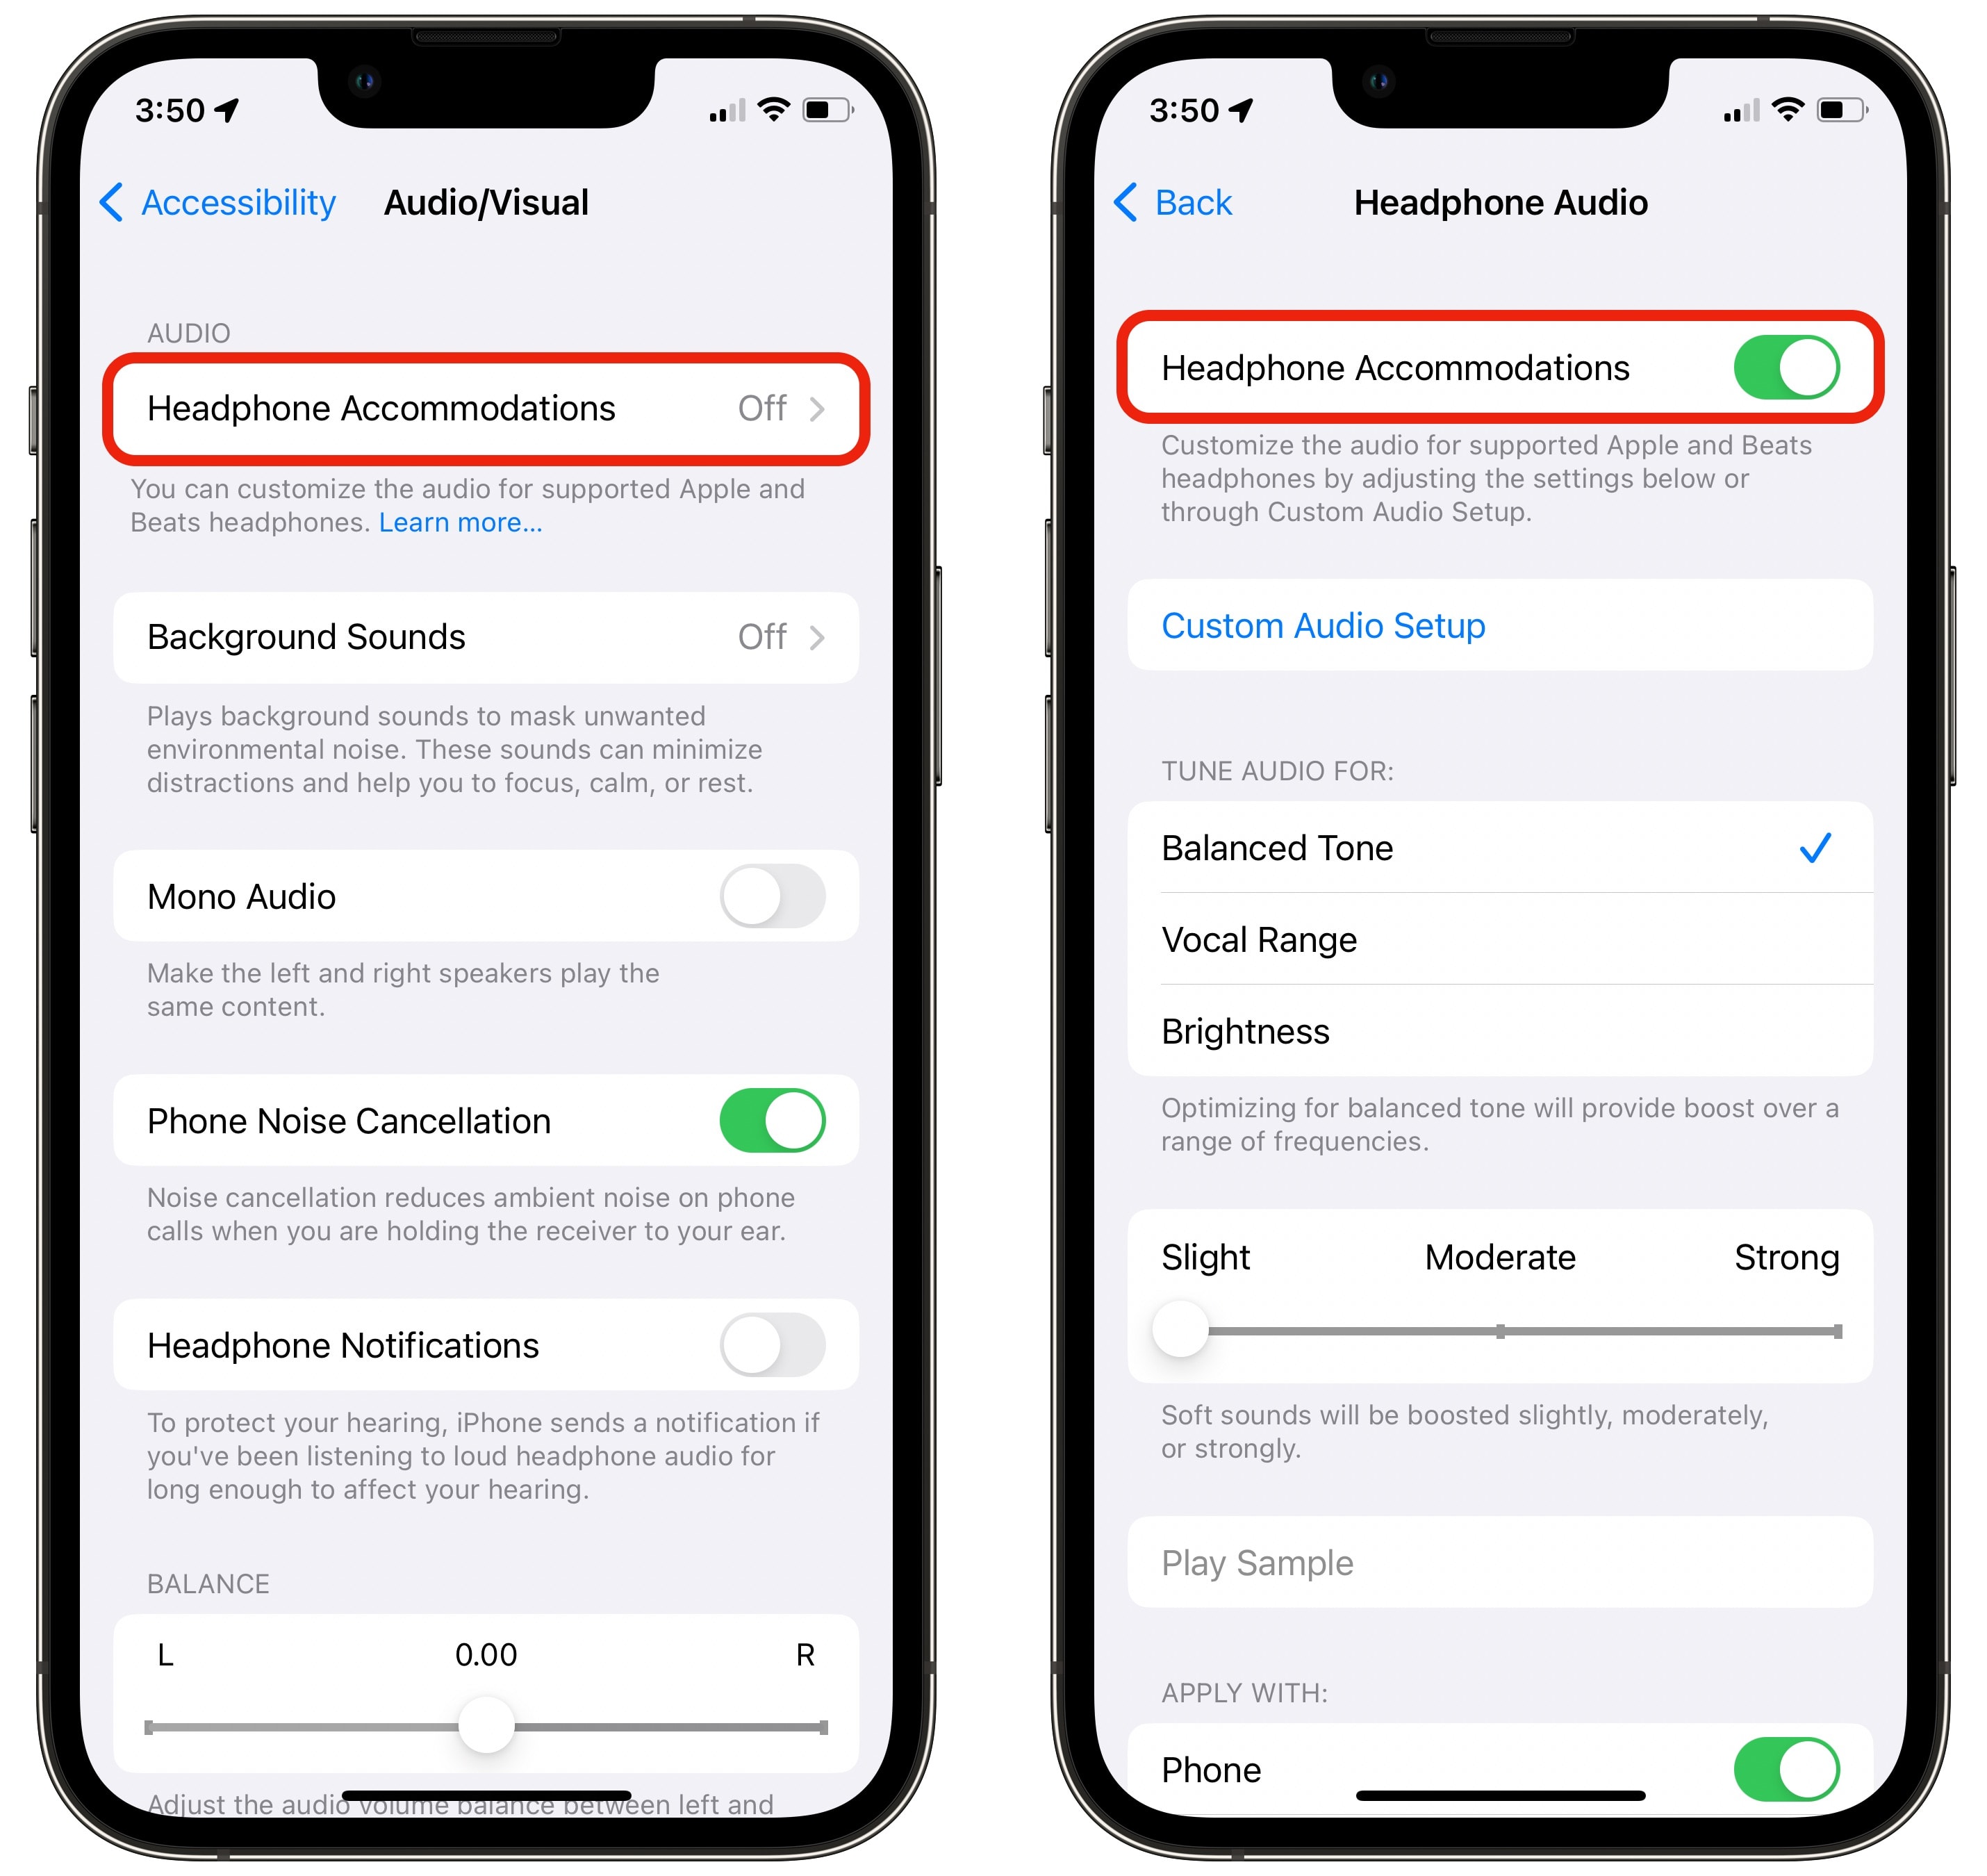
If you own a supported set of headphones* you can actually create a custom setting adjusted for your hearing. Maybe you listened to music too loud when you were younger — maybe you still do! If so, you might be missing out on the higher or lower range of the sound spectrum. If you set up Headphone Accomodations, your “music, movies, phone calls, and podcasts [will] sound more crisp and clear,” Apple says.
Screenshot: D. Griffin Jones/Cult of Mac
Go to Settings > Accessibility > Audio/Visual > Headphone Accomodations and turn it on. Then, you will see options to optimize for balance, vocals and brightness. The slider will adjust how powerfully you want to boost the sound. Scroll down to set whether you want it to adjust the sound in phone calls, playing media or both.
But this AirPods tip doesn’t end there. You can use an app like Mimi to take a hearing test, connect it to Apple Health, and use your audiogram to precisely tune your AirPods for your ears.
Screenshot: D. Griffin Jones/Cult of Mac
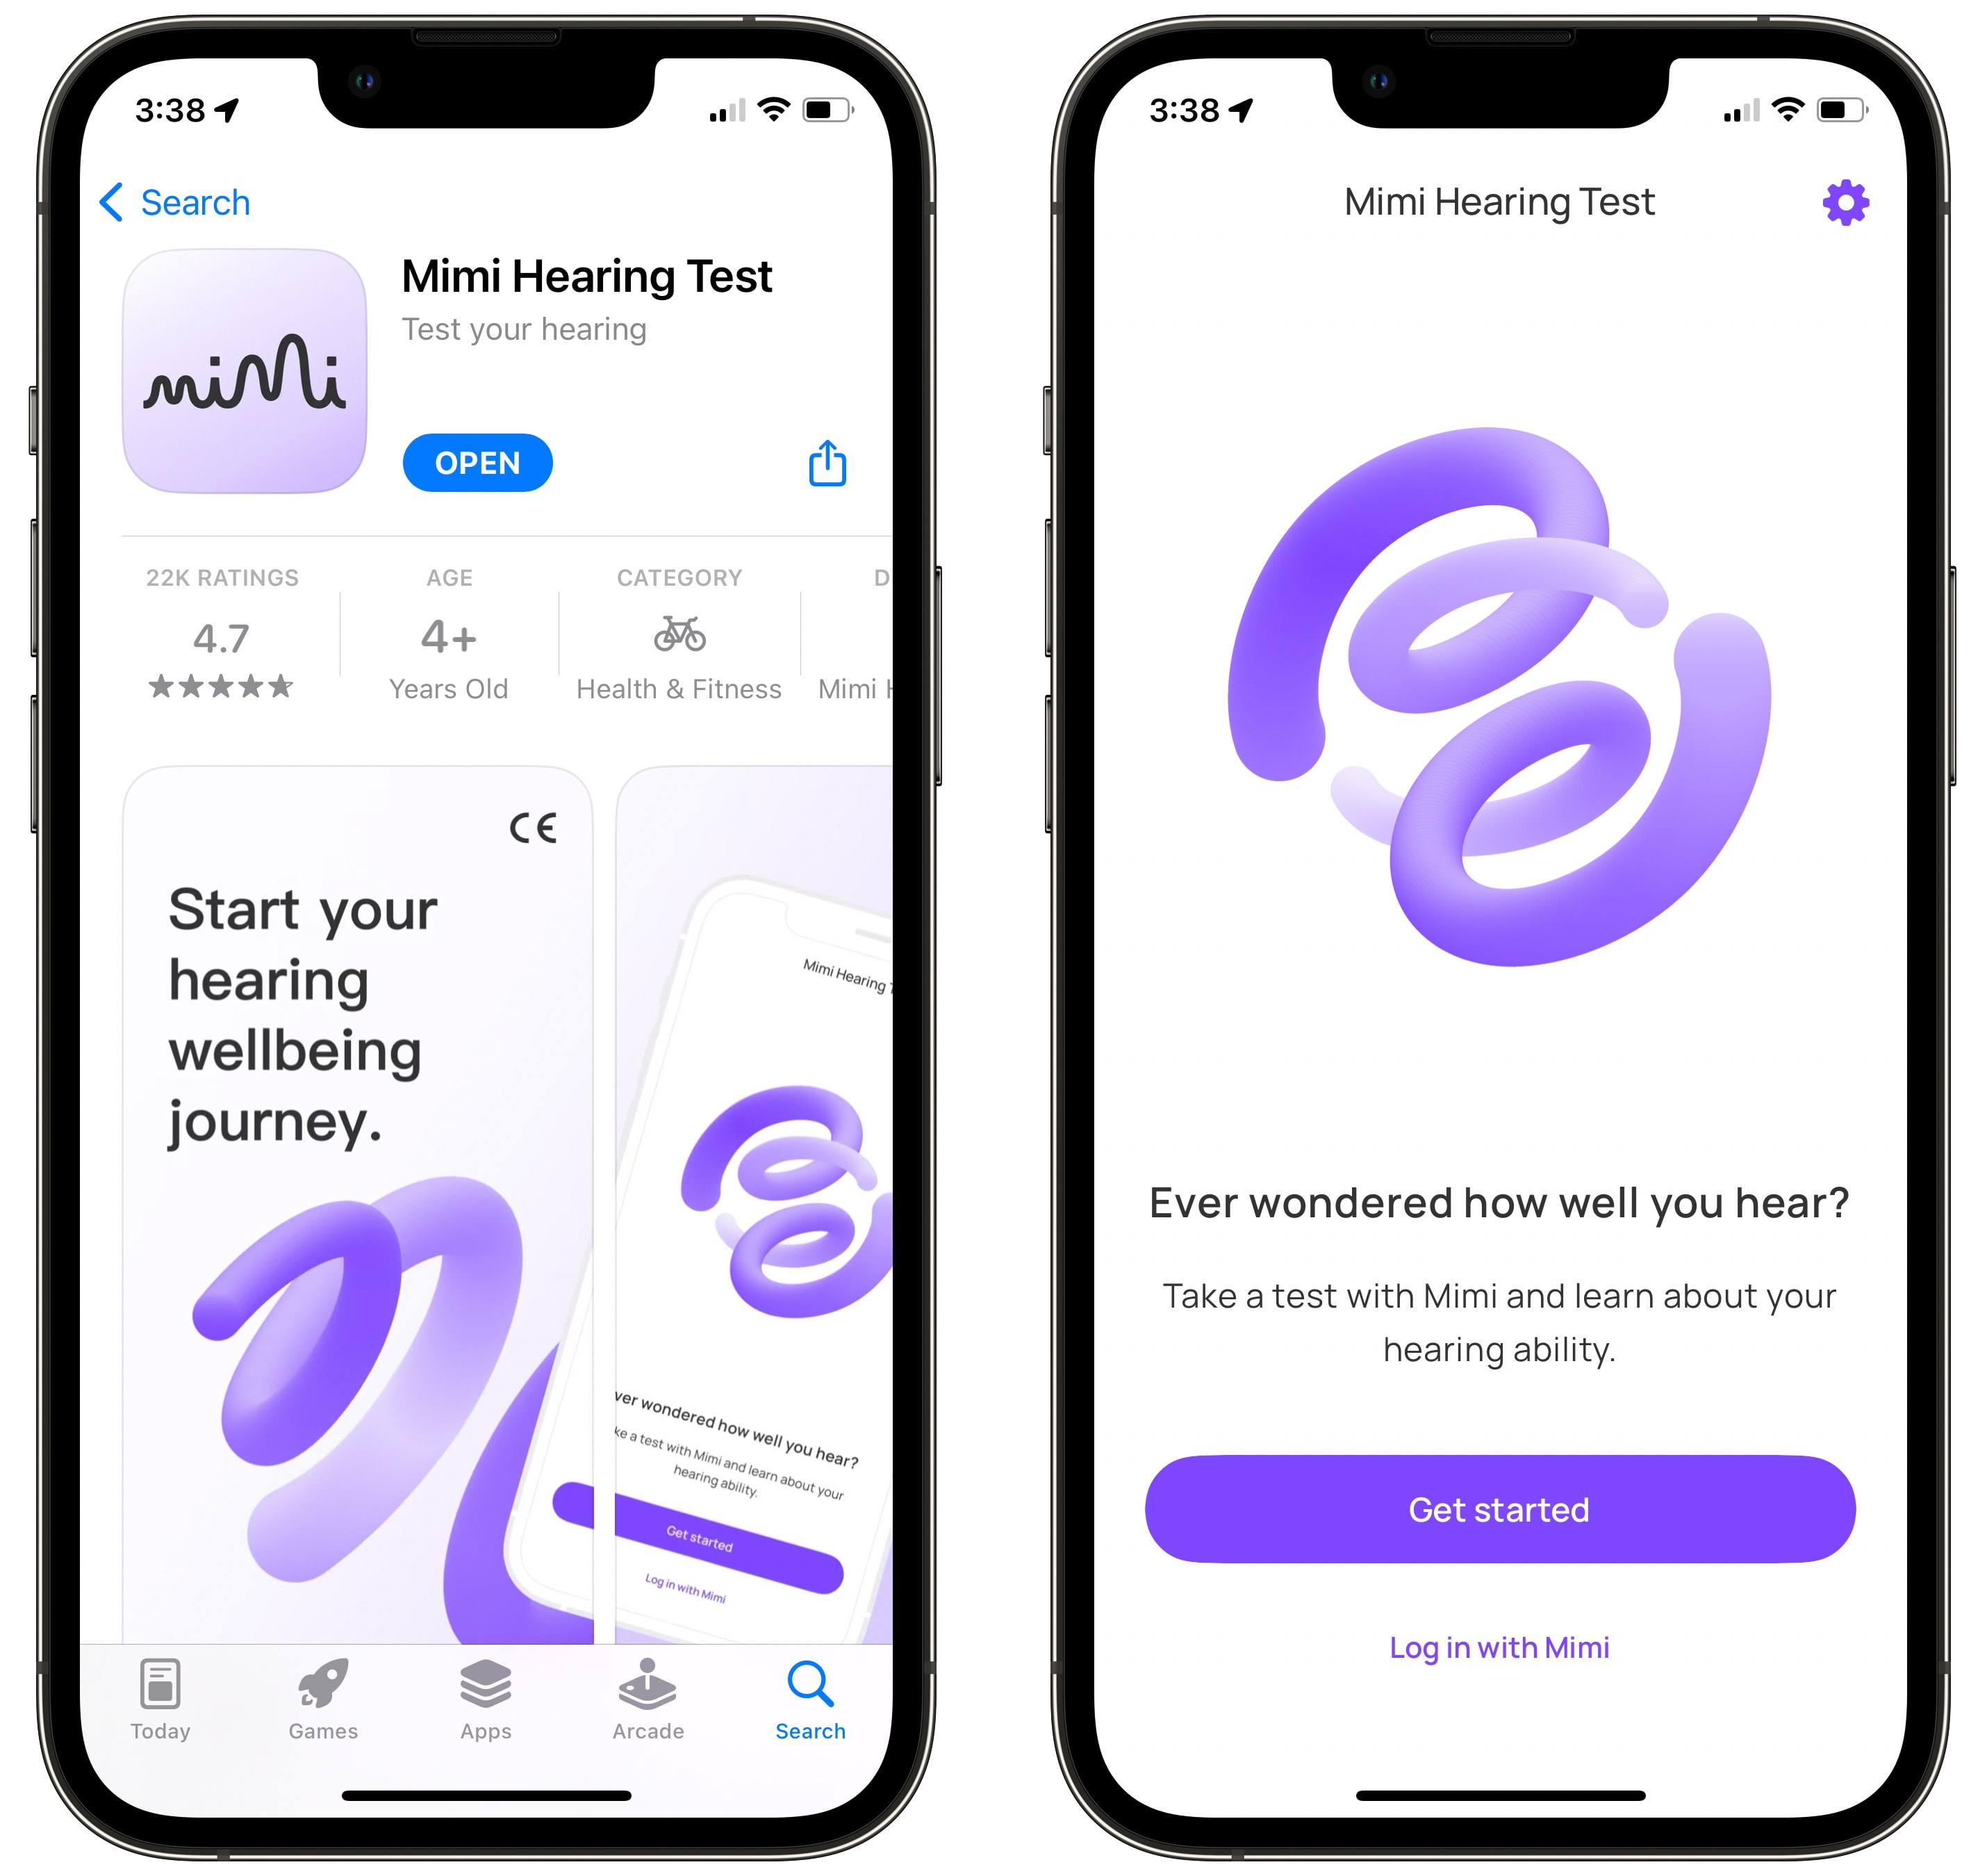
First, download Mimi from the App Store. It’s completely free and you don’t need to set up an account. After you open the app, tap Get started > Test your ears. I ran the Pure Tone Threshold Test. You need to answer a few simple questions, make sure your headphones are connected, set volume at 50% and tap All set.
Conduct a hearing test with the Mimi app
During the hearing test, you will tap and hold on your iPhone screen anytime you hear a beeping noise. The test takes about five minutes. (Note: Make sure you’re in total silence to achieve the most accurate results.)
Screenshot: D. Griffin Jones/Cult of Mac
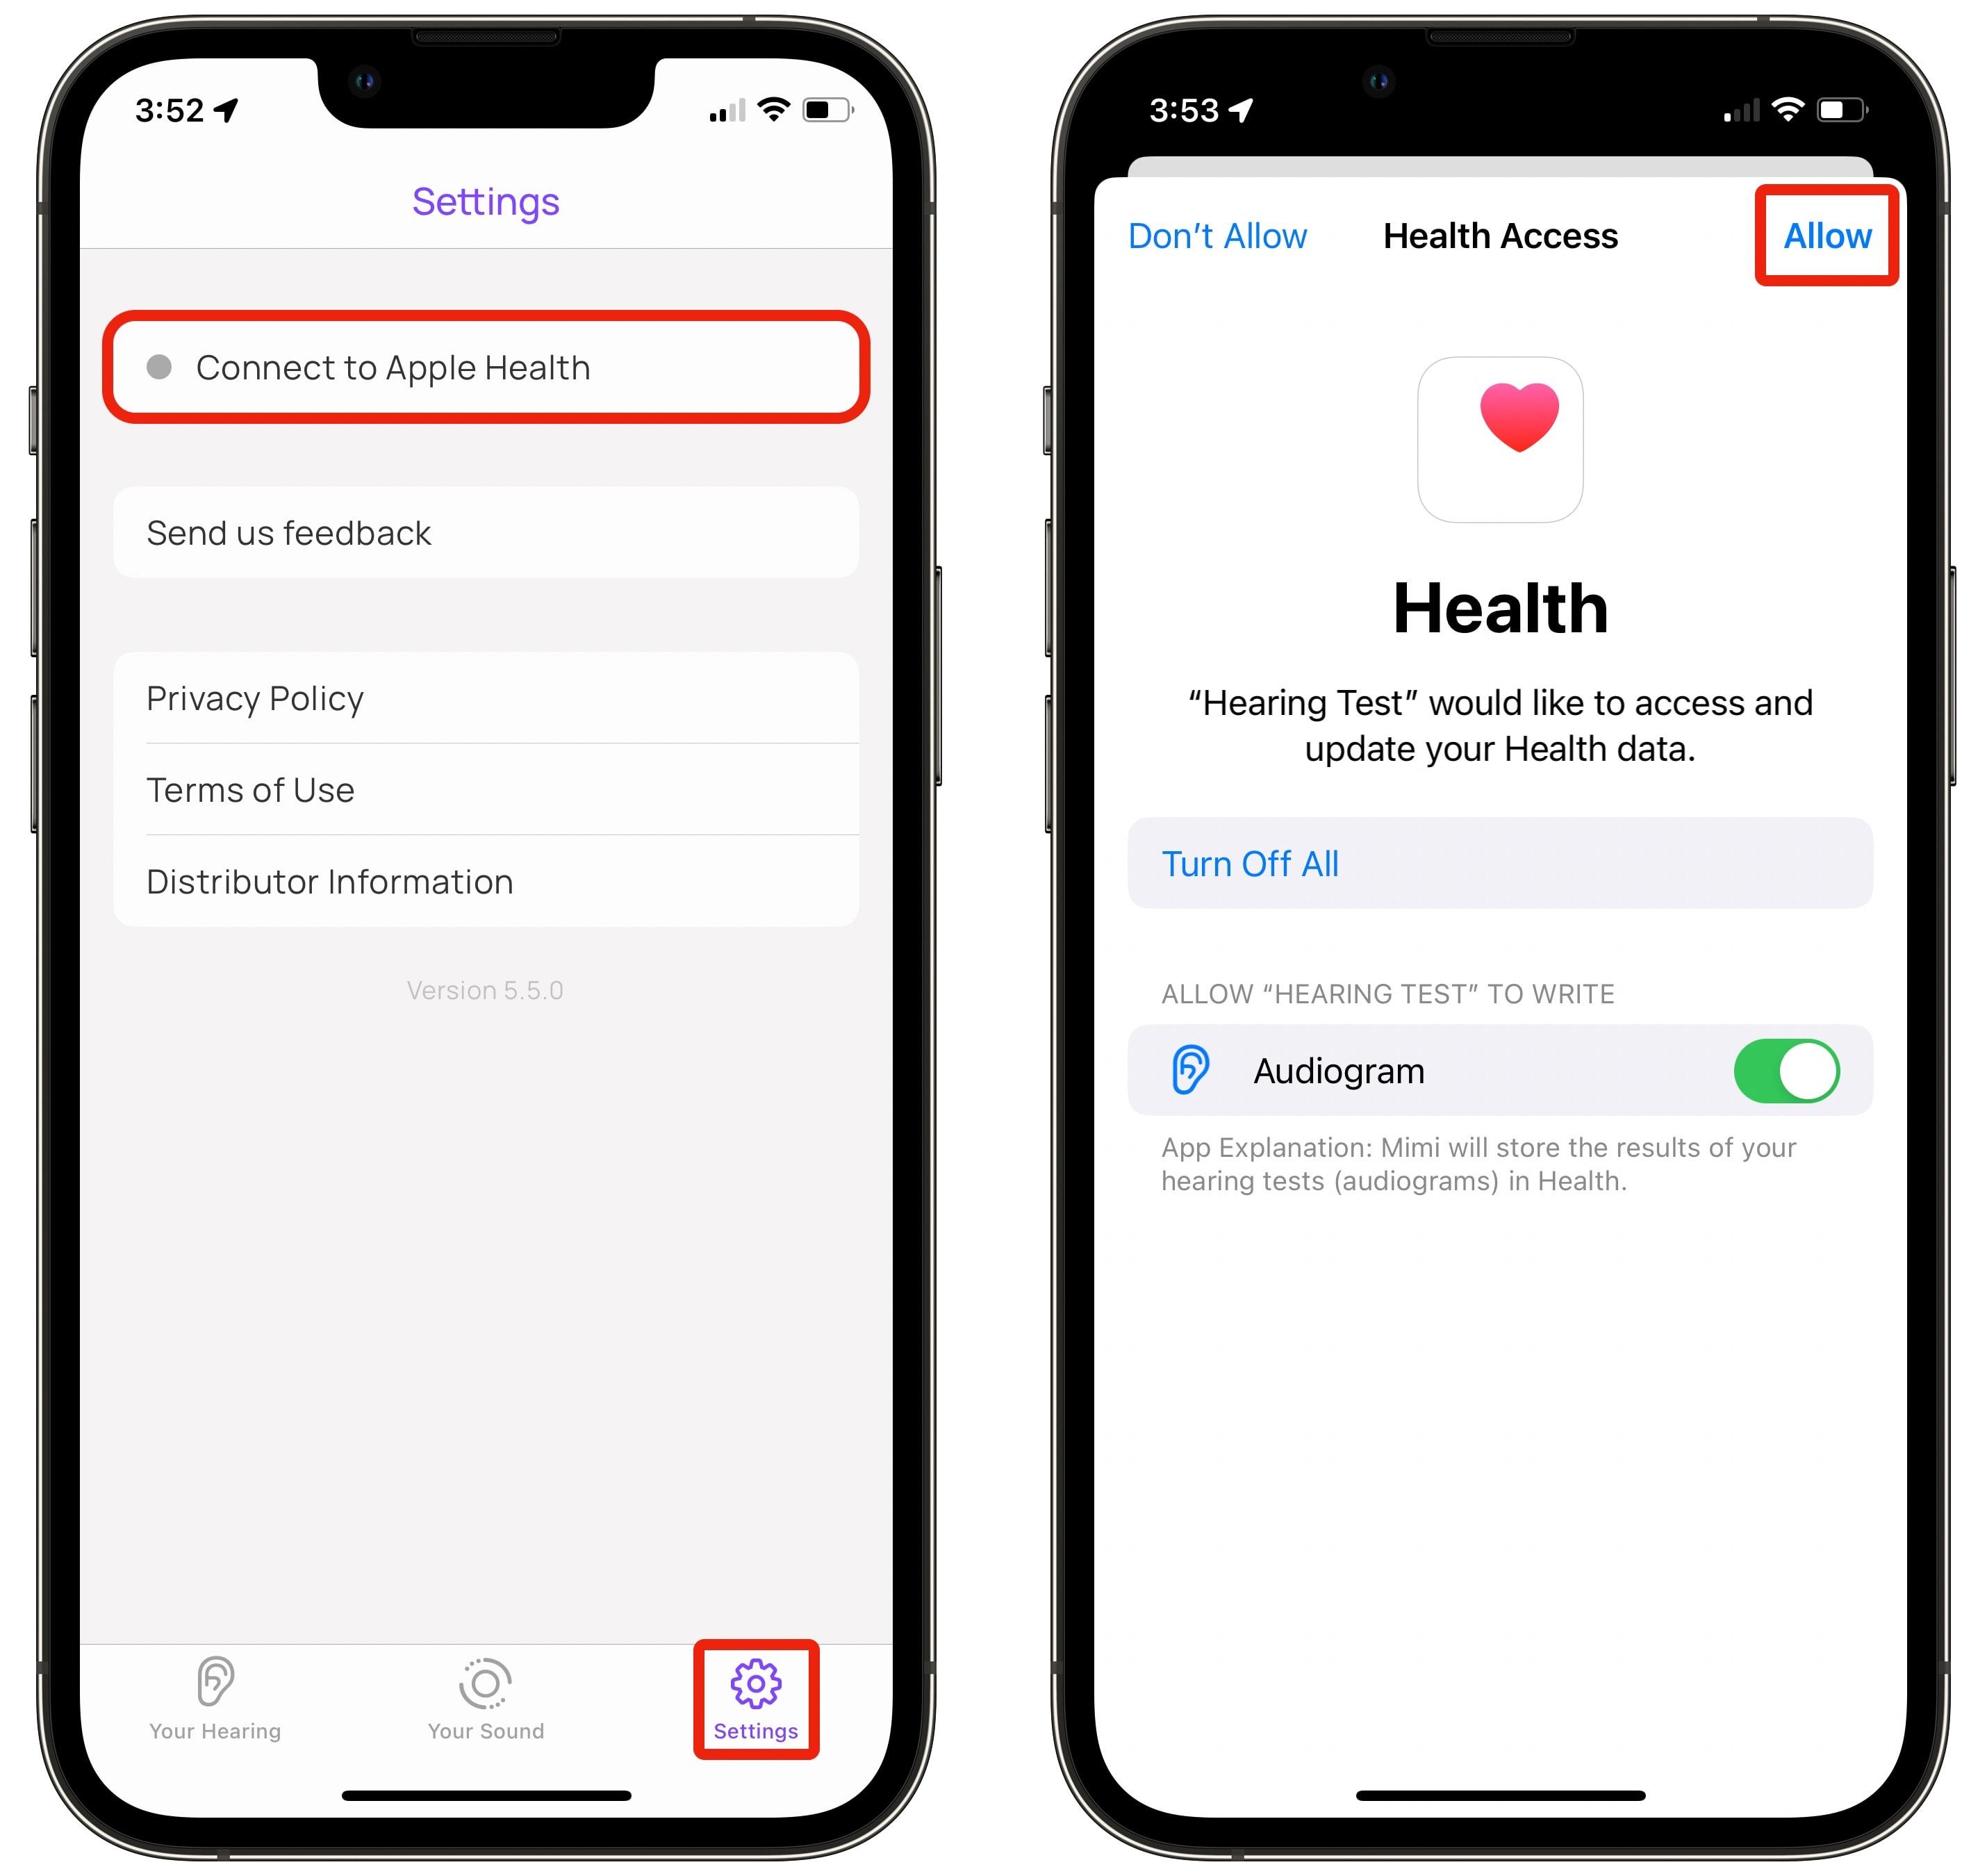
Once you complete the hearing test, tap Finish. Next, tap the Settings tab and tap Connect to Apple Health > Give Permission > Allow. This gives your iPhone access your audiogram data.
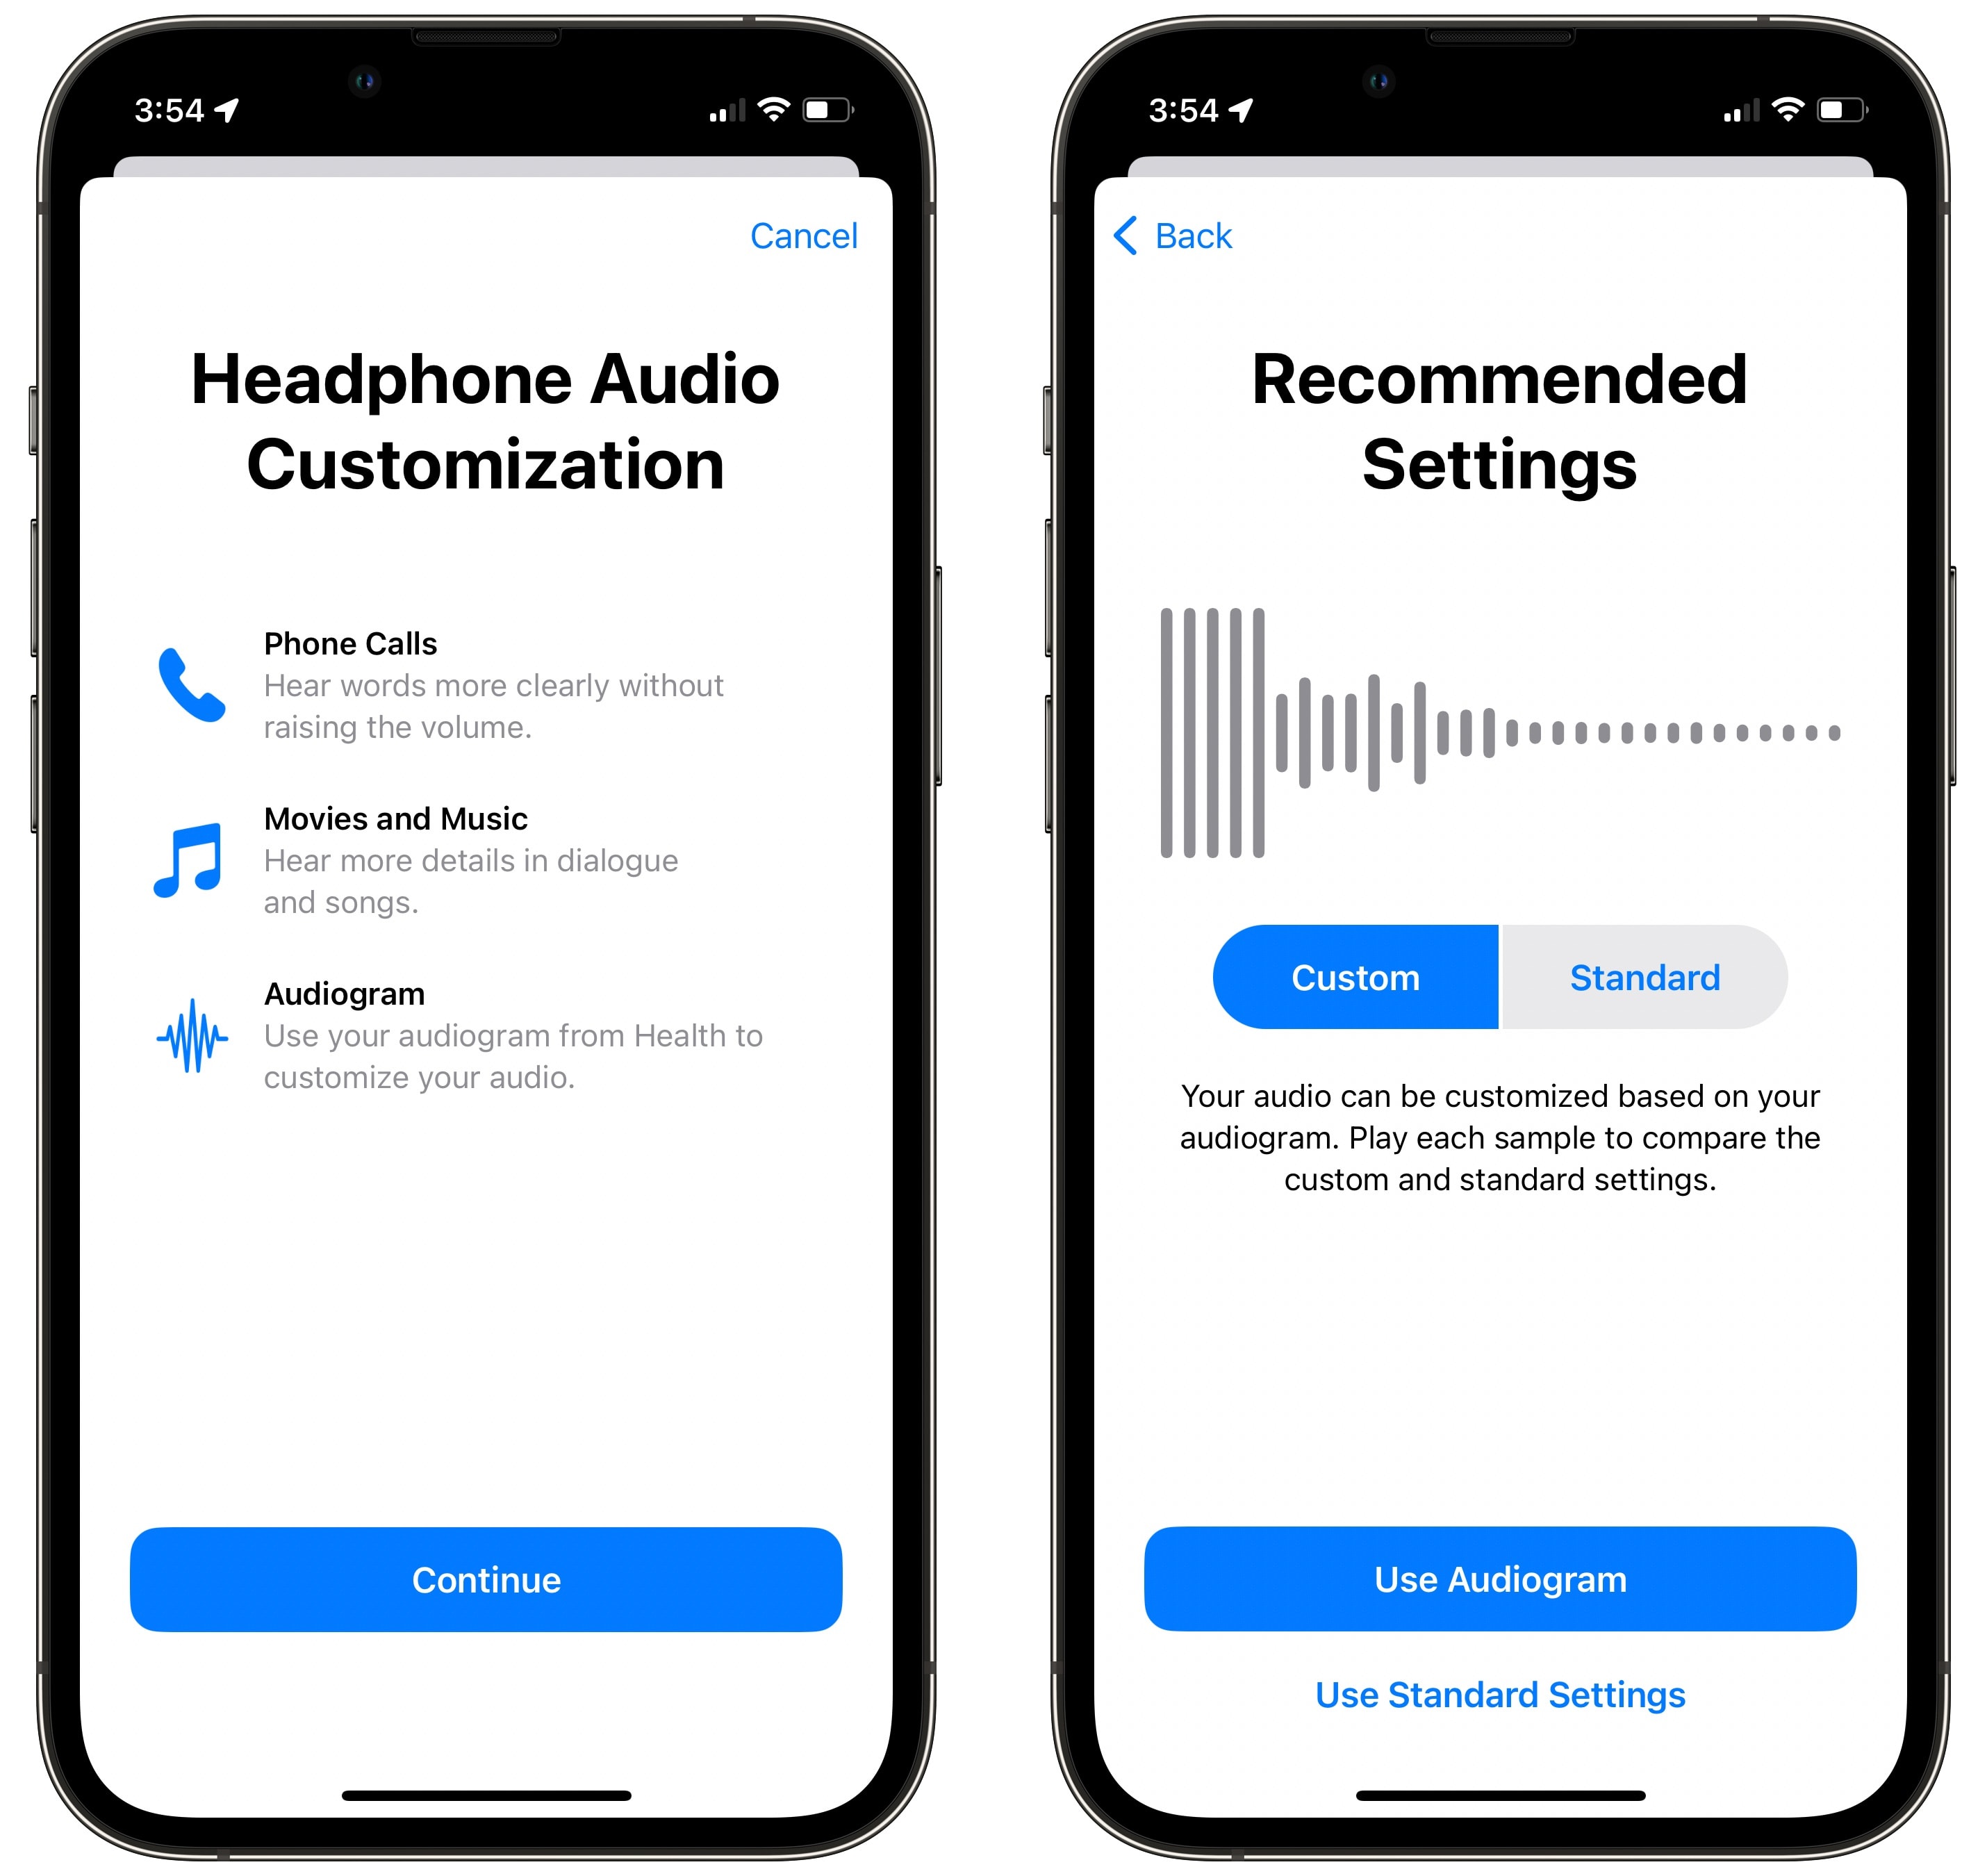
Screenshot: D. Griffin Jones/Cult of Mac
Finally, switch back to the Settings app. If you still have the same screen up, tap Custom Audio Setup > Continue > Use Audiogram. It’ll play a short sample where you can toggle between the two and see how they compare. I couldn’t tell much difference, but it may be more dramatic if you have more hearing loss than I do.
Tap Use Audiogram again if you want to use the setting tailored for your ears.
* AirPods (2nd generation and later), AirPods Pro, AirPods Max, Beats Solo Pro, Powerbeats Pro, Powerbeats or wired EarPods
No. 4: Customize your AirPods’ controls
On newer AirPods, you can squeeze the stem for a variety of controls: click to play/pause, hold to turn on or off noise cancellation. On older AirPods, you do this by tapping your earbuds.
But you can change what these actions do. You can even assign different controls for the left and right AirPods.
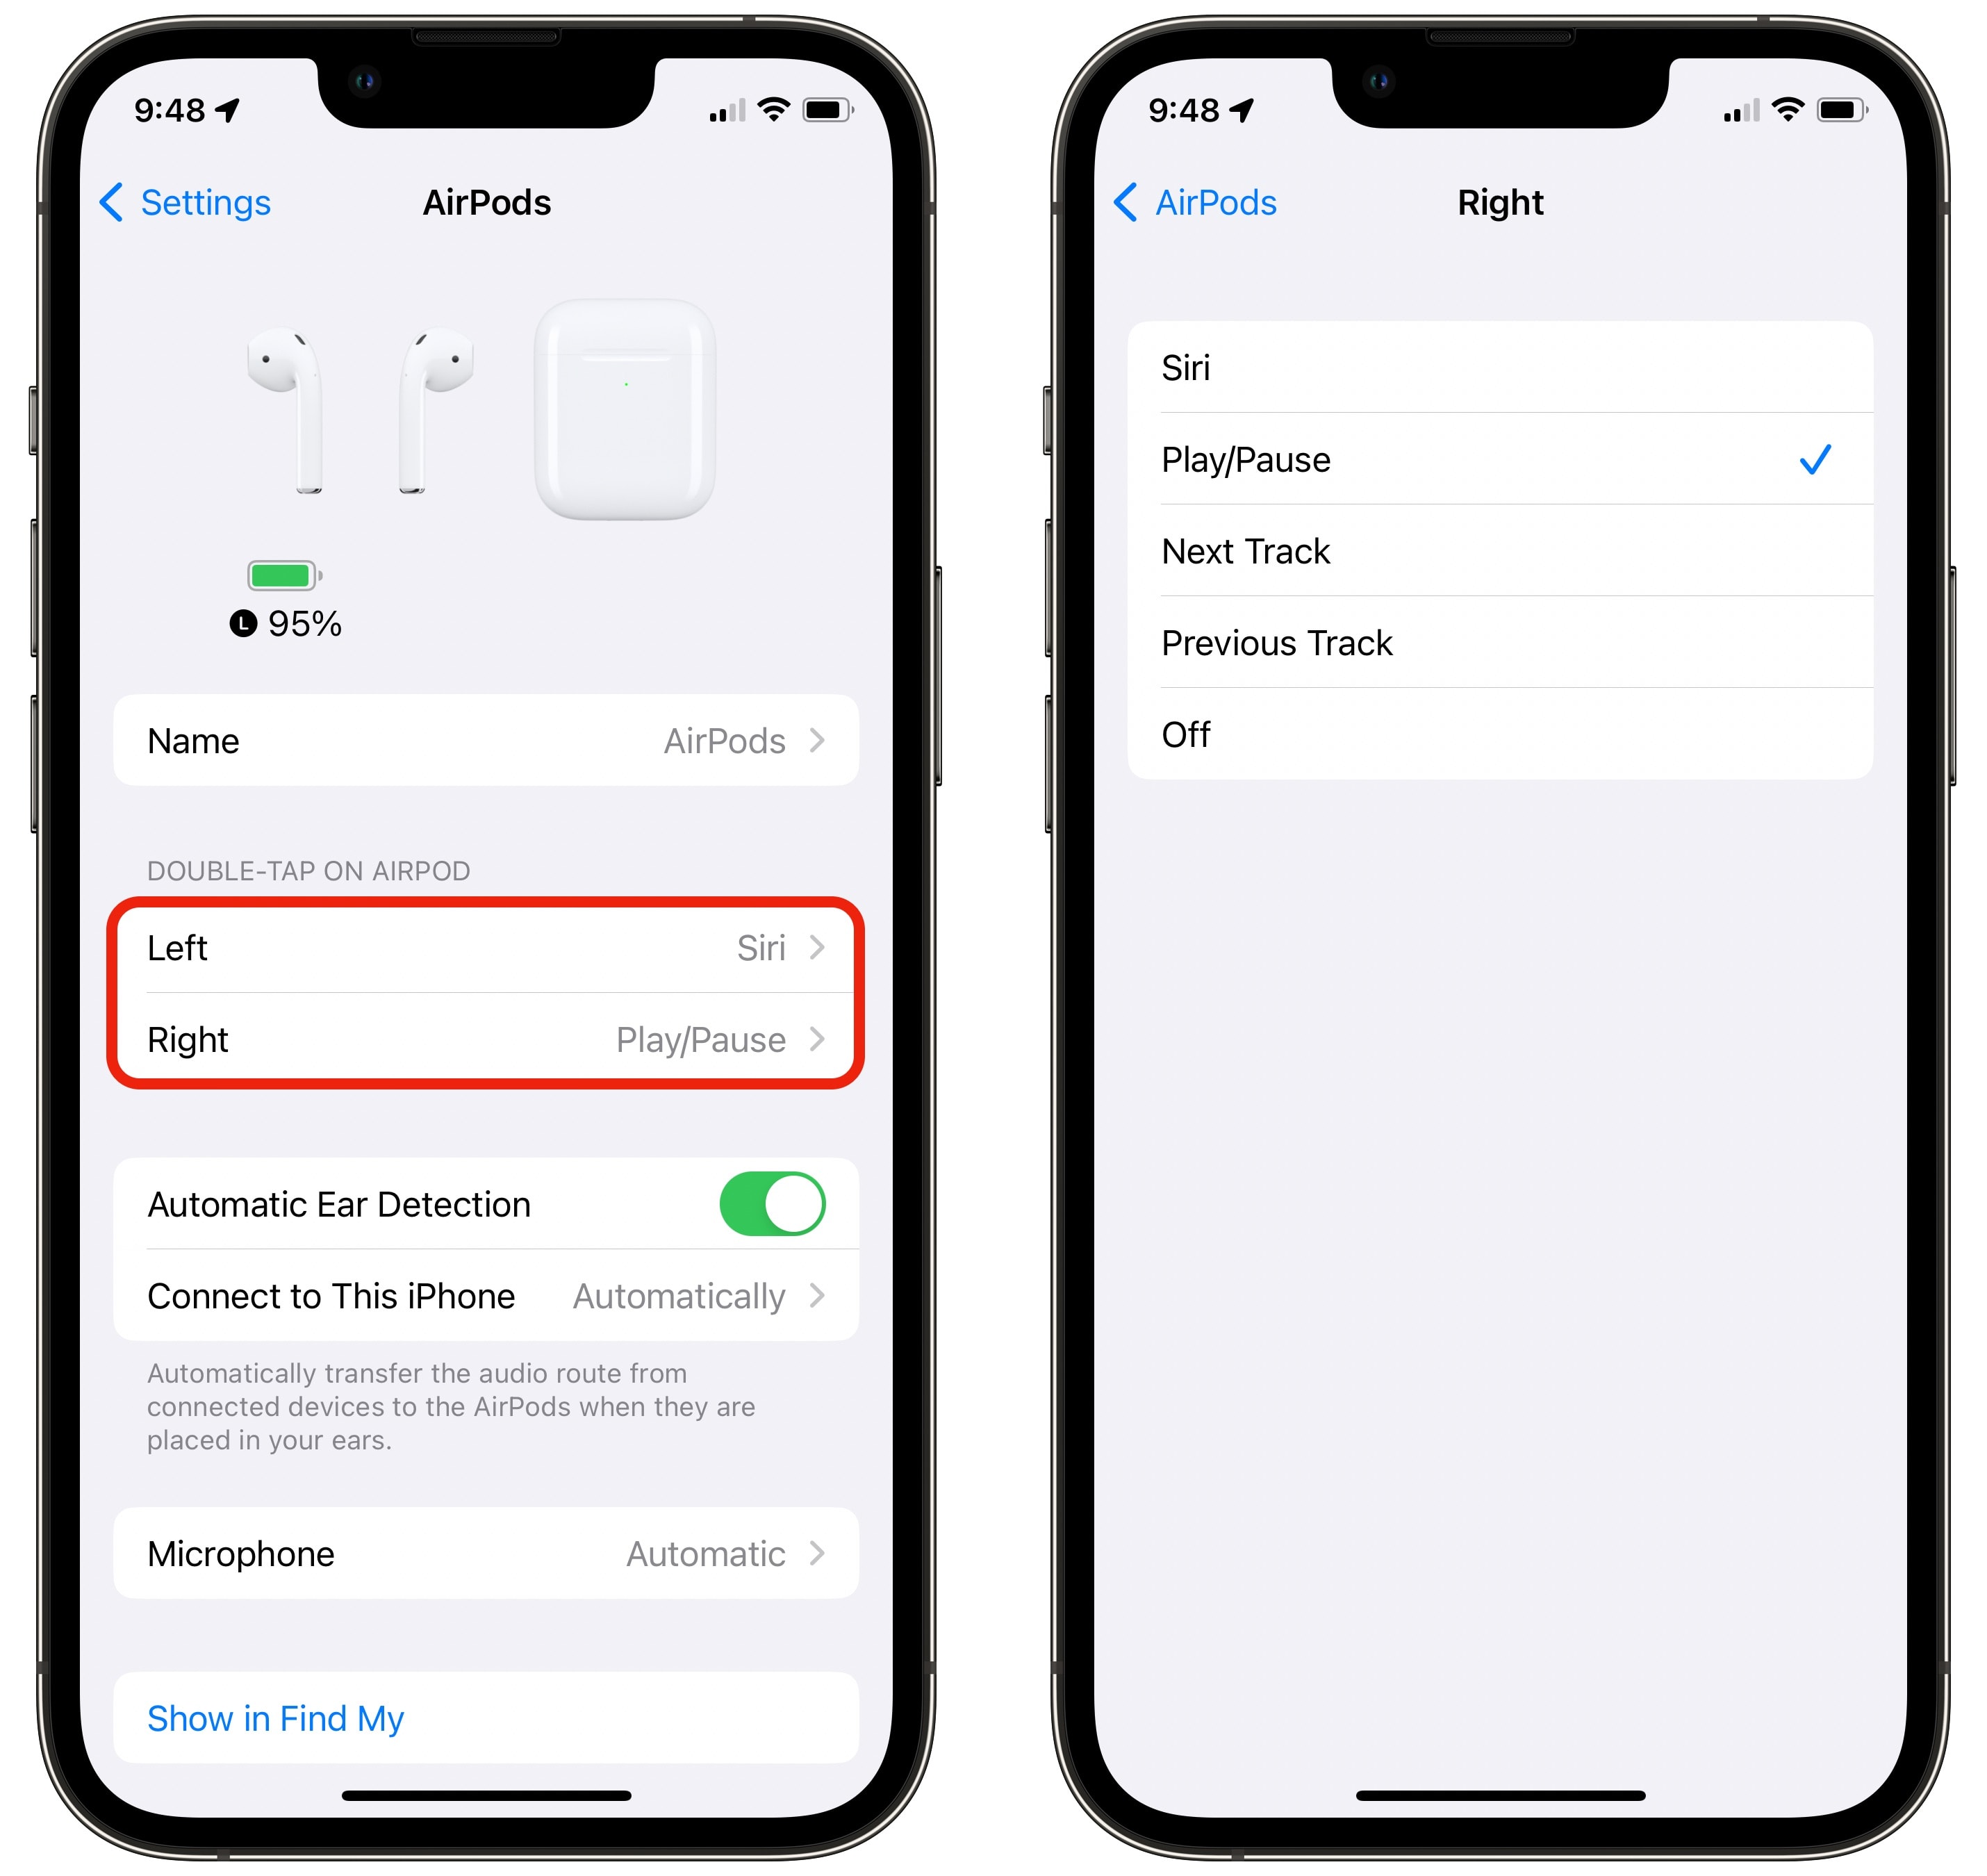
Screenshot: D. Griffin Jones/Cult of Mac
To tweak your AirPods controls, first make sure your earbuds are connected to your iPhone. Then open Settings > AirPods. Under Left or Right, you can pick a few different actions: Noise Control (on certain models), Siri, Play/Pause, Next Track, Previous Track or Off if you don’t want to use this feature. Personally, I use the left AirPod for Siri and the right for audio controls.
No. 5: Control noise cancellation from Apple Watch
If you have AirPods Pro, you might know that you can switch between Active Noise Cancellation and Transparency mode by pressing and holding the stem on an AirPod or in Control Center on your iPhone.
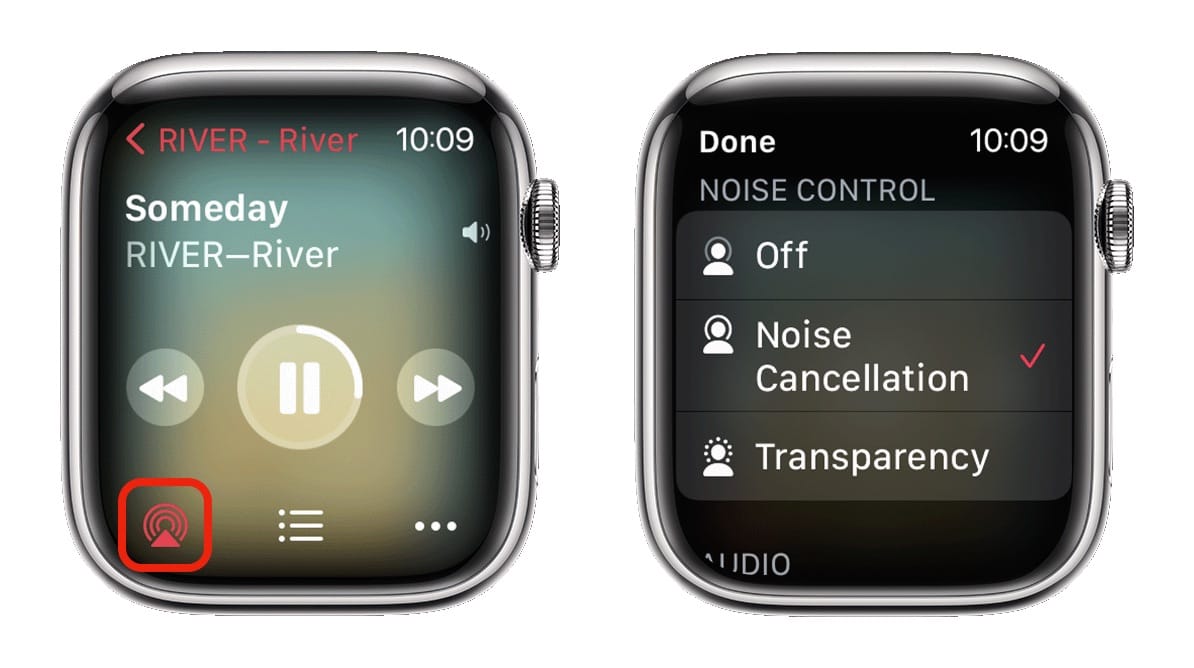
Screenshot: Apple
But you also can do it from your Apple Watch. From the Now Playing screen on your watch, tap the AirPlay icon in the bottom-left corner and select from the menu (Off, Noise Cancellation or Transparency). Doing it visually like this is sometimes easier than blindly clicking the button on your AirPods.
If you’re one of those people who goes running with a cellular Apple Watch without your phone, using this AirPods tip gives you a really convenient way to quickly turn on transparency mode when you’re going through the city, and switch back to active noise cancellation when you get to a bike path.
No. 6: Announce calls and messages
In the same vein, you can have your AirPods announce who’s calling or read your text messages to you so you don’t need to look at your iPhone or Apple Watch.
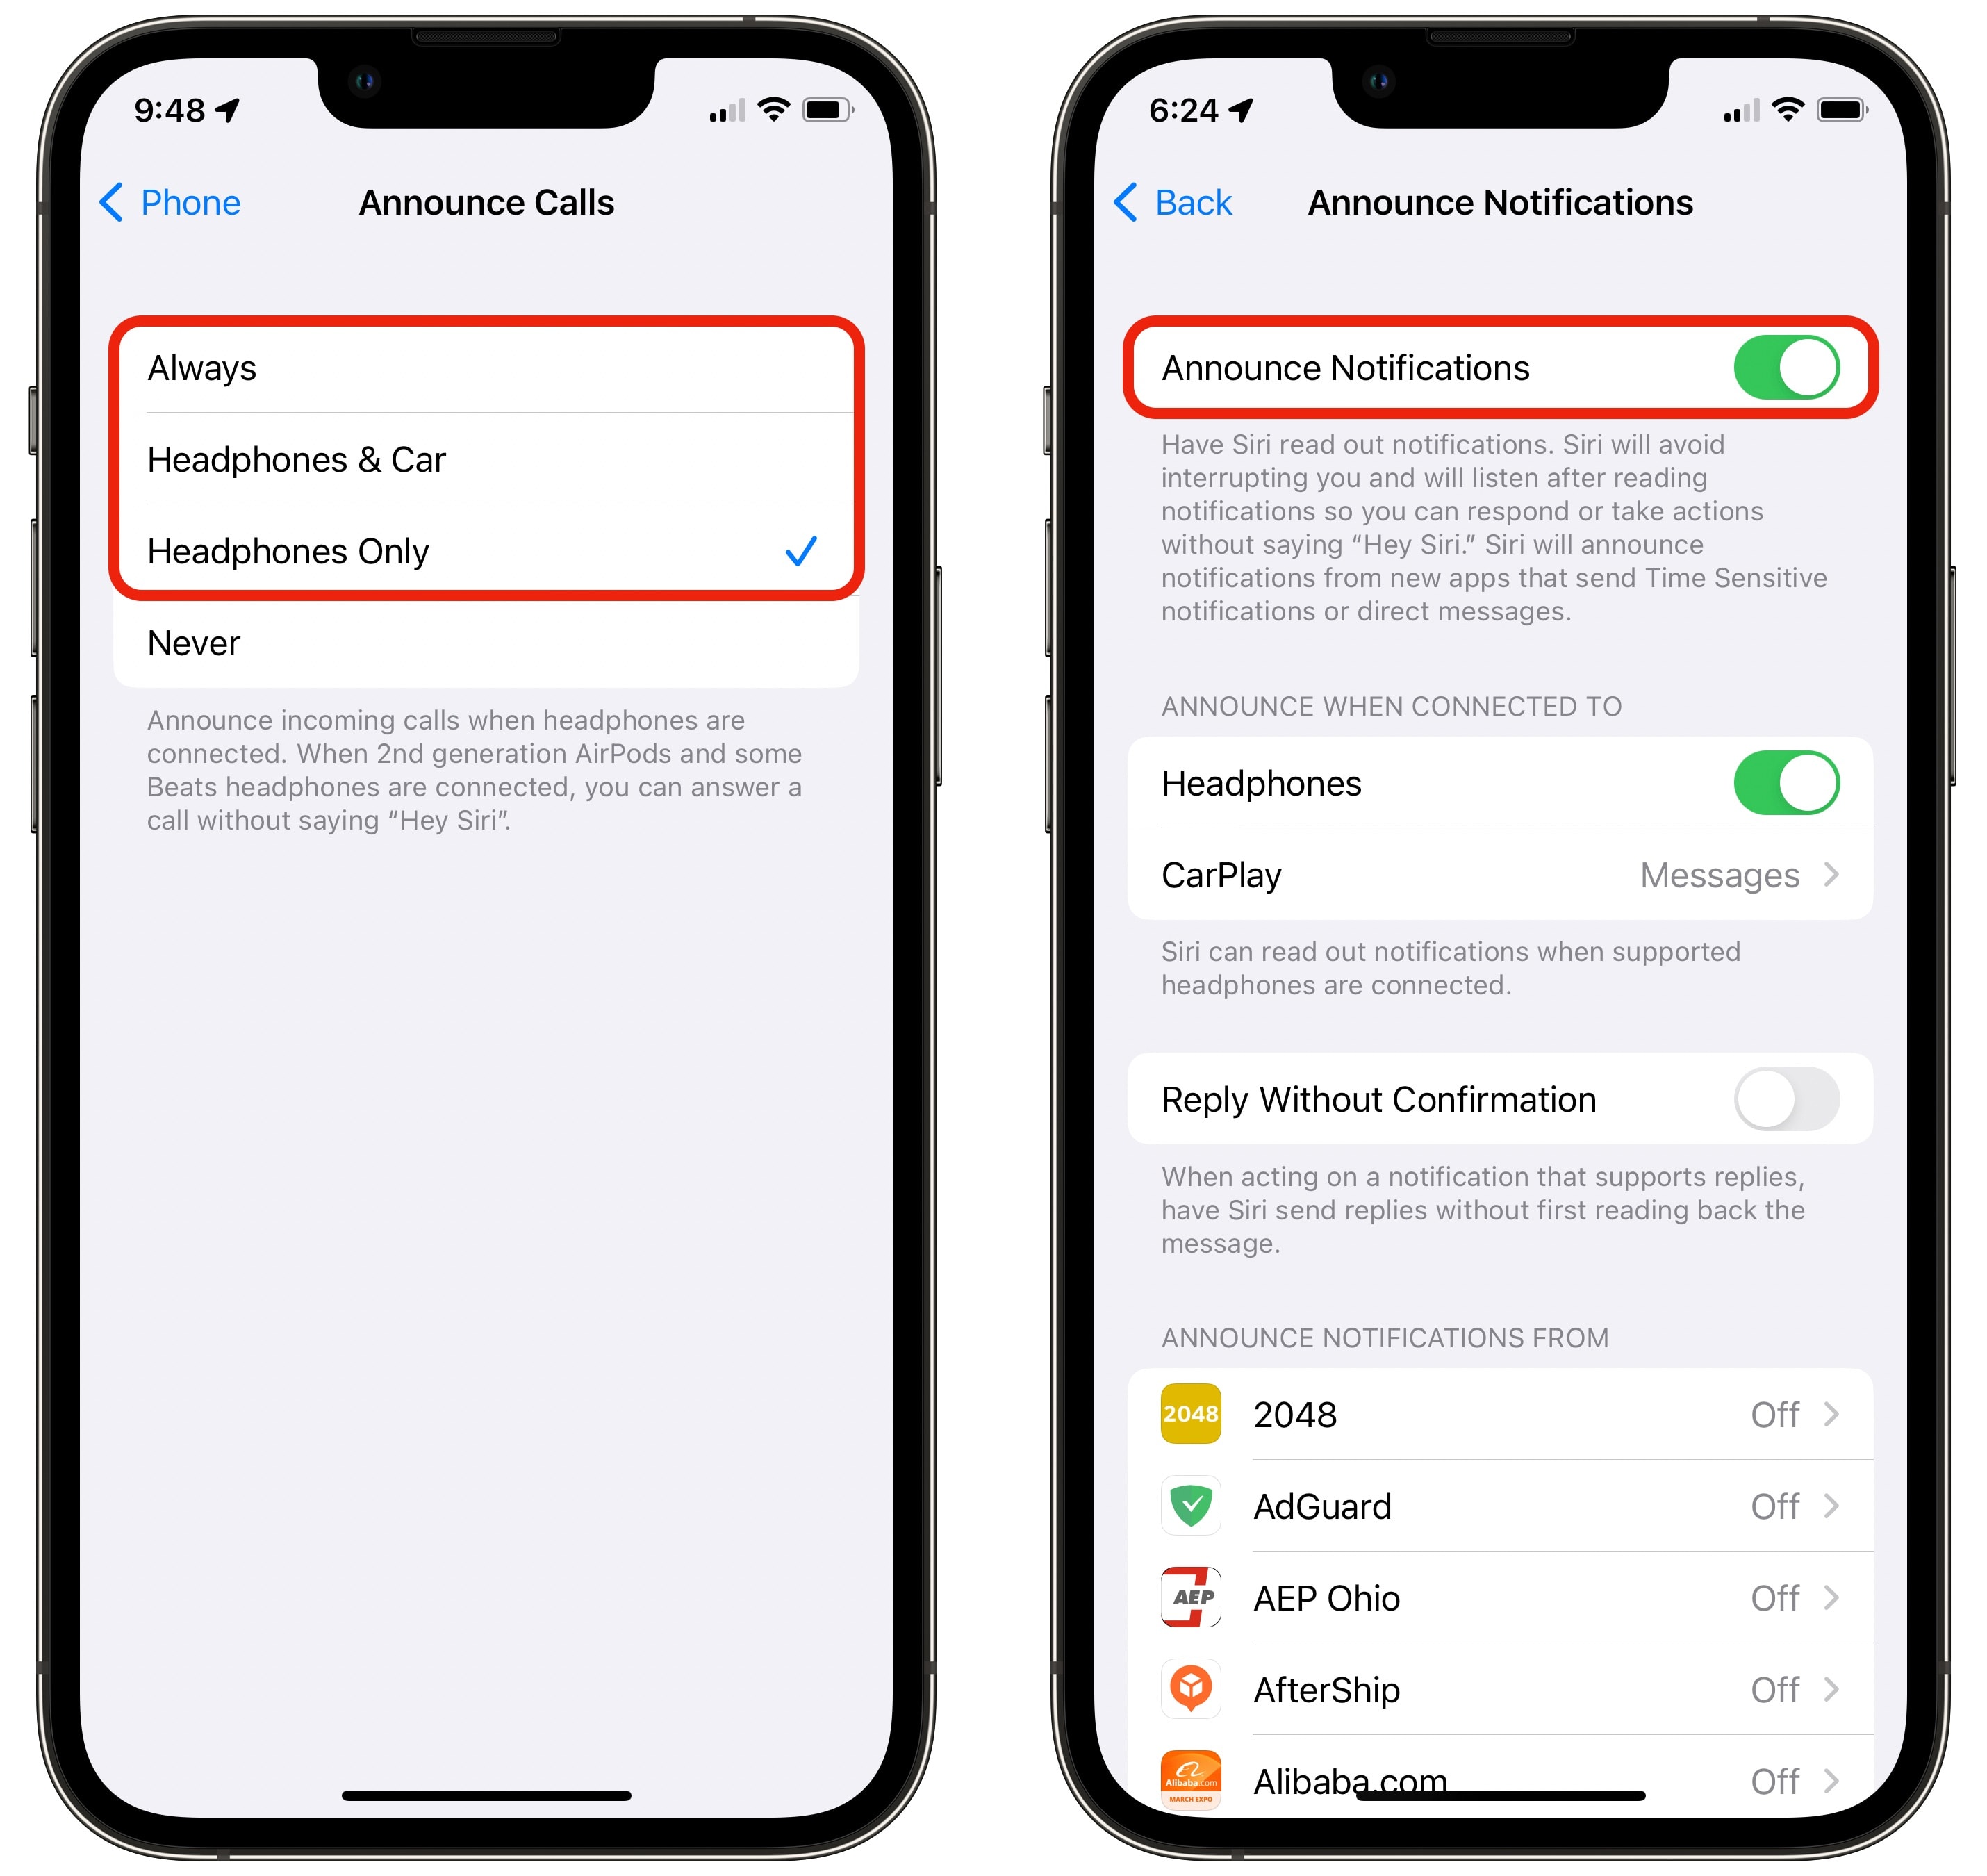
Screenshot: D. Griffin Jones/Cult of Mac
To do so, go to Settings > Phone > Announce Calls and set it to Headphones Only. Next, go to Settings > Notifications > Announce Notifications and turn it on. This AirPods tip proves really convenient if you don’t want to be disrupted by taking out your phone or staring at your watch while you’re exercising.
One More Thing™
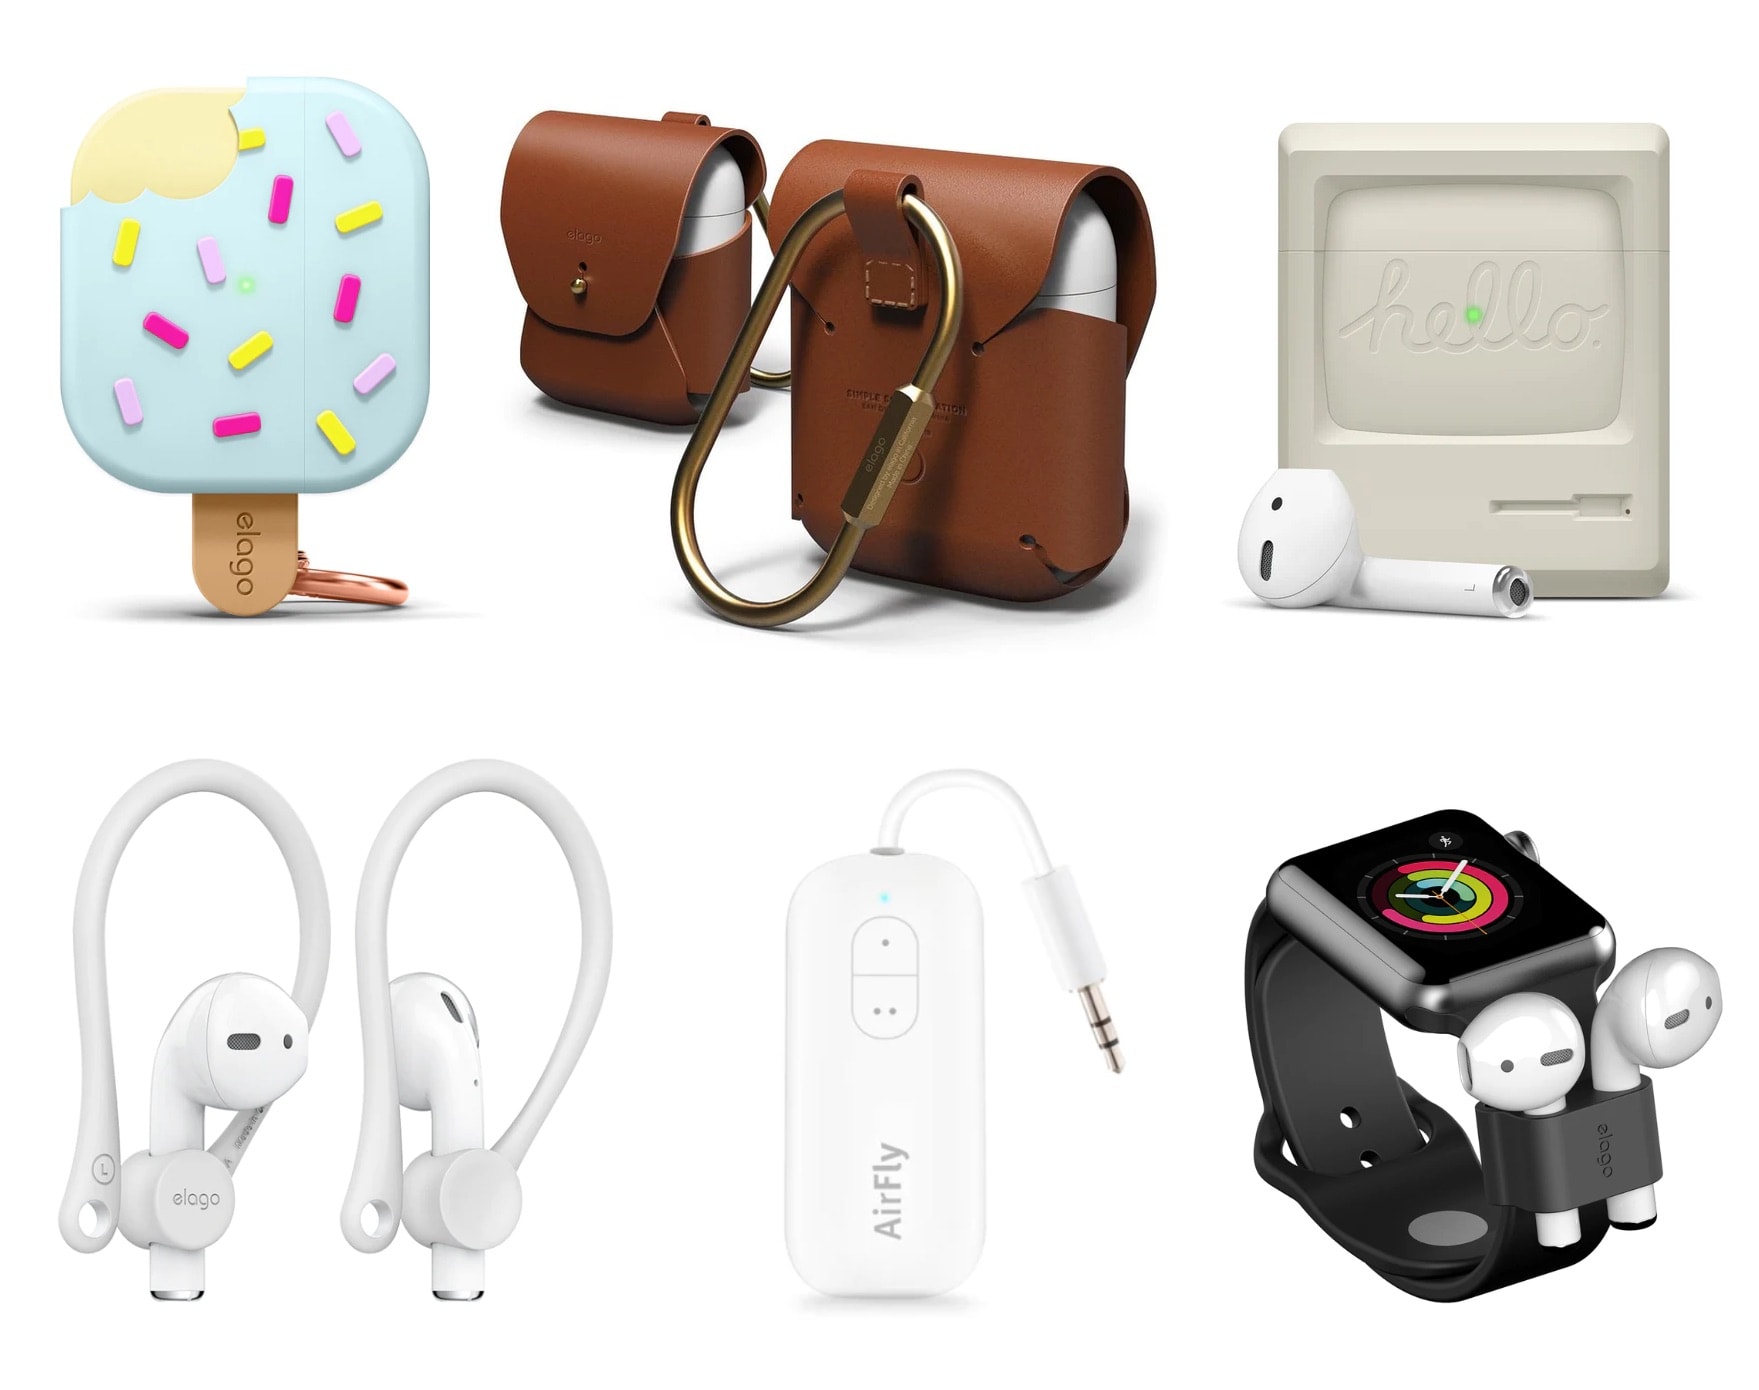
Image: Elago/Twelve South
The Cult of Mac Store offers loads of AirPods accessories. The store offers dozens of fun cases, an adapter for using your AirPods with a headphone jack, an Apple Watch band that holds your AirPods on your wrist, ear hooks for keeping AirPods secure while you run and more.
We originally published this post on AirPods tips on April 28, 2023. We updated the information.


