Key Takeaways
- ZSH, an extended version of the Bourne Shell, offers new features, such as automatic cd, spelling correction, themes, and plugins.
- Installing ZSH on Ubuntu or other Debian-based distros is as simple as running “sudo apt install zsh” and changing the default shell using “chsh -s $(which zsh).”
- To install ZSH on Fedora, “run sudo dnf install zsh” then switch the shell by entering “zsh” in the Terminal.
Bash, or the Bourne Again Shell, is a hallmark of Linux systems. However, there are other shells out there that may offer extra functionality. Here’s how to install one popular alternative, ZSH.
What is ZSH?
ZSH, also called the Z shell, is an extended version of the Bourne Shell (sh), with new features and support for plugins and themes. Since it’s based on the same shell as Bash, ZSH has many of the same features, and switching over is a breeze.
ZSH vs. Bash: The Important Differences
ZSH has too many features to list here, some just minor improvements to Bash, but here are some of the major ones:
- Automatic cd: Just type the name of the directory
- Recursive path expansion: For example “/u/lo/b” expands to “/usr/local/bin”
- Automatic Syntax Highlighting: Words, file extensions, and other things visible in the Terminal are color-coded
- Spelling correction and approximate completion: If you make a minor mistake typing a directory name, ZSH will fix it for you
- Plugin and theme support: ZSH includes many different plugin frameworks
Plugin and theme support is probably the coolest feature of ZSH and is what we’ll focus on here. If you’re on Linux, the command to install ZSH varies by the distro, but it should be a default package in your package manager.
Install ZSH on Ubuntu (or any Debian Distribution)
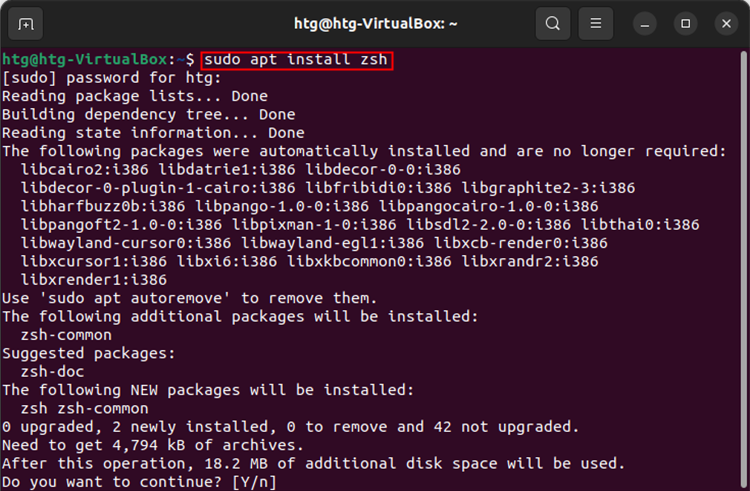
To install ZSH on Ubuntu, or any other Debian-based distro, open up the Terminal, then run:
sudo apt install zsh
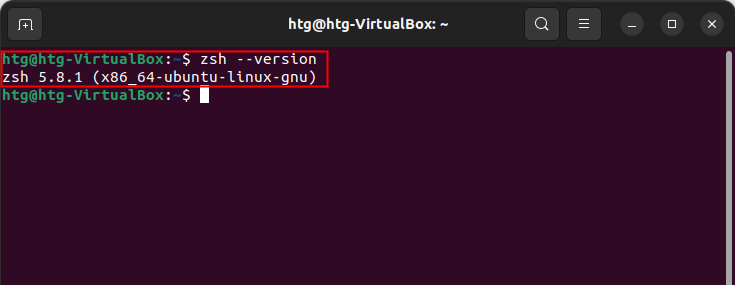
Confirm that zsh has been installed correctly by running zsh --version in the console. You should see something like this:
Now that ZSH has been downloaded and installed correctly, we need to change the default shell from Bash to ZSH. Run:
chsh -s $(which zsh)
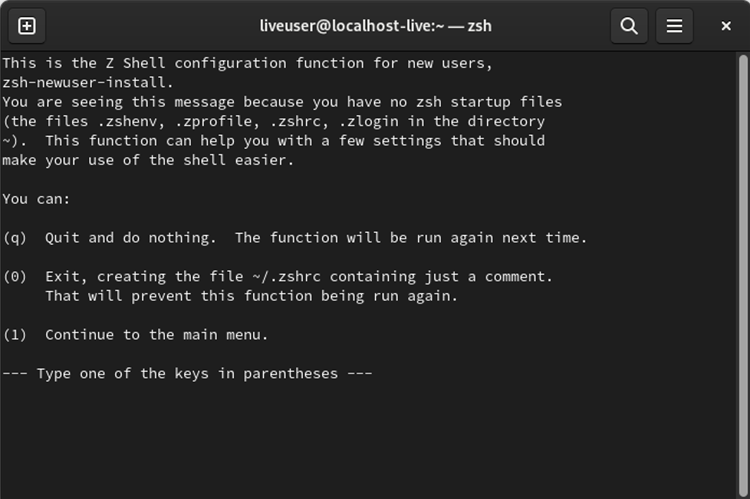
To be sure it takes, just restart your PC at this point. When you reopen the Terminal, you’ll be given some configuration options for ZSH. Once you’ve installed ZSH you can start adding themes and using plugins. We’ve covered how to do that in the last two sections of the article.
Install ZSH on Fedora
To install ZSH on Fedora, open up the Terminal, then run:
sudo dnf install zsh
You’ll need to confirm you want to install it and then wait for everything to finish up. Once it is done, execute the following command to switch your shell to ZSH:
zsh
As soon as you run zsh you’ll be prompted to go through some of the basic options zsh lets you customize.
Install ZSH on Other Linux Systems
Generally speaking, you’ll want to use your distros default package manager to install ZSH, as it is included by default in most repositories (repos). If it is not present for some reason, you can always download the source code and install that. Additionally, the ZSH GitHub has instructions for installing it on the most popular Linux distros.
Install Oh My Zsh
Oh-My-Zsh is the most popular plugin framework for ZSH, and it comes with many built-in plugins and themes as well. There are also a couple of other plugin frameworks, including Antigen, which is a full package manager for ZSH, but Oh-My-Zsh has loads of plugins built right in and does its job well.
Oh-My-Zsh has a simple install script you can run:
sh -c "$(curl -fsSL https://raw.githubusercontent.com/robbyrussell/oh-my-zsh/master/tools/install.sh)"
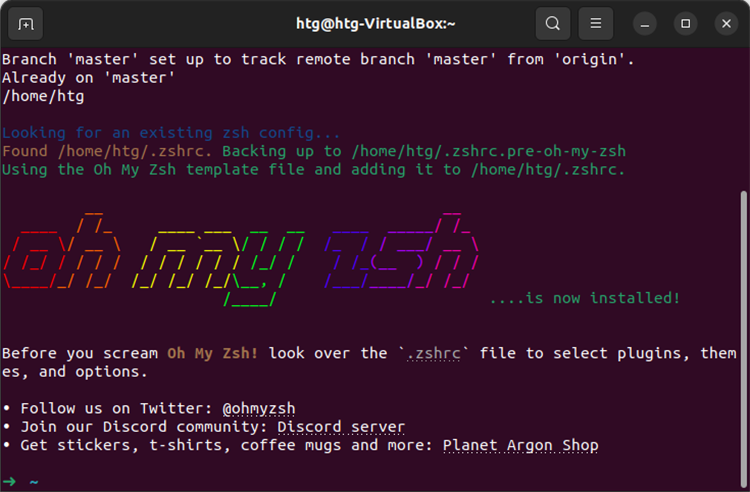
You’ll see a message in the Terminal if everything goes correctly:
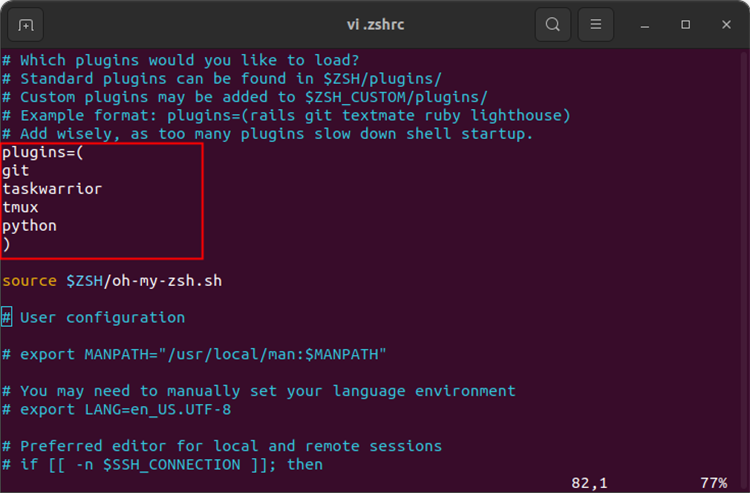
From there, you can enable and disable plugins by adding them to your .zshrc file, located in your ~ directory.
You can get a full list of plugins on the Oh-My-Zsh repository.
How to Use ZSH Themes
There are plenty of themes to go around, but powerlevel9k is by far the coolest. It adds a right-aligned info box, integration with git and command history, incredible customization, and wraps it all up in a slick interface based on the powerline plugin for vim. You’ll want to use iTerm on macOS, or any terminal with 24-bit color, to get the most out of powerlevel9k (or any ZSH theme, really).
To set up powerlevel9k (if you installed Oh-My-Zsh) just clone the repository into the .oh-my-zsh custom themes folder:
git clone https:
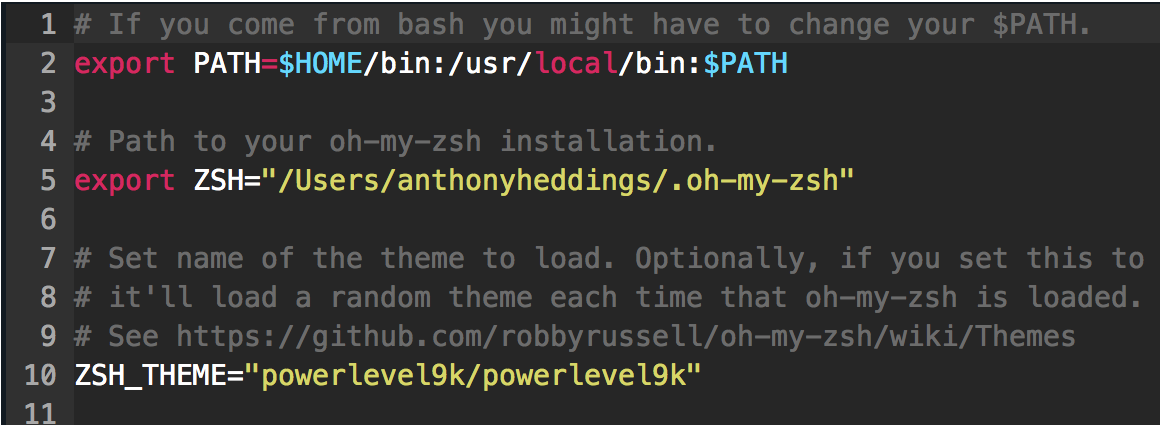
Then you need to enable it in .zshrc. Open the “.zshrc” file with Vi (or use your preferred editor), and add the following line.
ZSH_THEME="powerlevel9k/powerlevel9k"
After that, run source .zshrc to reload the configuration file, and you should see the changes applied.
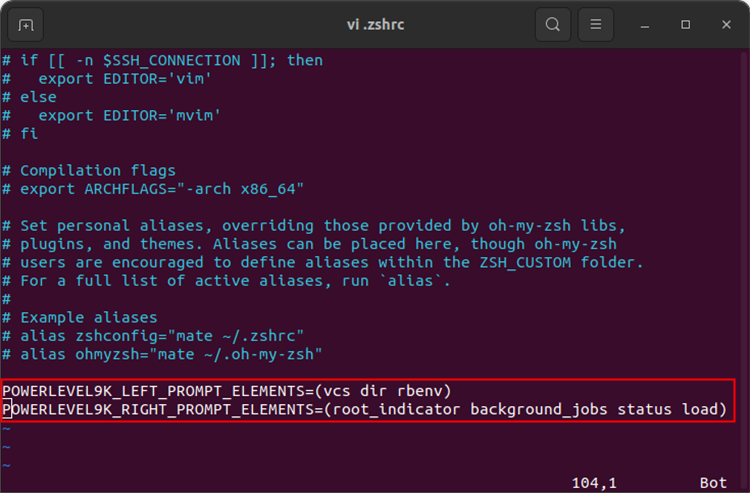
If you want, you can customize the default prompt by defining POWERLEVEL9K_LEFT_PROMPT_ELEMENTS in your .zshrc. Here’s mine, with a minimal prompt:
 POWERLEVEL9K_LEFT_PROMPT_ELEMENTS=(vcs dir rbenv)
POWERLEVEL9K_RIGHT_PROMPT_ELEMENTS=(root_indicator background_jobs status load)
You can find the full documentation for powerlevel9k on the repo.

