
If you’re traveling this summer, there’s a neat editing trick to get spectacular shots of landmarks or murals.
With advanced editing tools in the Photos app, you can make adjustments you might not have thought were possible. Fix the perspective or angle a picture was taken, correct the fisheye distortion on an ultra-wide photo and more.
You can also precisely rotate and skew perspective on photos from your iPhone, for those times when you don’t realize until it’s too late that your shot is slightly to the side or slightly askew. You can fix it all directly in the Photos app.
How to skew, adjust perspective and rotate photos on iPhone
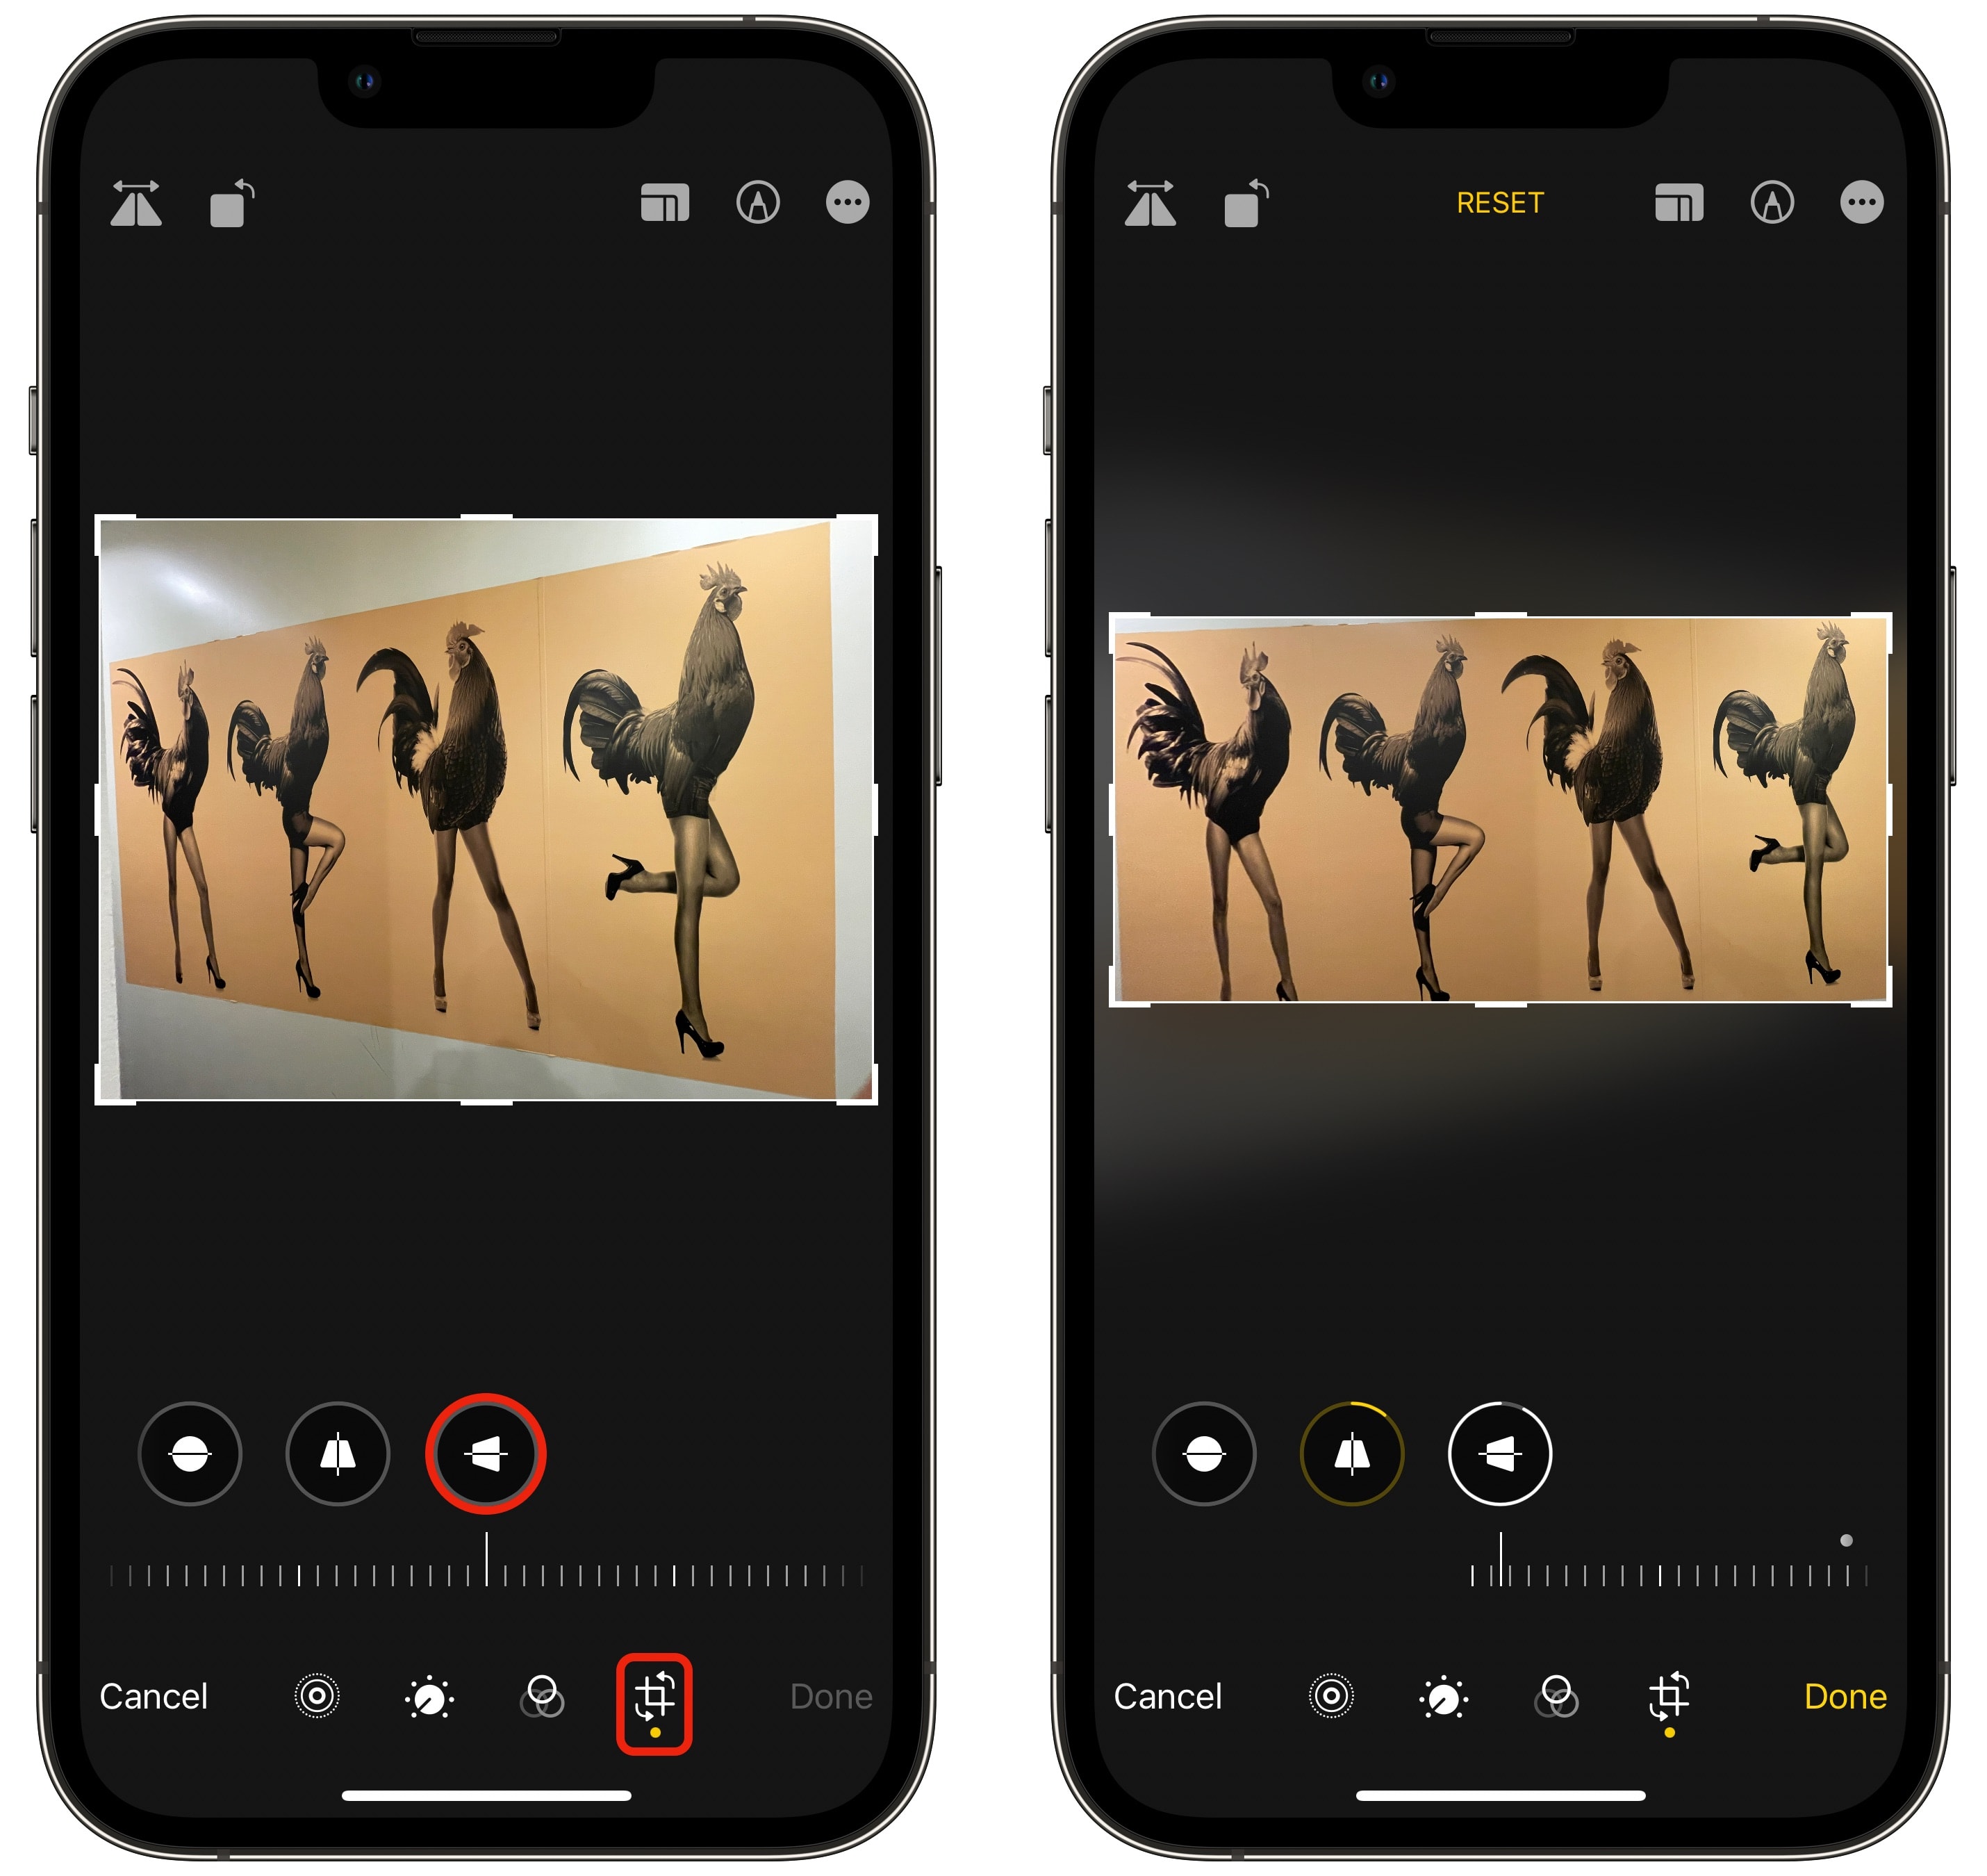
I try to take pictures of paintings on walls or food laid out on a table straight-on, but it’s not easy getting it perfect. Luckily, you can adjust the perspective of an image after the fact.
Screenshot: D. Griffin Jones/Cult of Mac
Consider this image of a mural in a tight hallway. I didn’t have room to get a square shot of it. Tapping the horizontal adjust button, I can use the slider to change the perspective of the image as if I were standing directly in front of it.
Screenshot: D. Griffin Jones/Cult of Mac
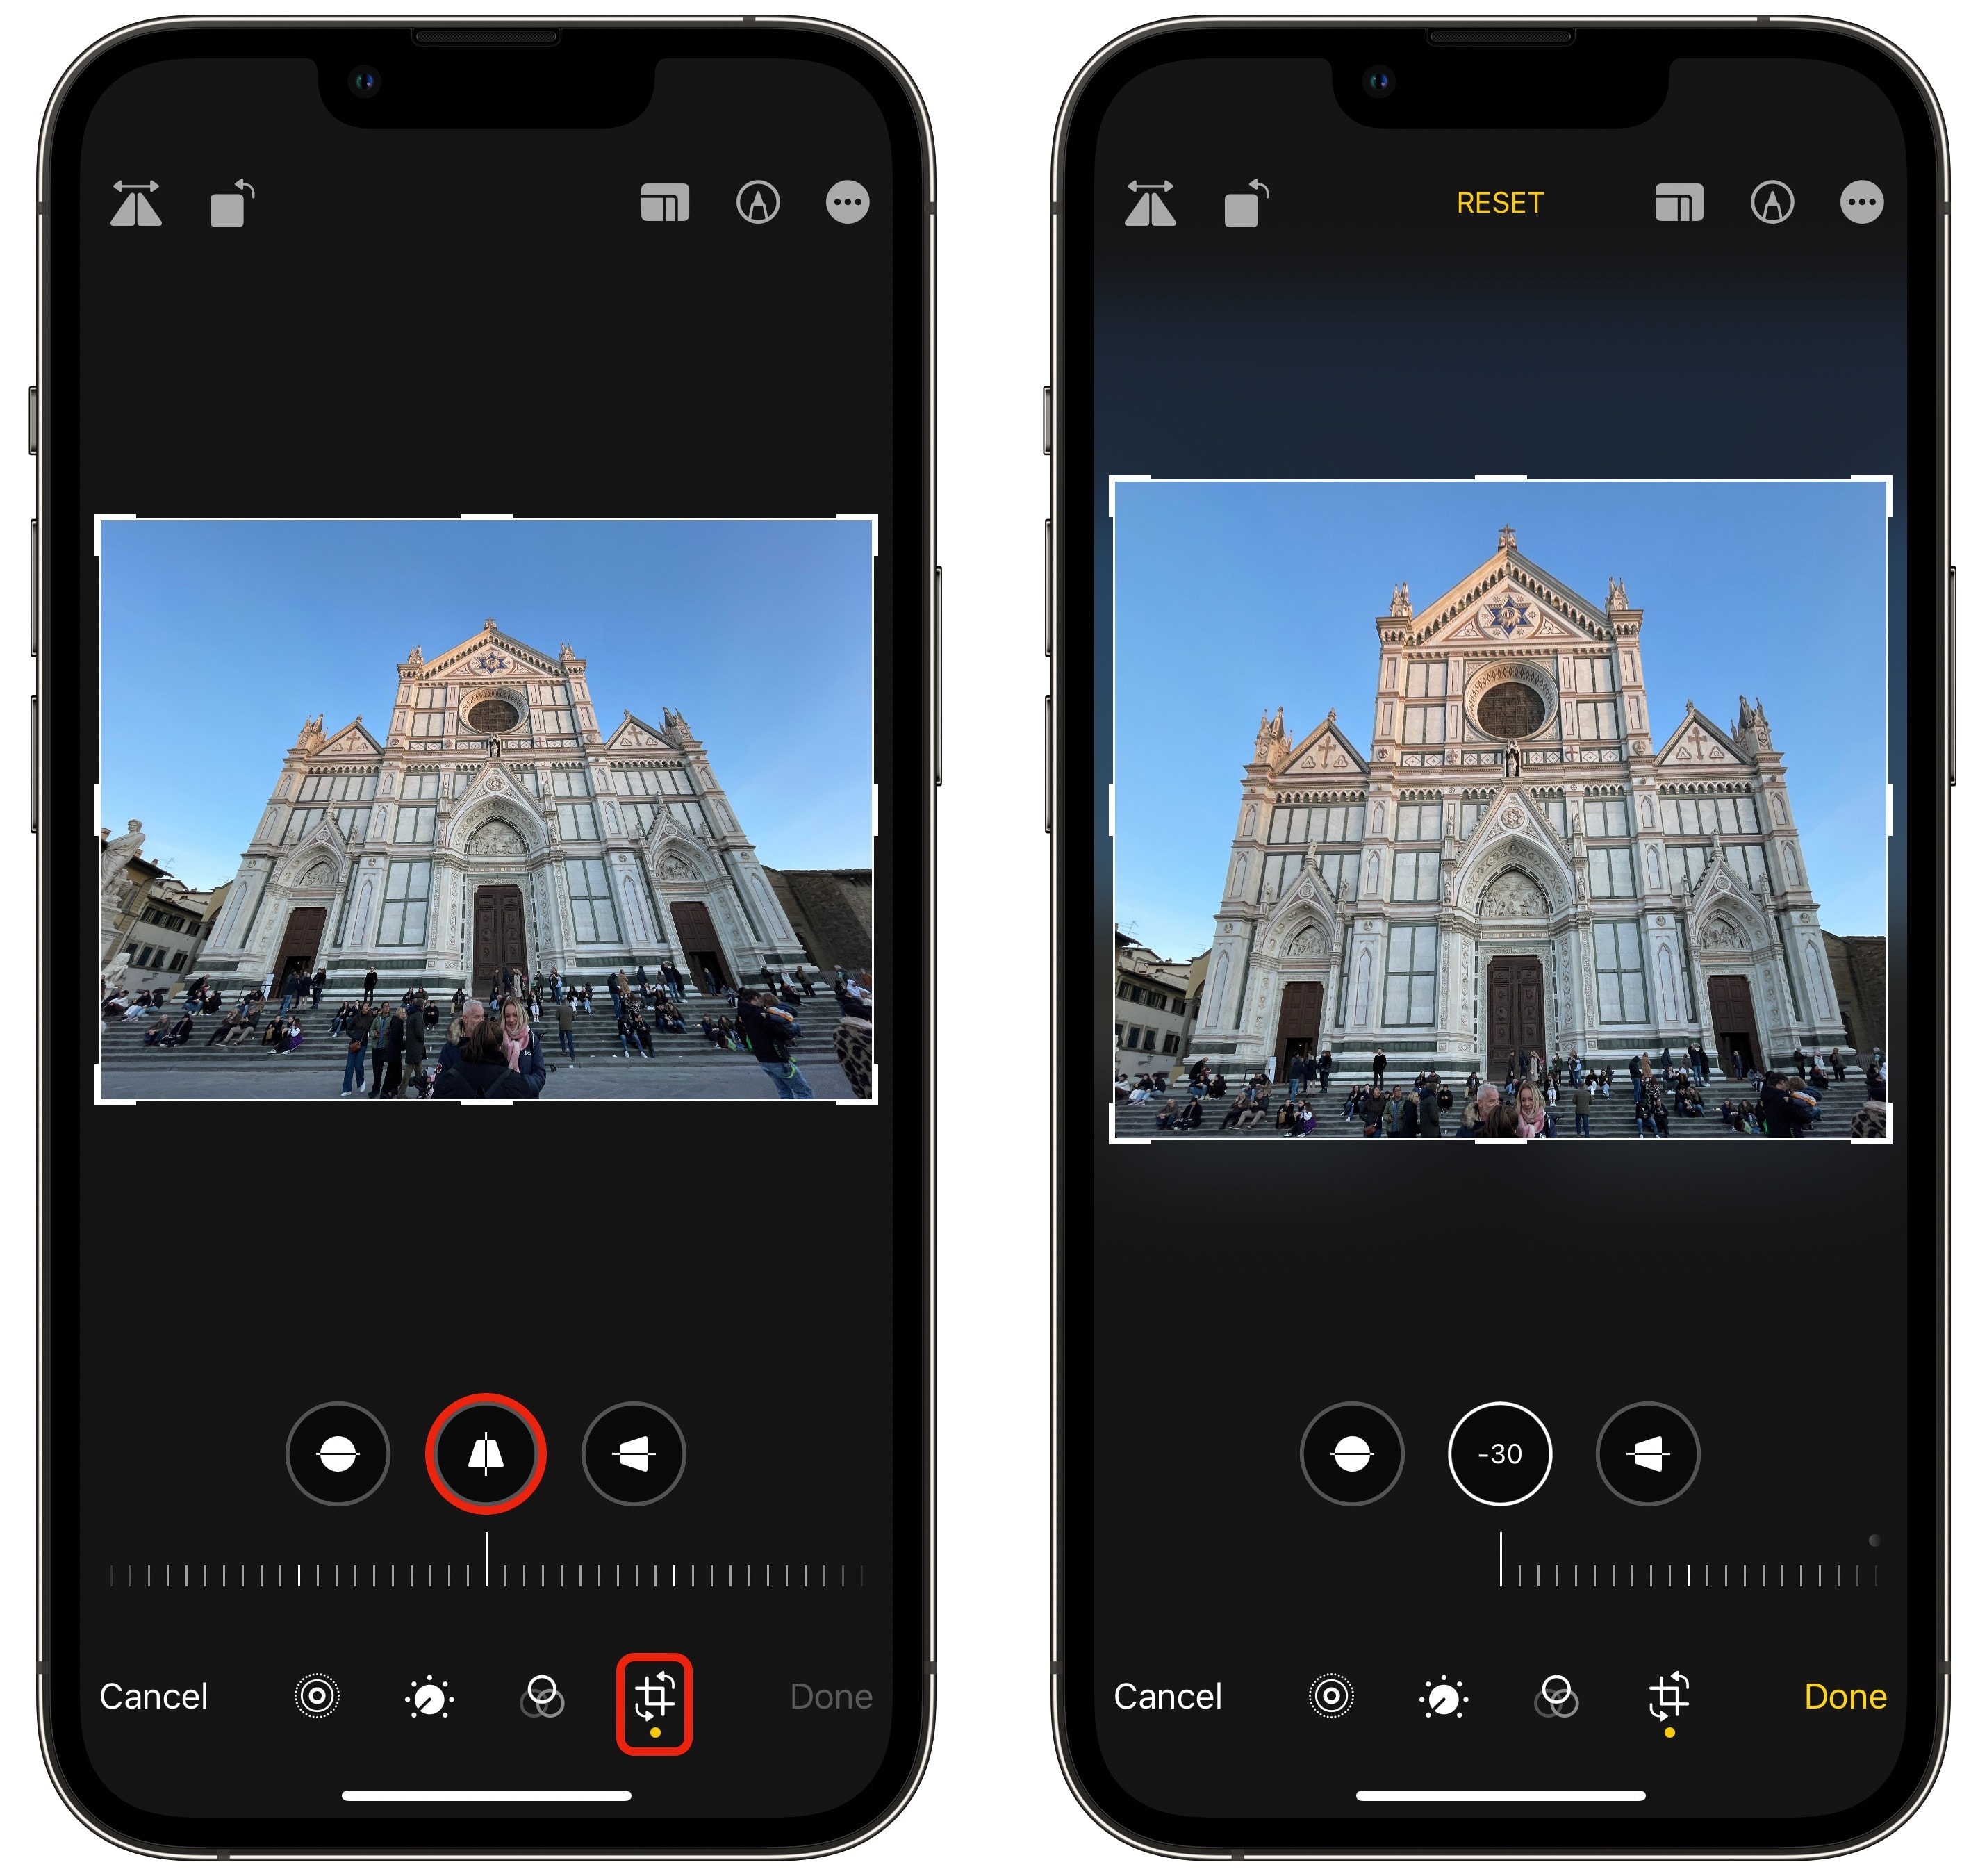
The vertical adjust can work wonders on tall buildings shot from the ground. Take this image of the Duomo di Firenze, shot with the 0.5× lens. Using the maximum amount of correction on the image reduces much of the fish-eye distortion.
There wasn’t enough room in the plaza to capture the whole building with the 1× lens, but with the perspective adjust, it looks good.
Screenshot: D. Griffin Jones/Cult of Mac
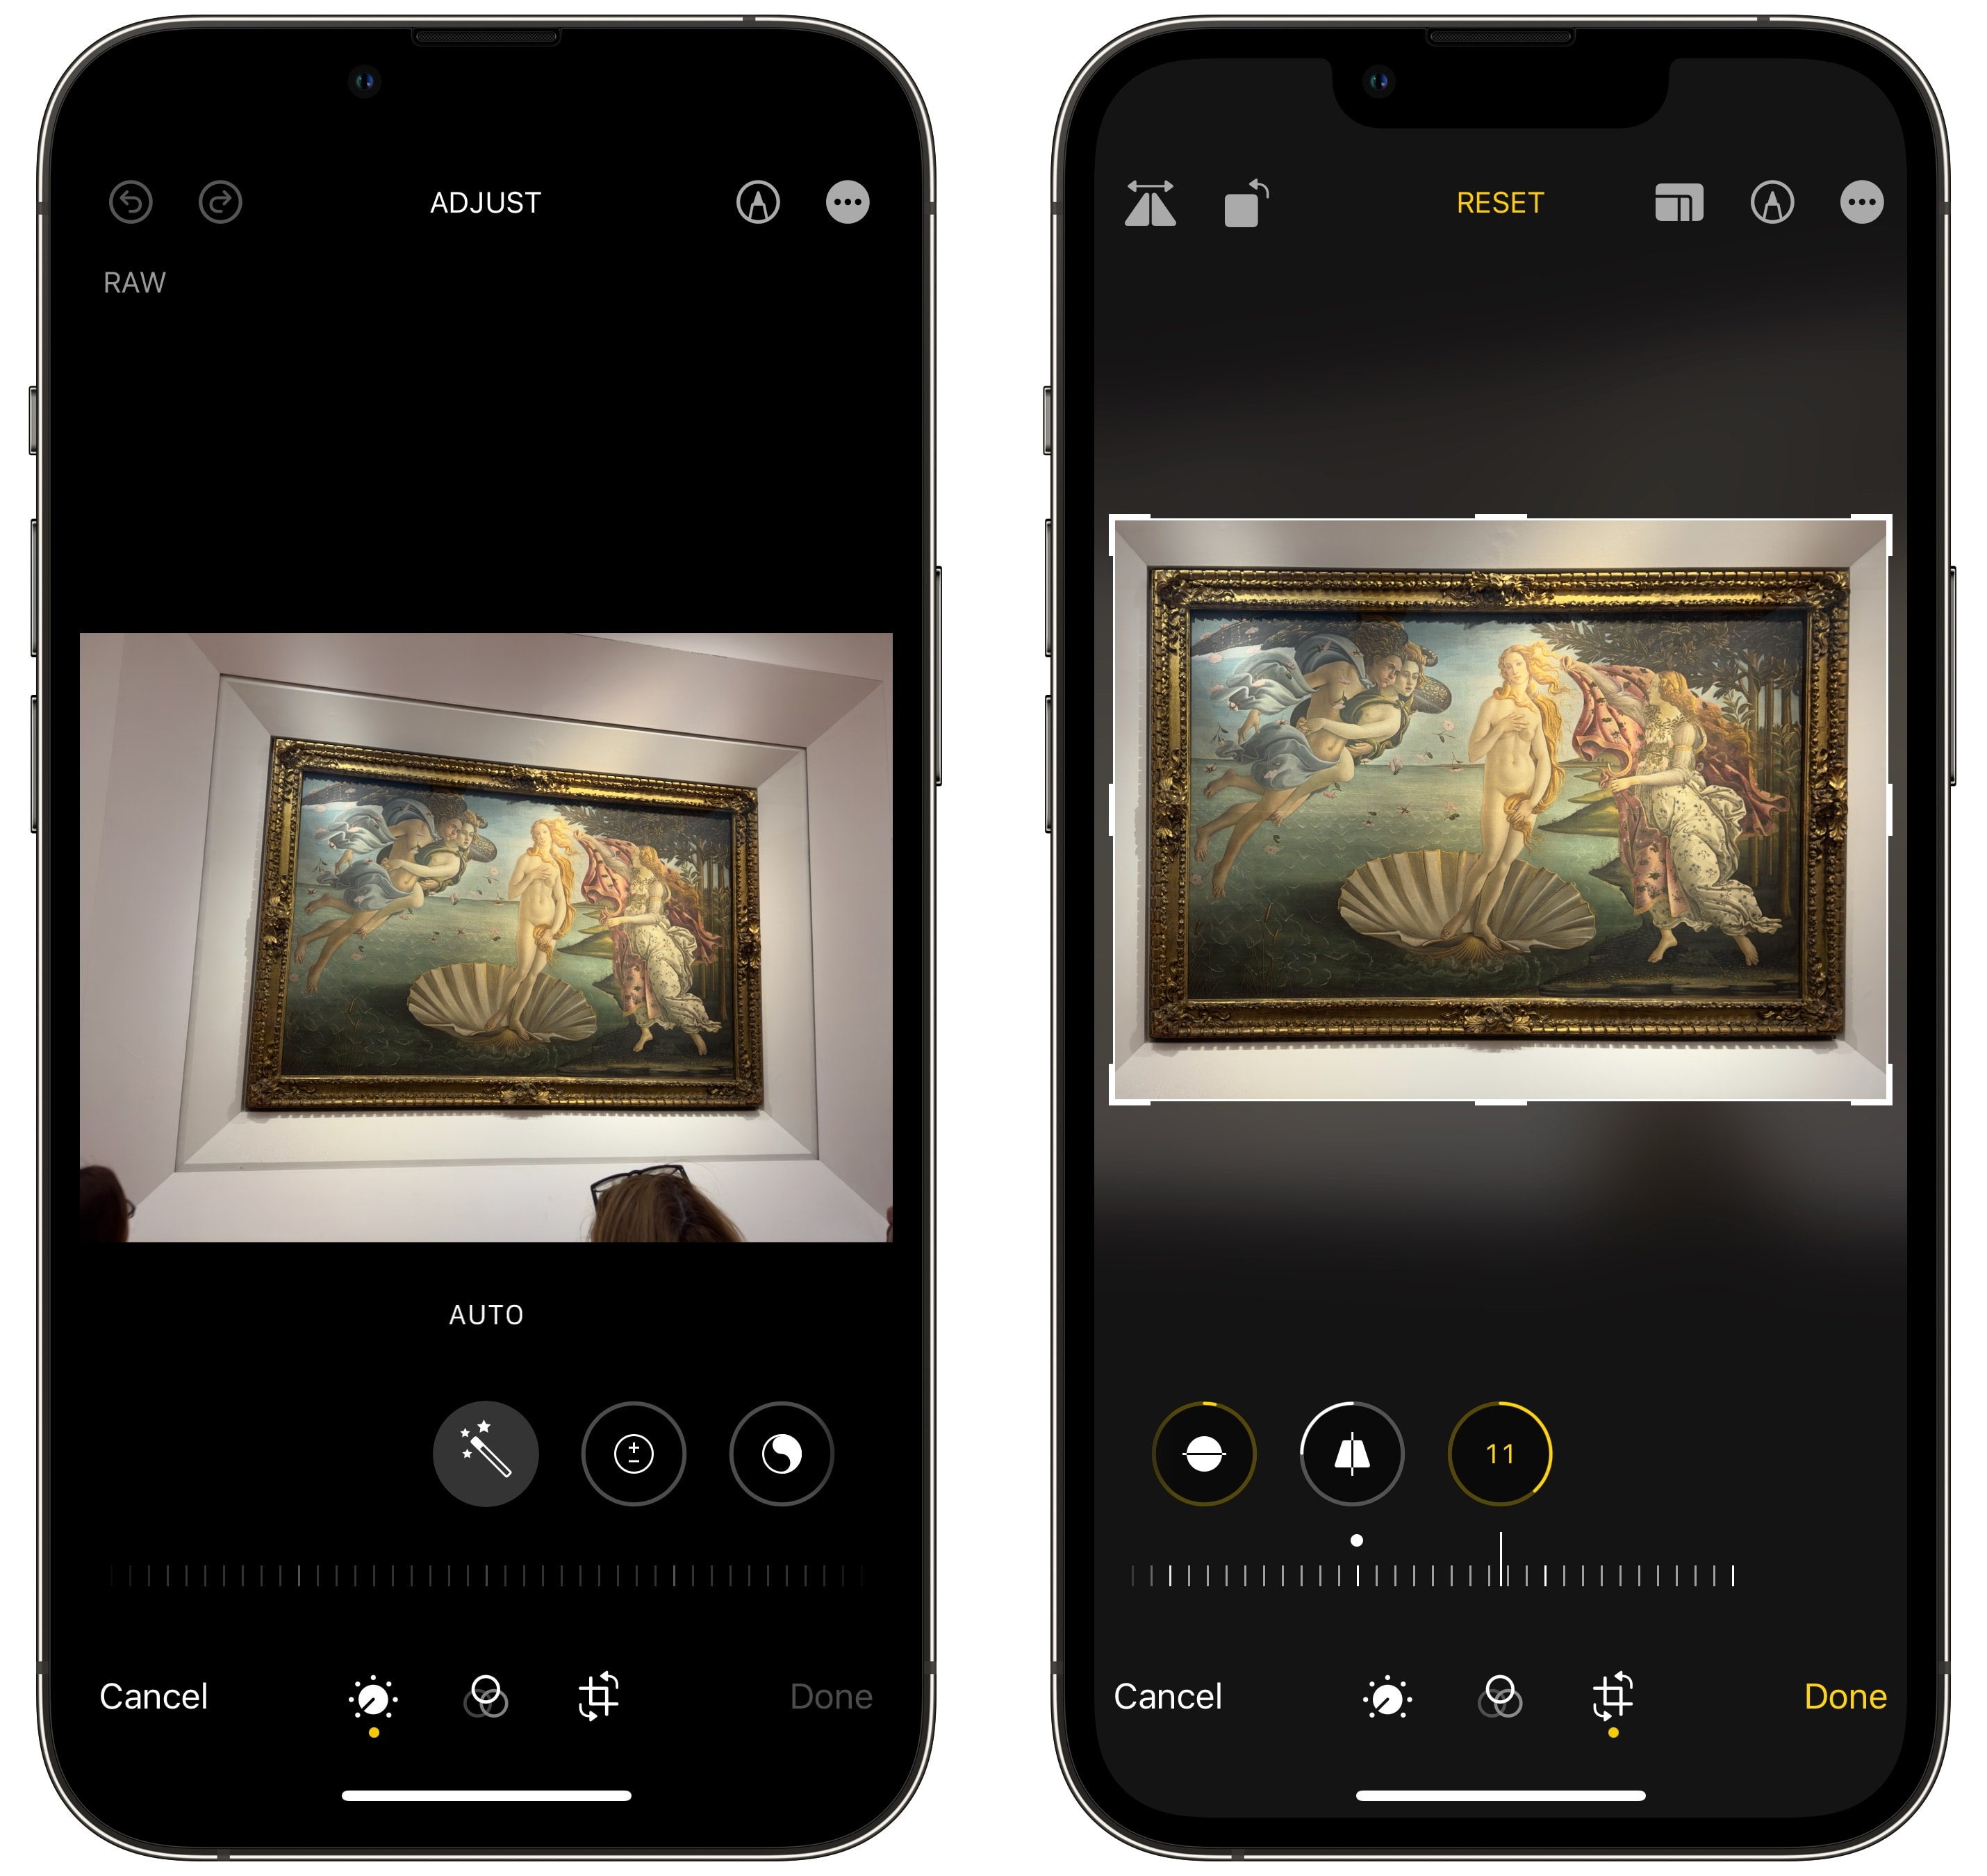
As one last example, you can combine all three tools — rotate, horizontal and vertical adjust — to fix pictures like these. In a big crowded room in a museum, you can rarely get a great shot. The image on the left is the best I could do, holding my phone way above my head.
But with some careful editing, the image on the right looks like I had all day to set up a tripod perfectly centered in front of the image. And since I shot it in ProRAW, it’s pretty good resolution even after all those edits.
Rotate pictures on iPhone
Screenshot: D. Griffin Jones/Cult of Mac
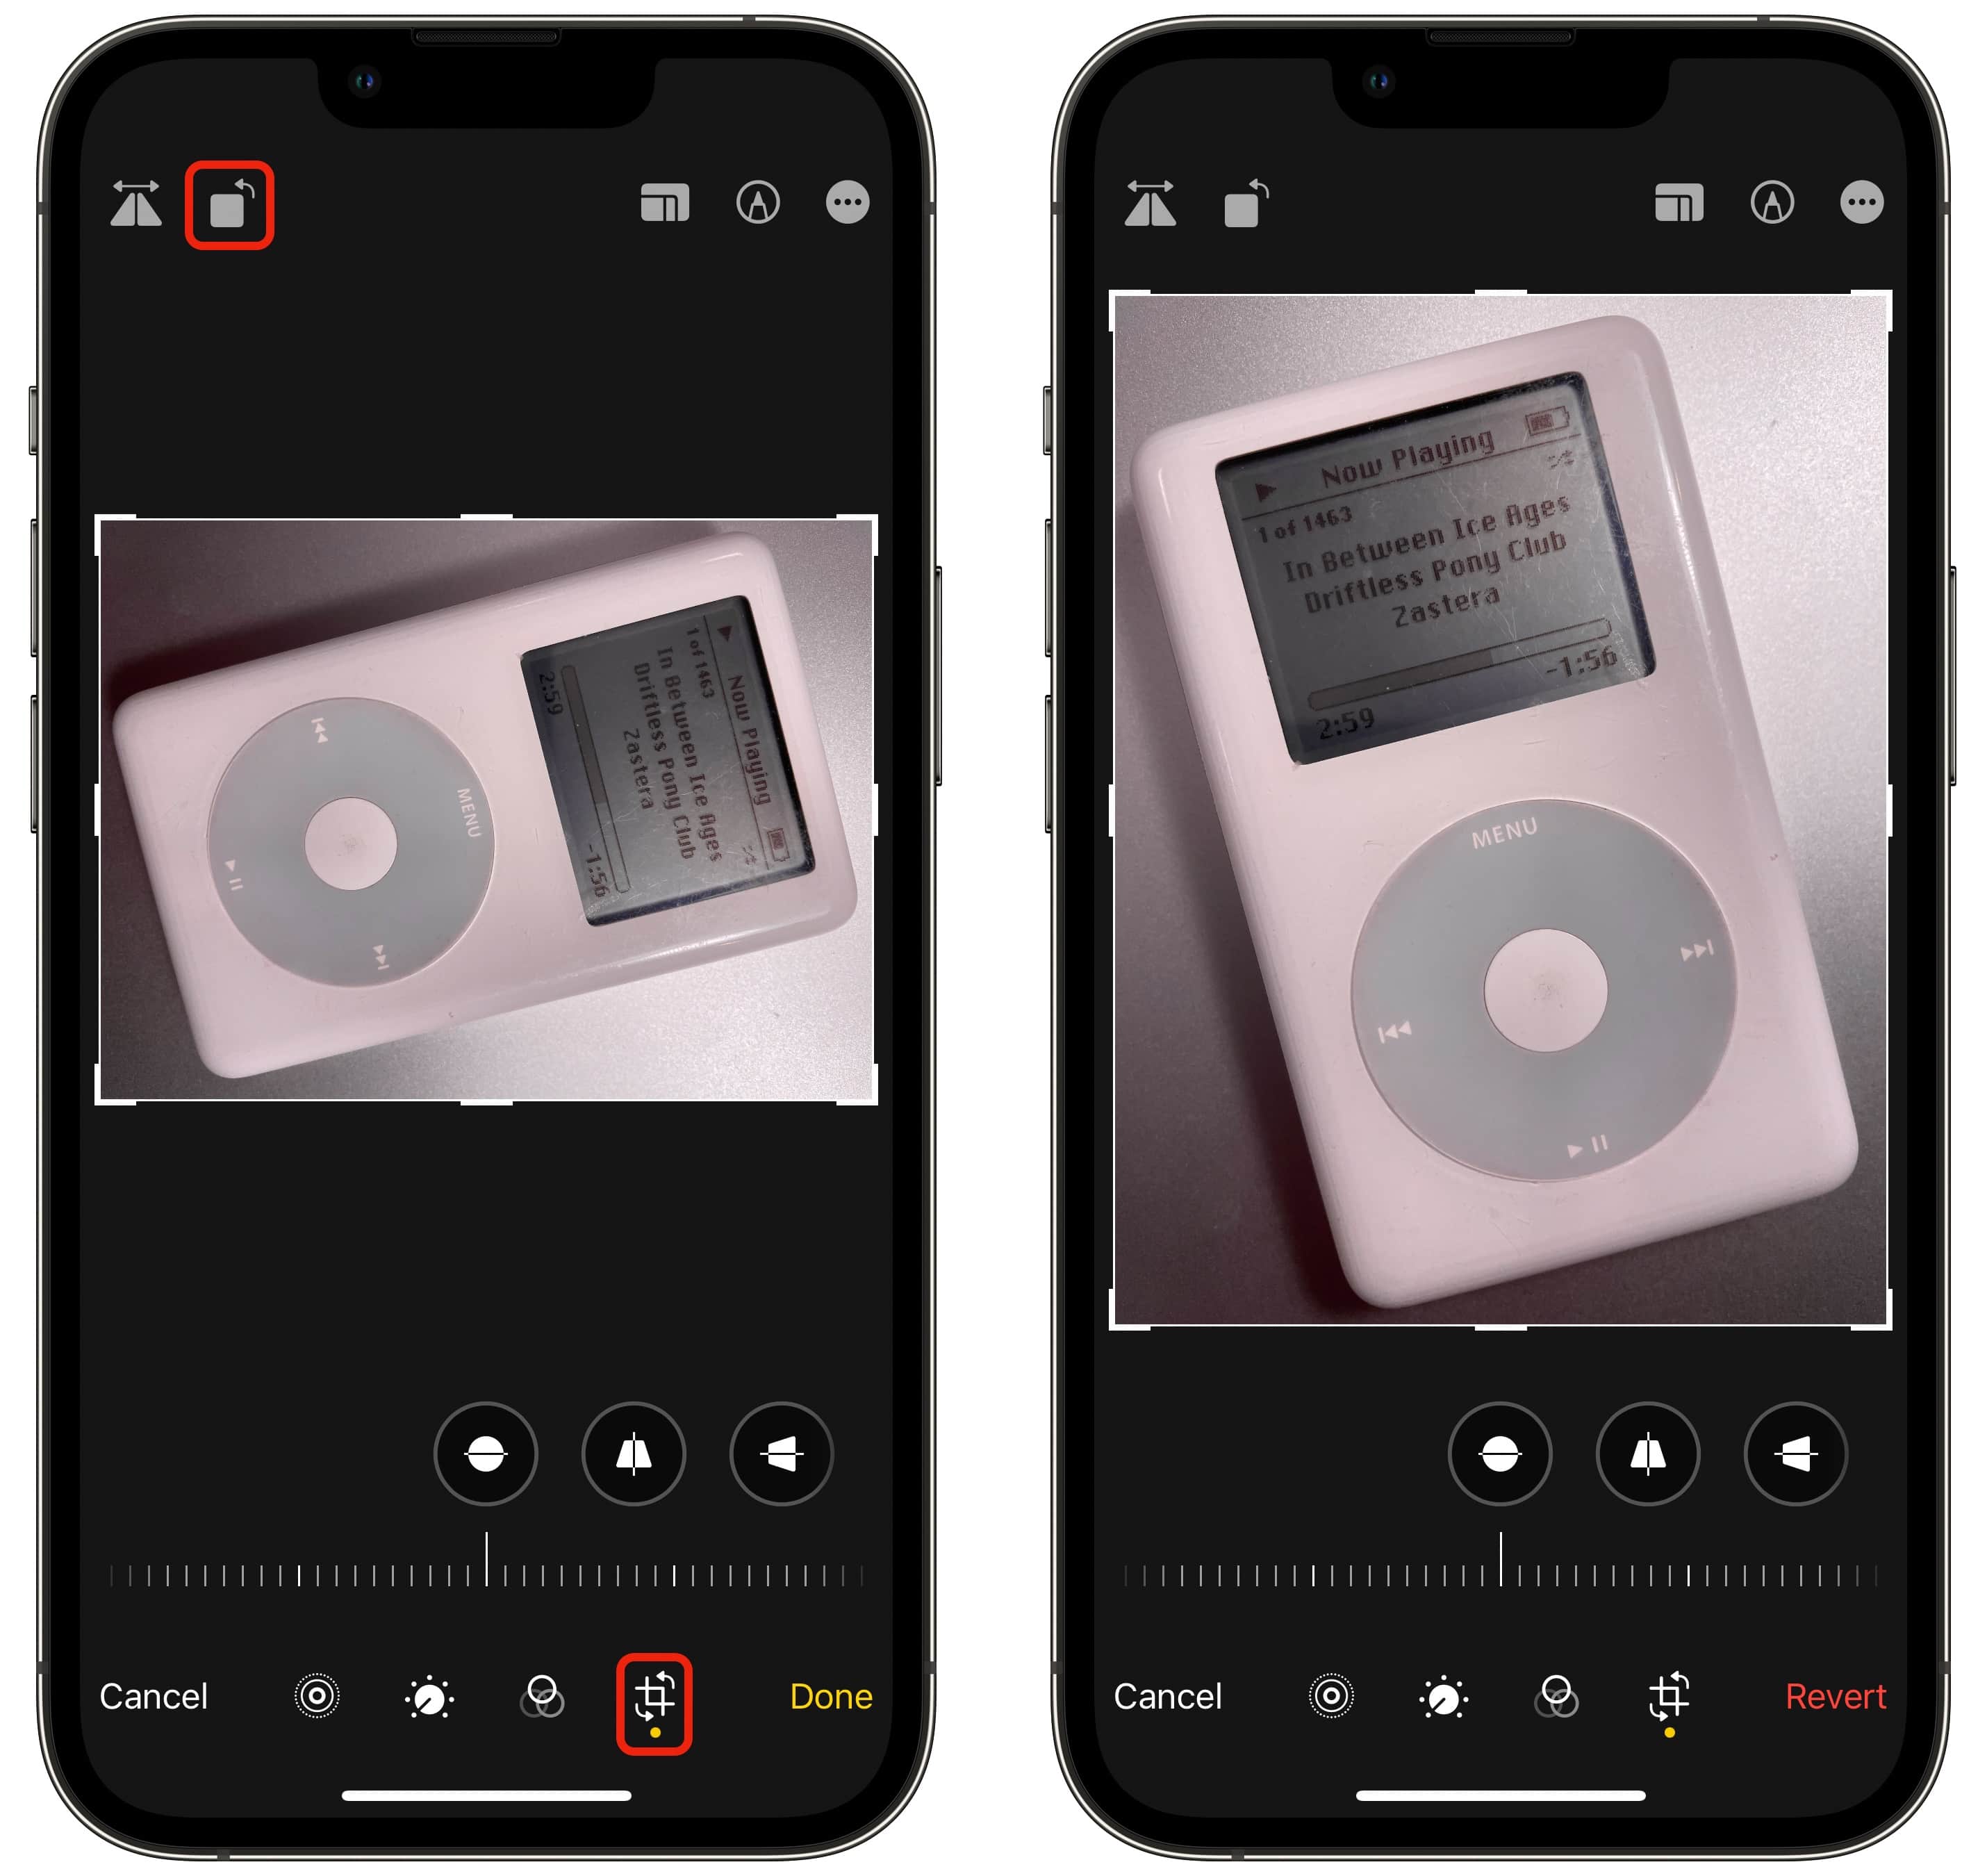
Tap Edit and tap the crop/rotate tool in the bottom right. Tap the Rotate button in the top-left — that’ll spin it by a full 90°.
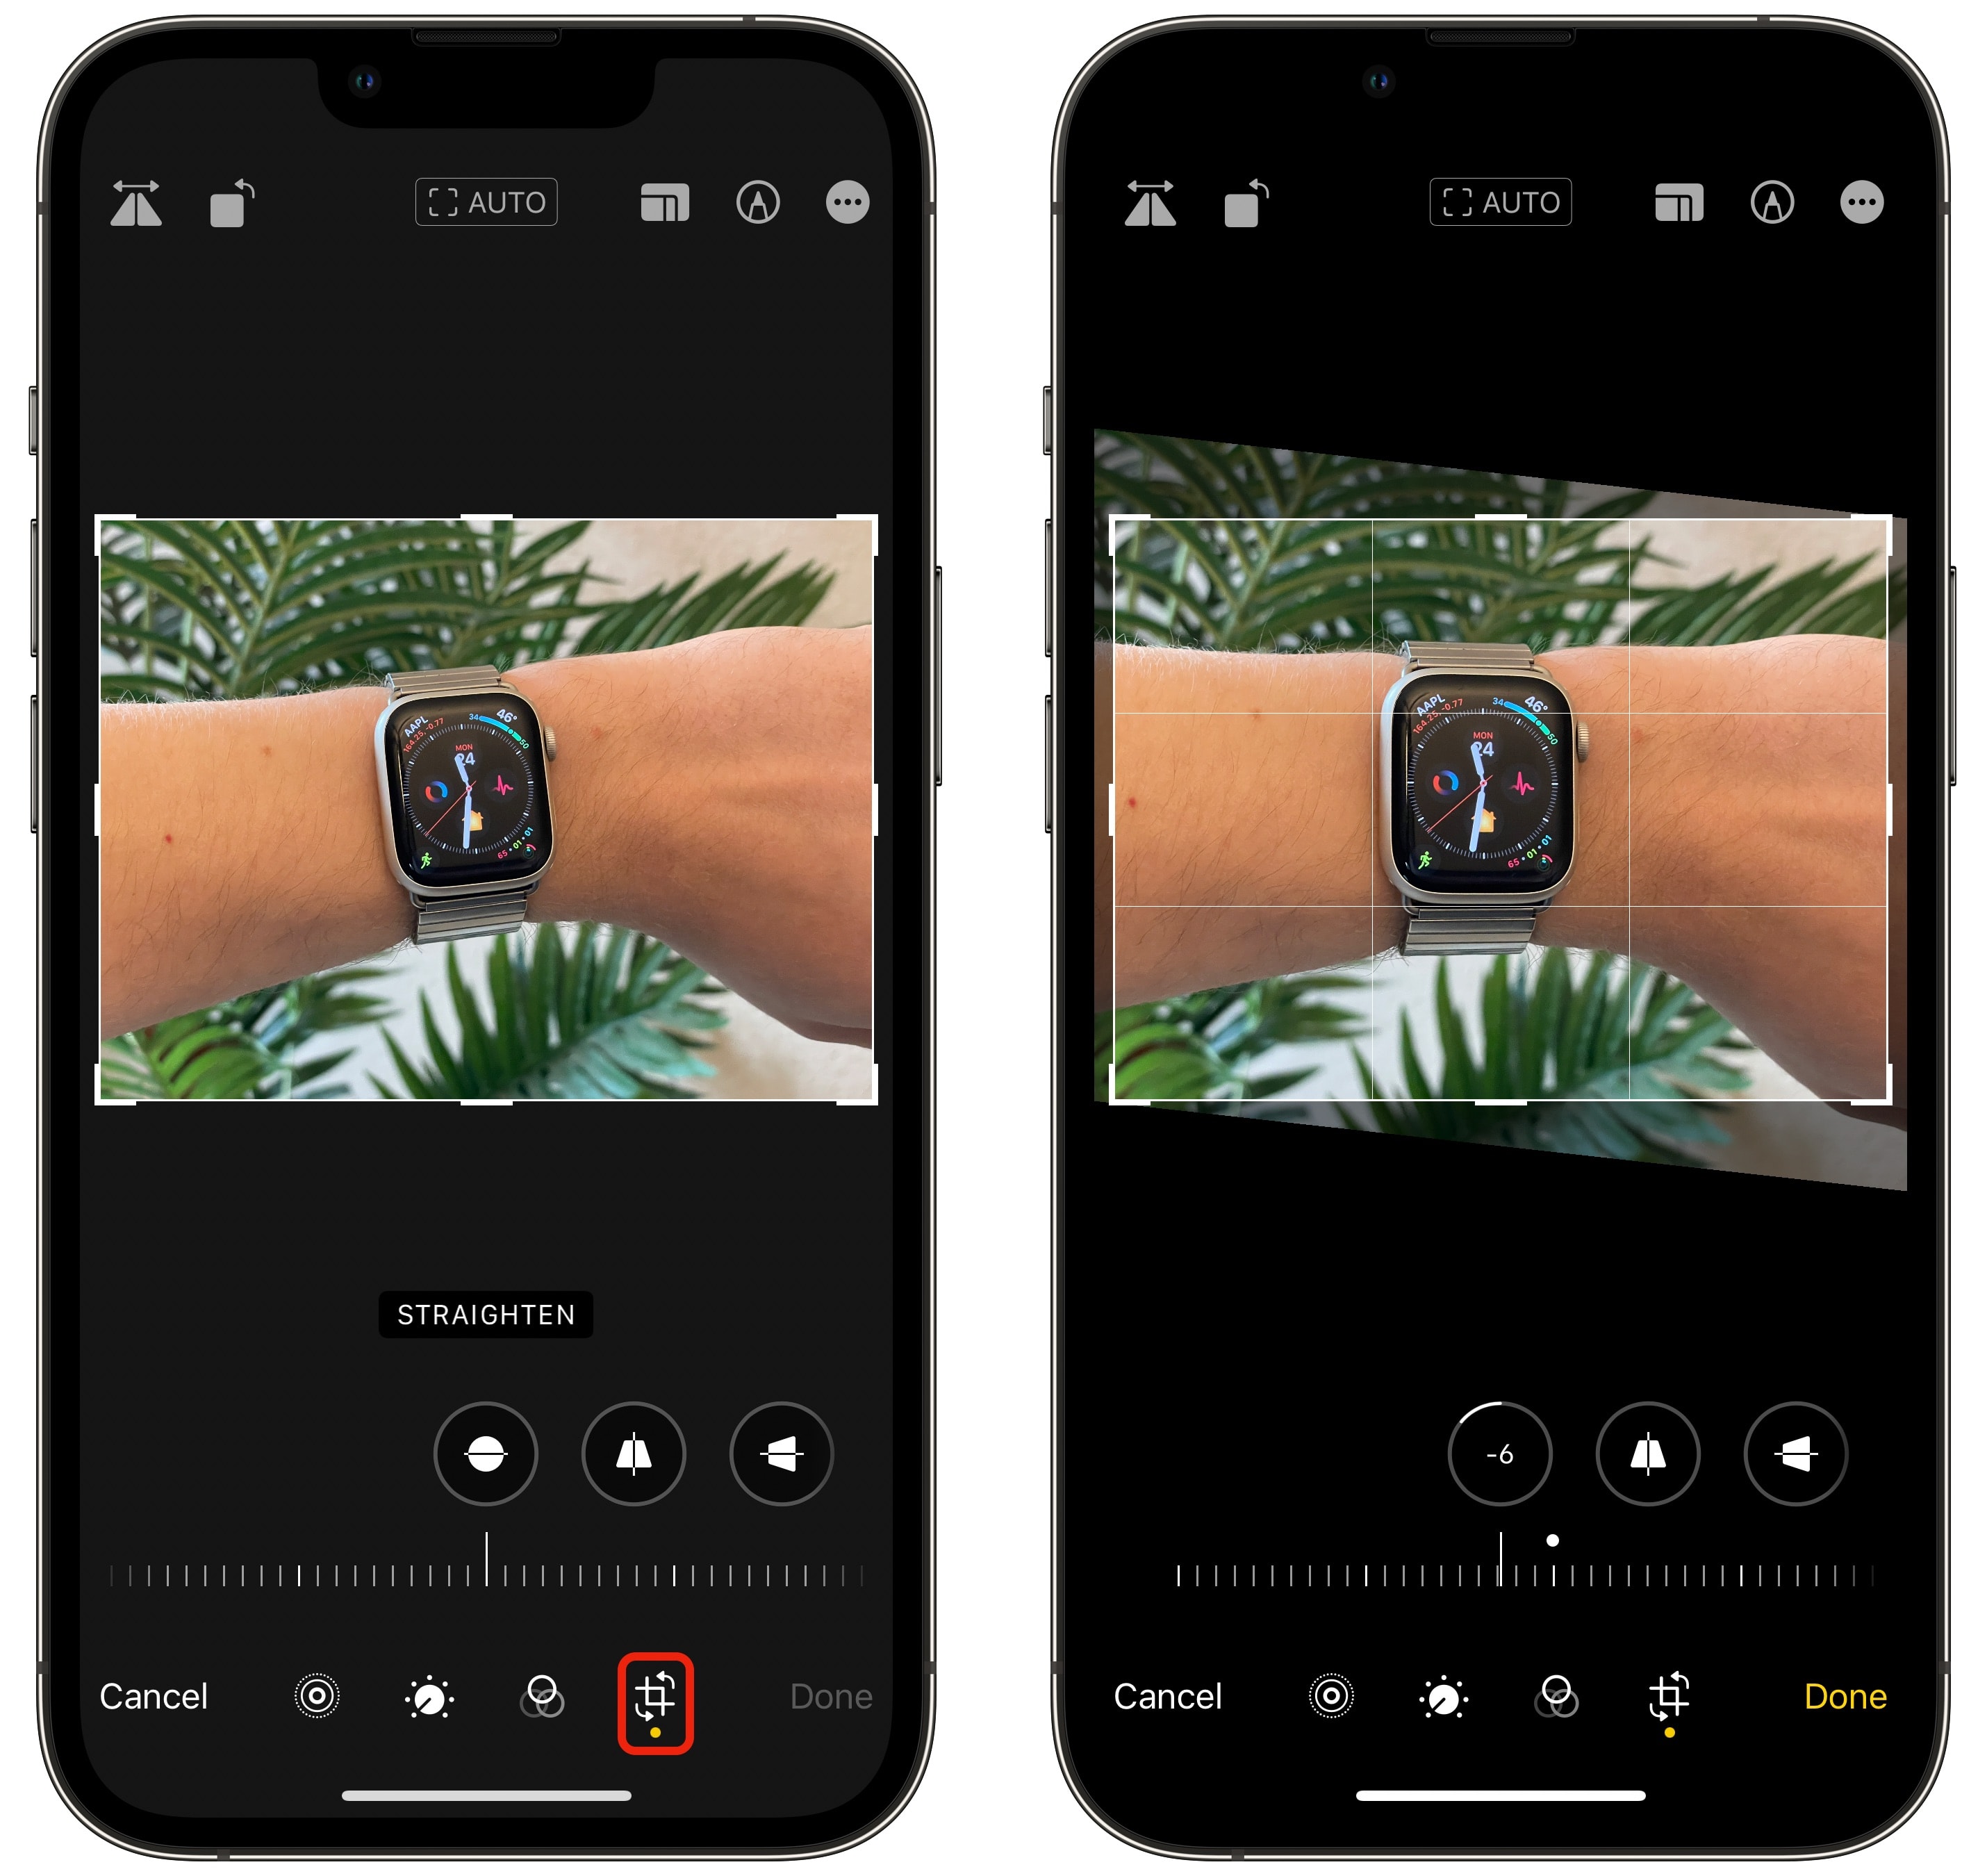
Screenshot: D. Griffin Jones/Cult of Mac
If you only want to correct it a little bit, slide your finger along the level at the bottom. It will both rotate the image and crop it inwards, so the corners will still look perfect.
Tap Done to save your changes.
Crop to preset aspect ratios
If you just need to crop in an image, you don’t need to touch any of the advanced tools — just grab the edge of the image and drag it inwards, or pinch to zoom in on the image.
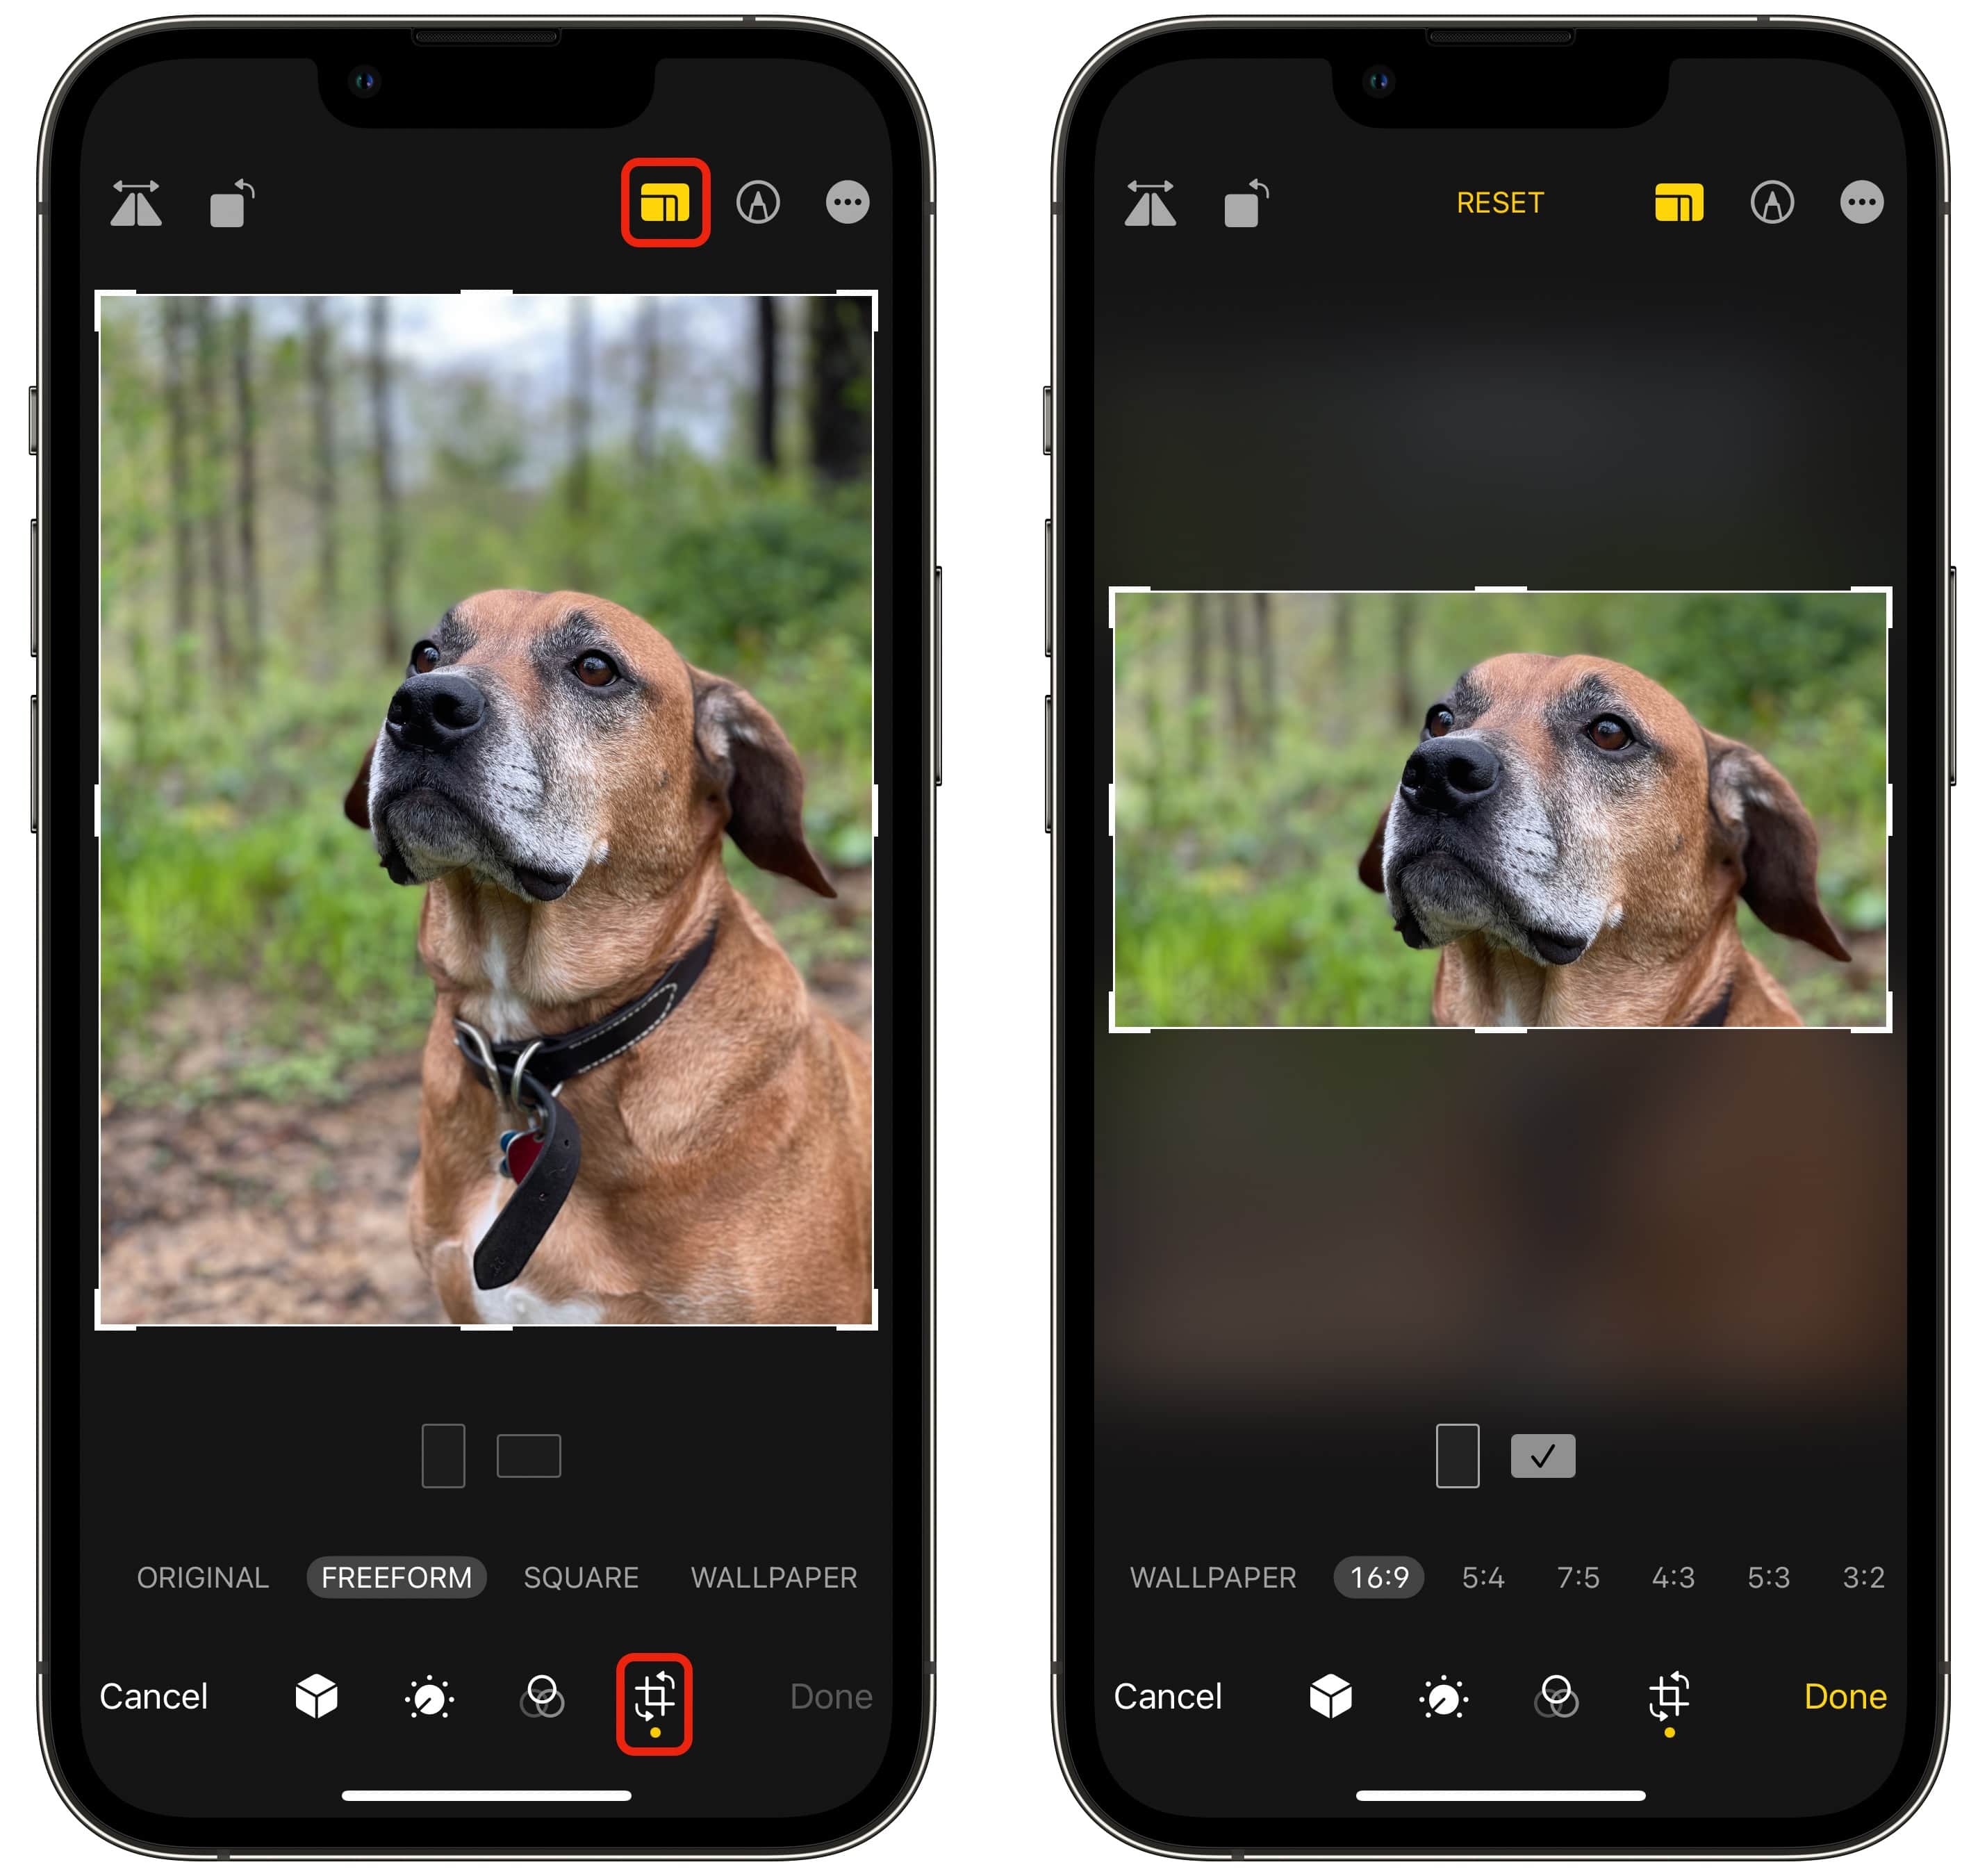
Screenshot: D. Griffin Jones/Cult of Mac
However, if you need to make the image perfectly square, or crop it to 16:9 or any other preset, tap the aspect ratio button in the top right. Switch between vertical and horizontal, scroll through the list of presets and pick one. The Wallpaper preset will make sure it’s the correct aspect ratio for your Lock Screen / Home Screen, no matter what iPhone you have.
A bunch of handy tools for your photos
The Photos app is full of tricks and hidden features:
Source


