Gestures are a great way to become an iPad power user. Gestures help you easily navigate through apps, switch between pages, access controls, and reduce multiple taps to a single swipe. Gestures are especially useful for Stage Manager, the new multitasking environment on iPad.
Apple designed gestures to mimic natural, real-world movements, making them intuitive to use and learn. Swiping, pinching, tapping, and other gestures feel familiar and are easy to master.
If you use your iPad a lot, they’re well worth learning — even just a few. Your fingers will thank you!
How to use all the multitasking gestures on the iPad
Be sure to check out the accompanying video:
I’ll start with the very basics, but feel free to jump ahead to more advanced tips.
Table of Contents:
- The Basics
- Multitasking Gestures
- Stage Manager Gestures
The Basics
Tap to wake
Any iPad without a Home Button will turn on by simply tapping the screen.
Swipe up to go Home
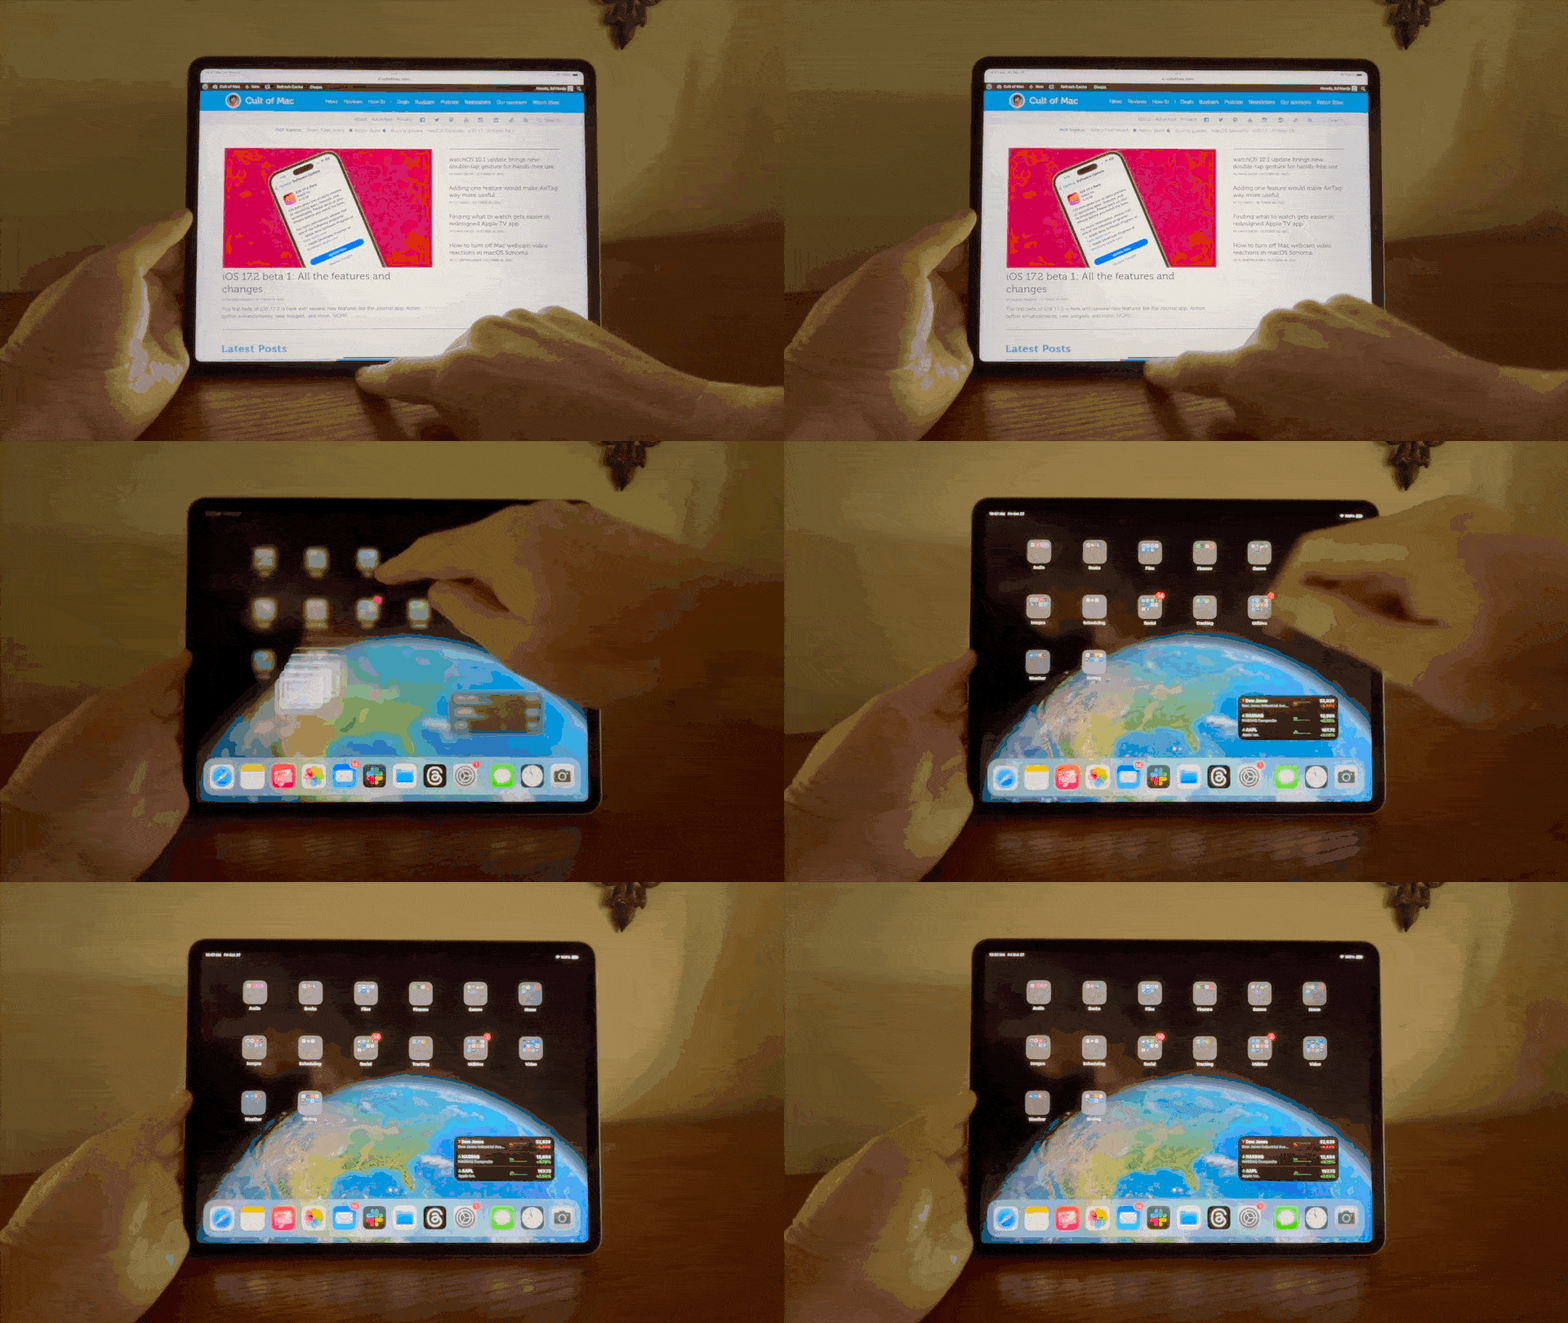
GIF: Ed Hardy/Cult of Mac
You can swipe up from the bottom of the screen to go back to the Home screen. Swiping up from the white bar on the bottom (called the Home bar) will get rid of whatever’s on screen.
You can also use a five-finger pinch if you have Four & Five Finger Gestures enabled in Settings > Multitasking & Gestures.
Swipe down from the top to show the Lock Screen
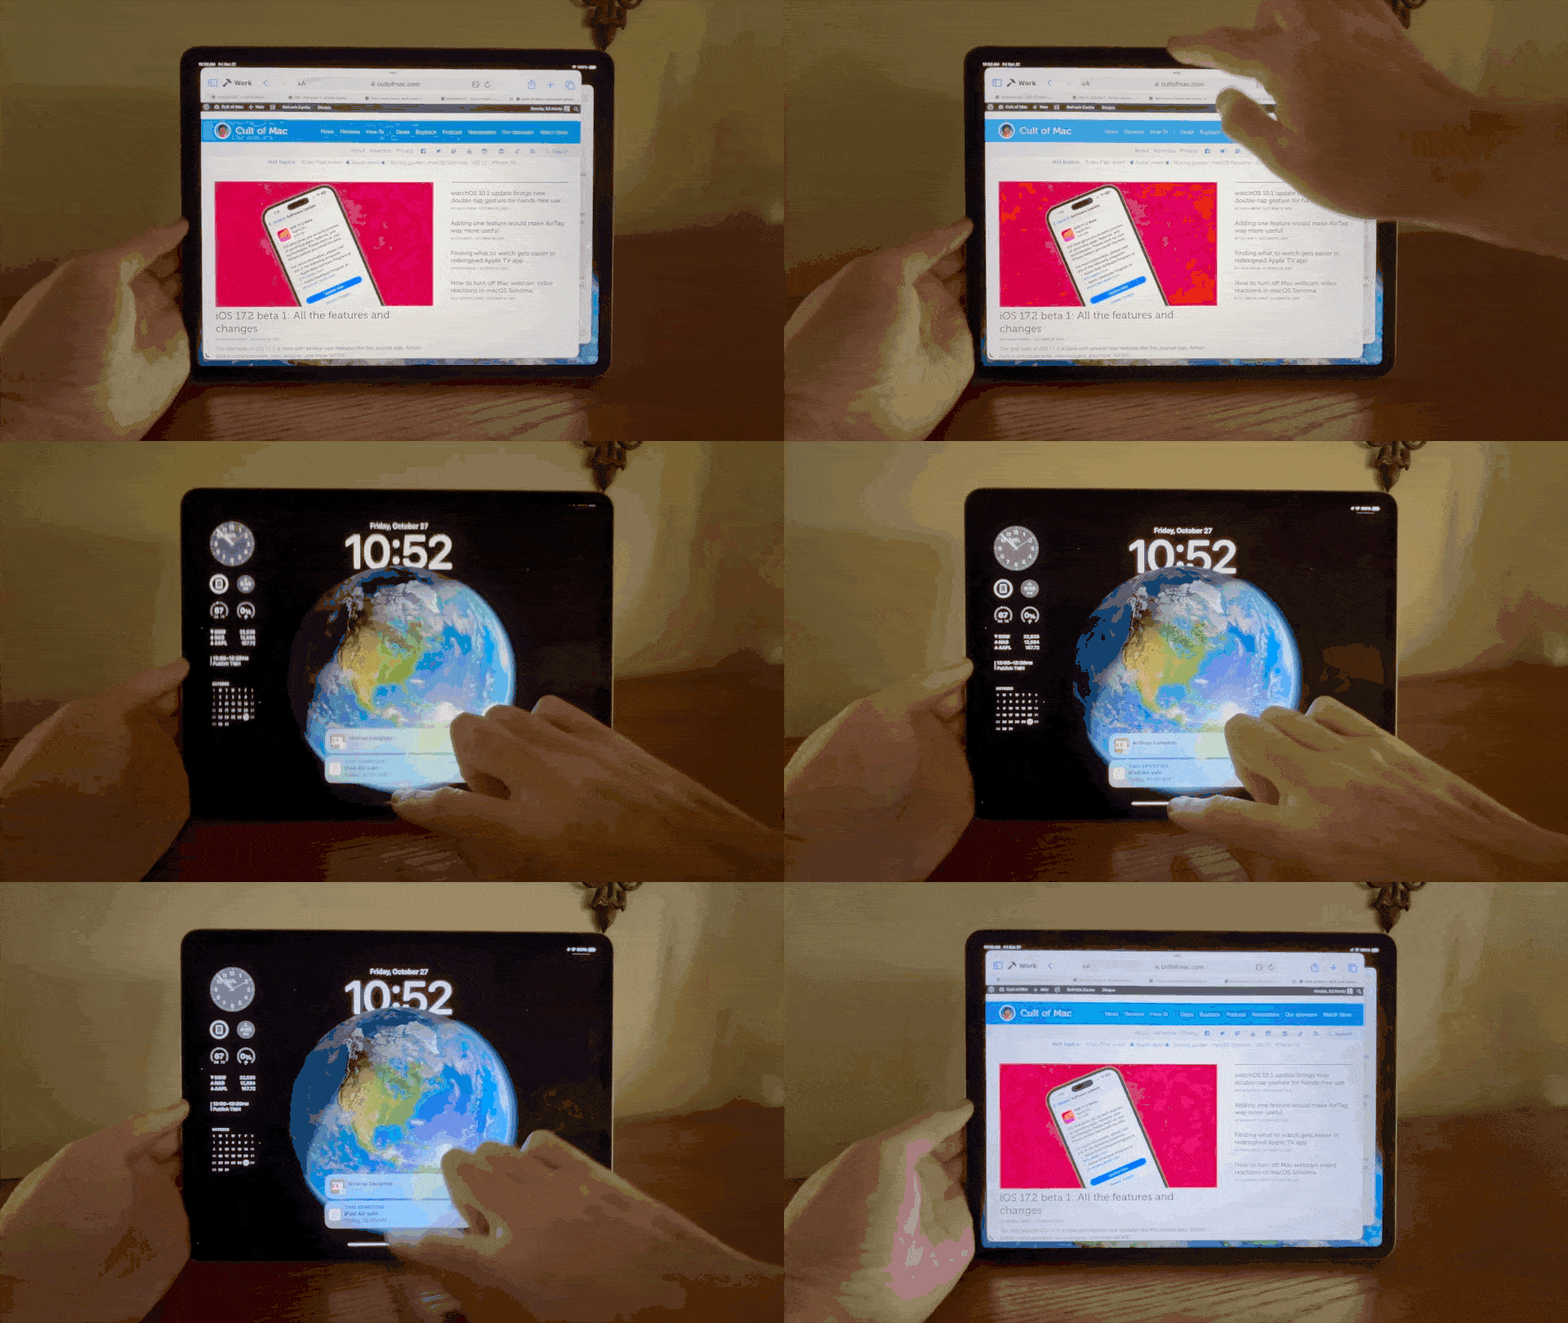
GIF: Ed Hardy/Cult of Mac
You can swipe down from the top of the screen to show the Lock Screen again. This is a quick and easy way to look at your notifications or check your widgets.
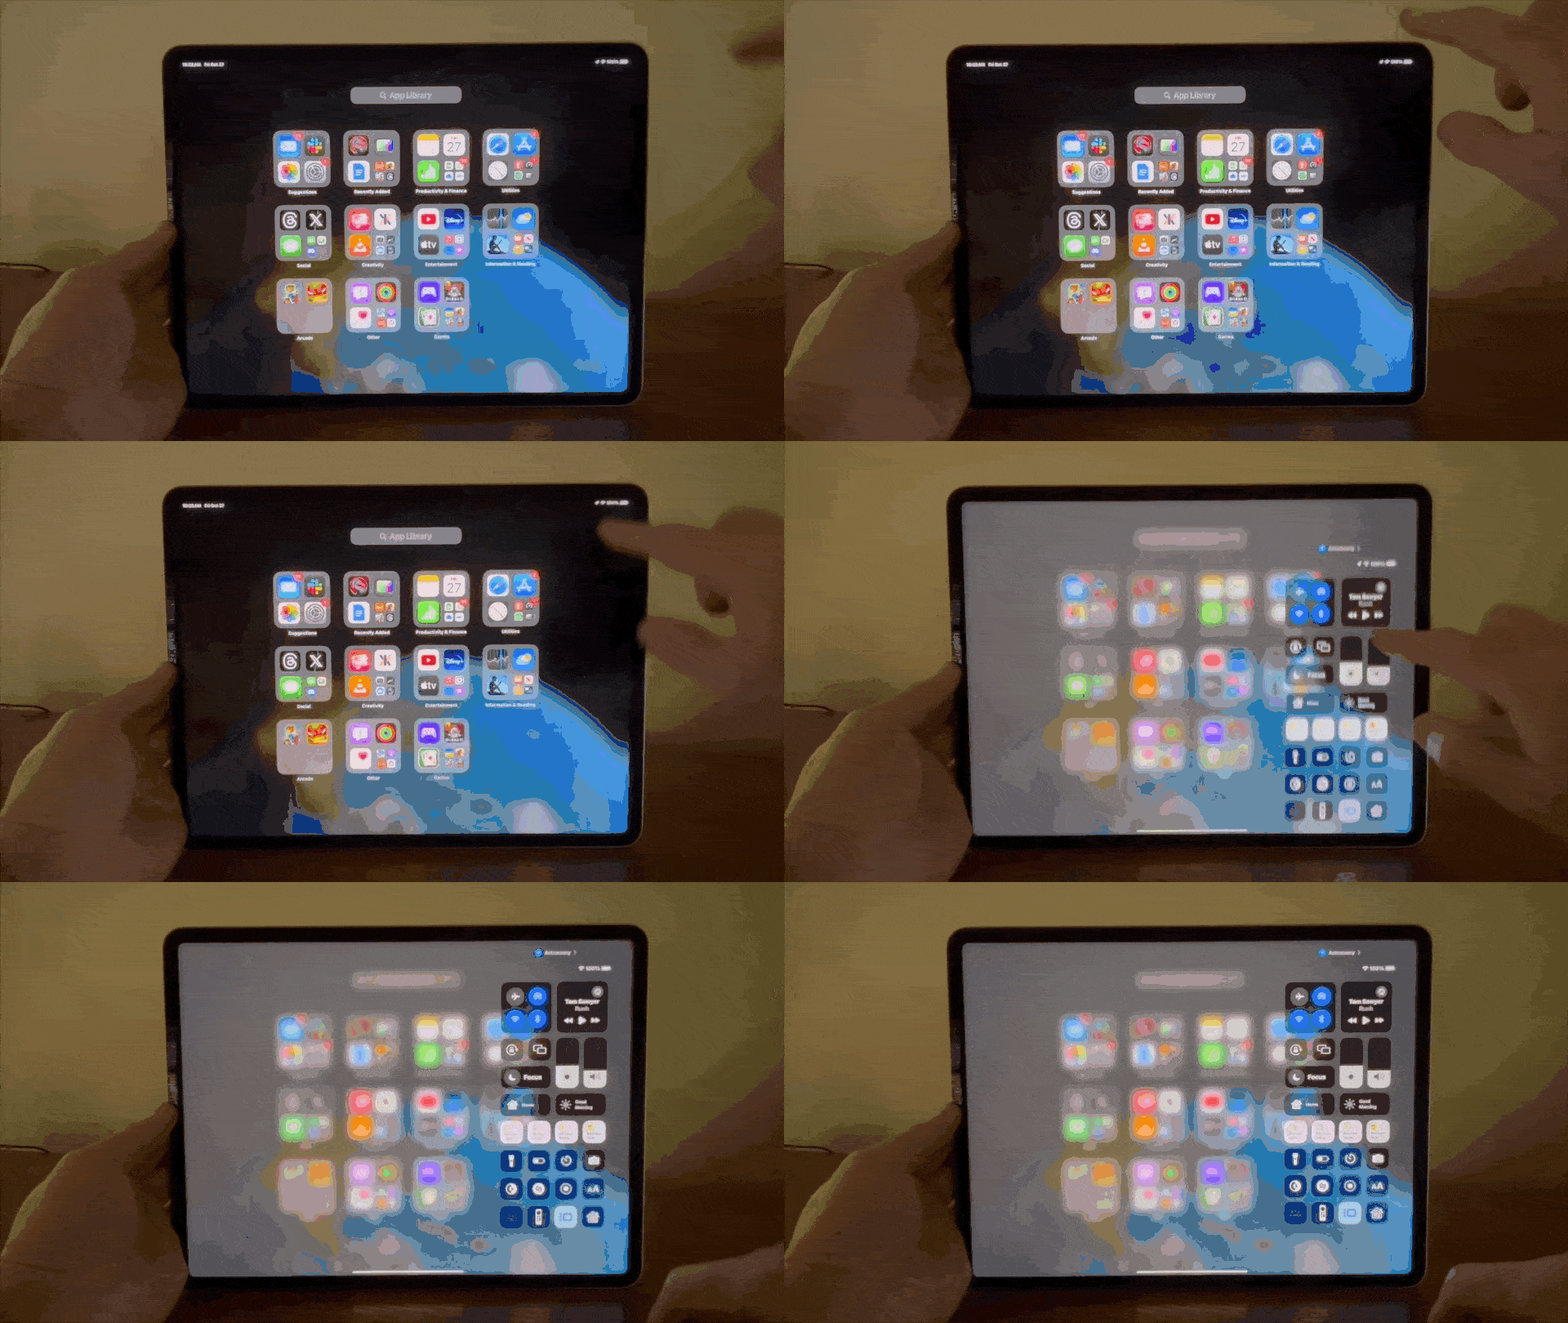
Swipe down from the top-right corner for Control Center
GIF: Ed Hardy/Cult of Mac
Swipe down from the right corner of the screen to show Control Center. Control Center has a bunch of system-wide controls.
You can customize these controls — add more, remove ones you never use — in Settings > Control Center.
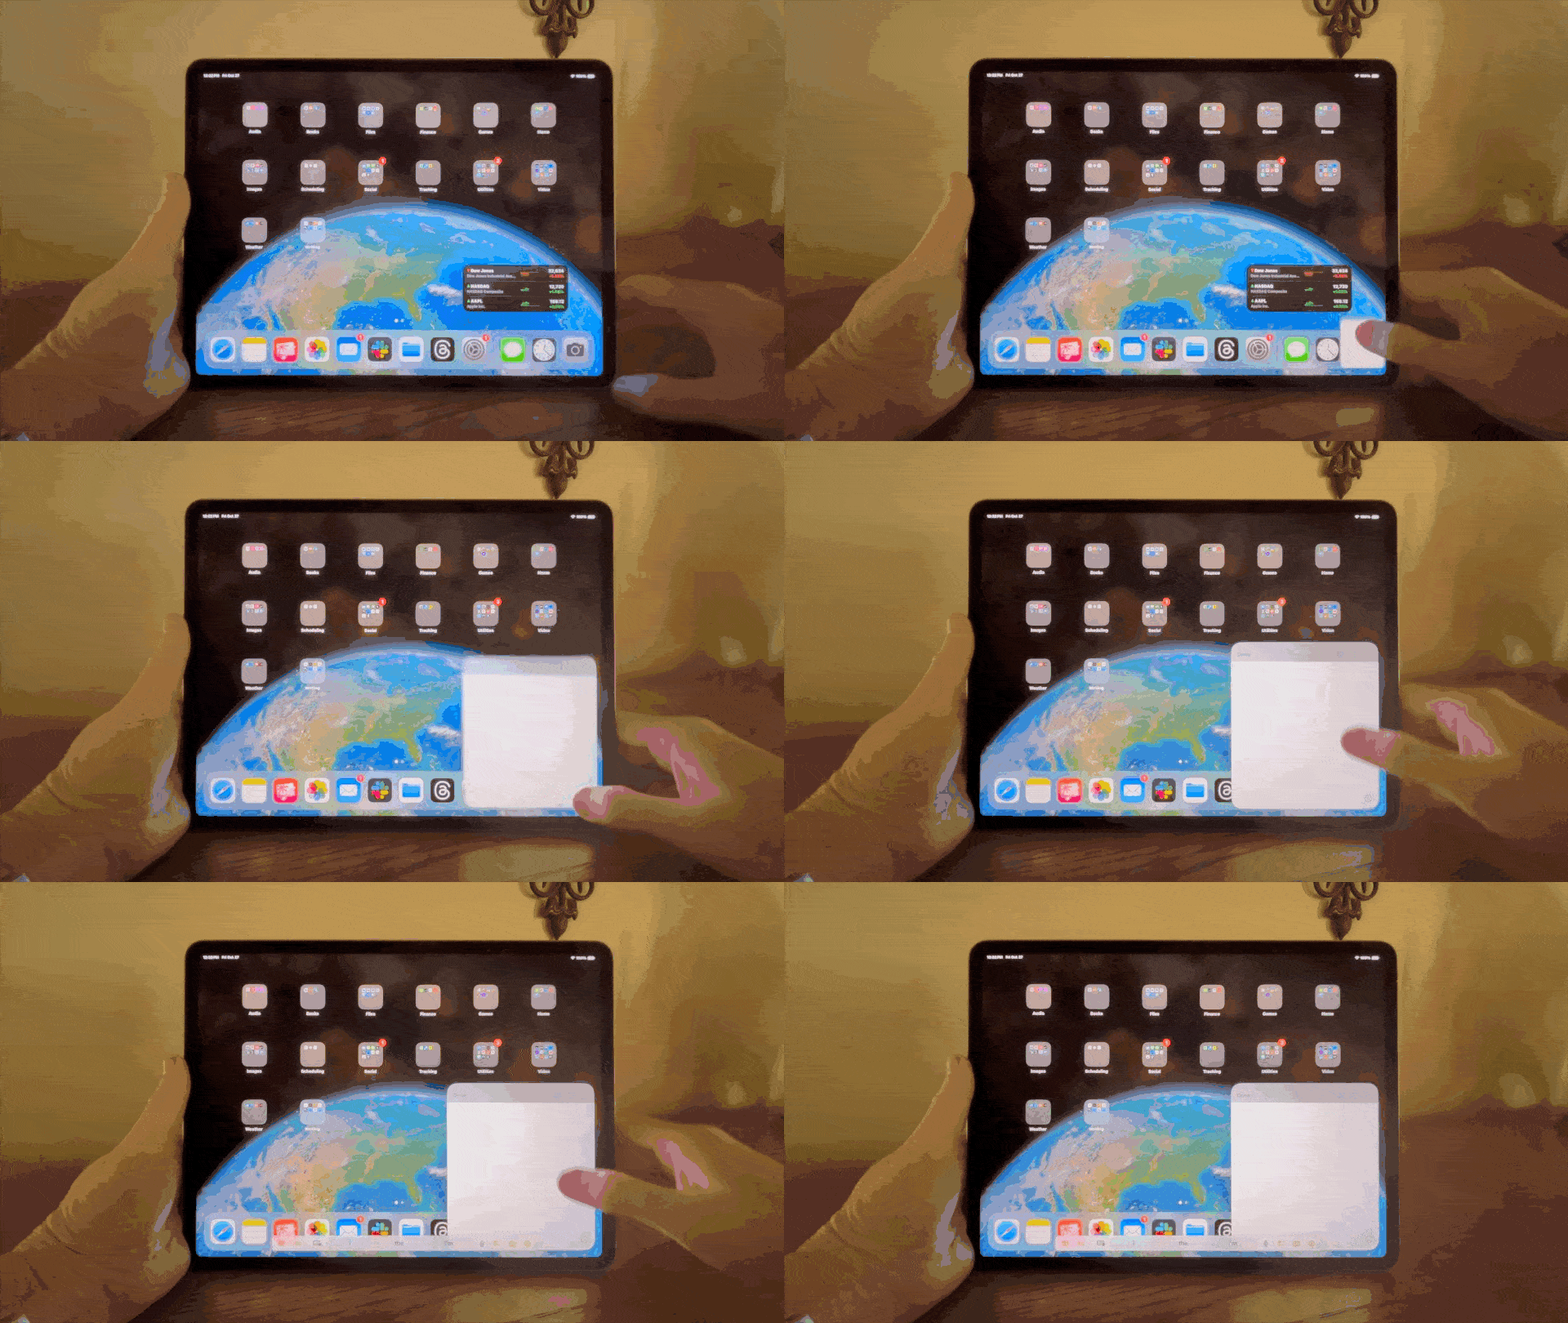
Swipe in from the bottom-right corner for Quick Note
GIF: Ed Hardy/Cult of Mac
Swipe from the bottom-right corner in towards the center of the screen to take a Quick Note. It’ll be saved in a Quick Notes folder in the Notes app. Quick Notes are great for jotting down things like shopping lists and phone numbers.
If you sometimes accidentally start Quick Notes when you don’t want to, you can turn this feature off in Settings > Notes > Corner Gestures.
Multitasking Gestures
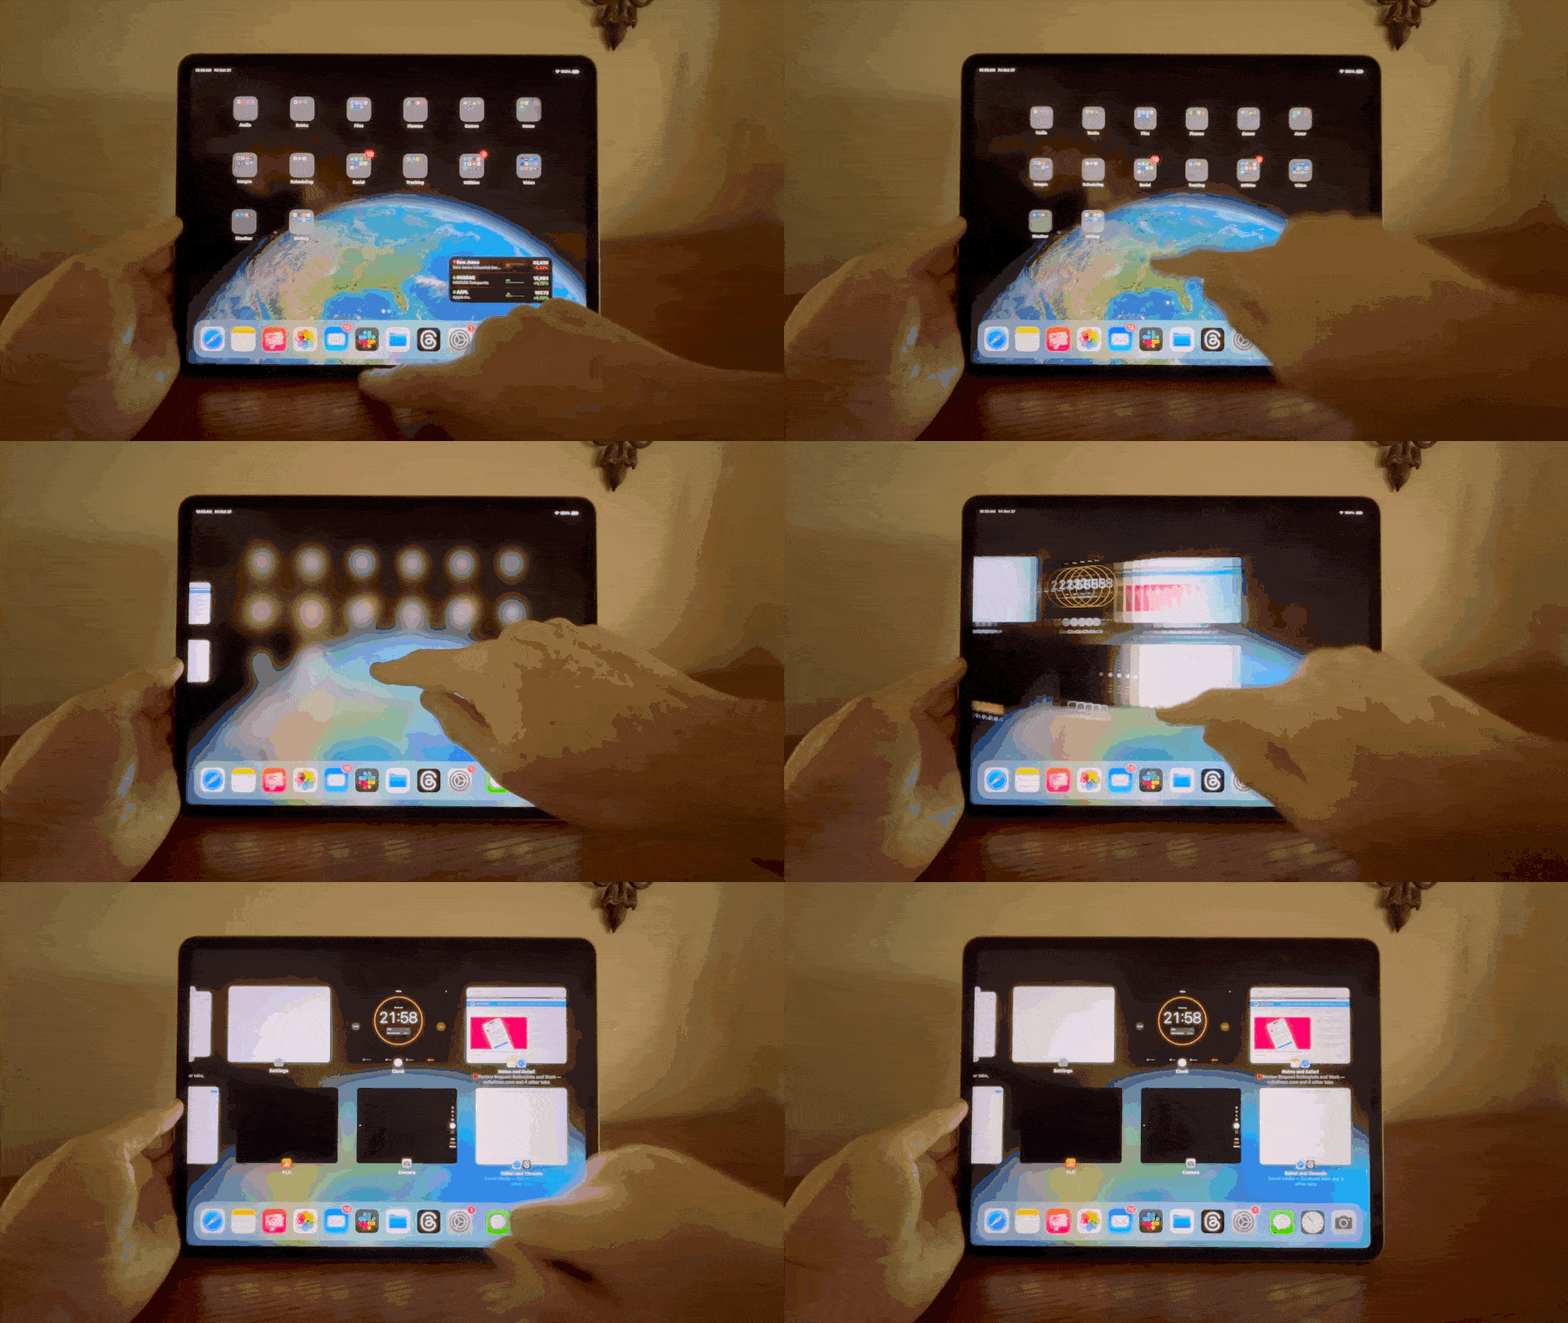
Swipe up to the middle and pause for the app switcher
GIF: Ed Hardy/Cult of Mac
With one finger, swipe up on the Home Bar, pause for a moment and let go to see all your running apps.
You can also pinch with five fingers and pause if you have Four & Five Finger Gestures enabled. I often use the app switcher to quit unresponsive apps.
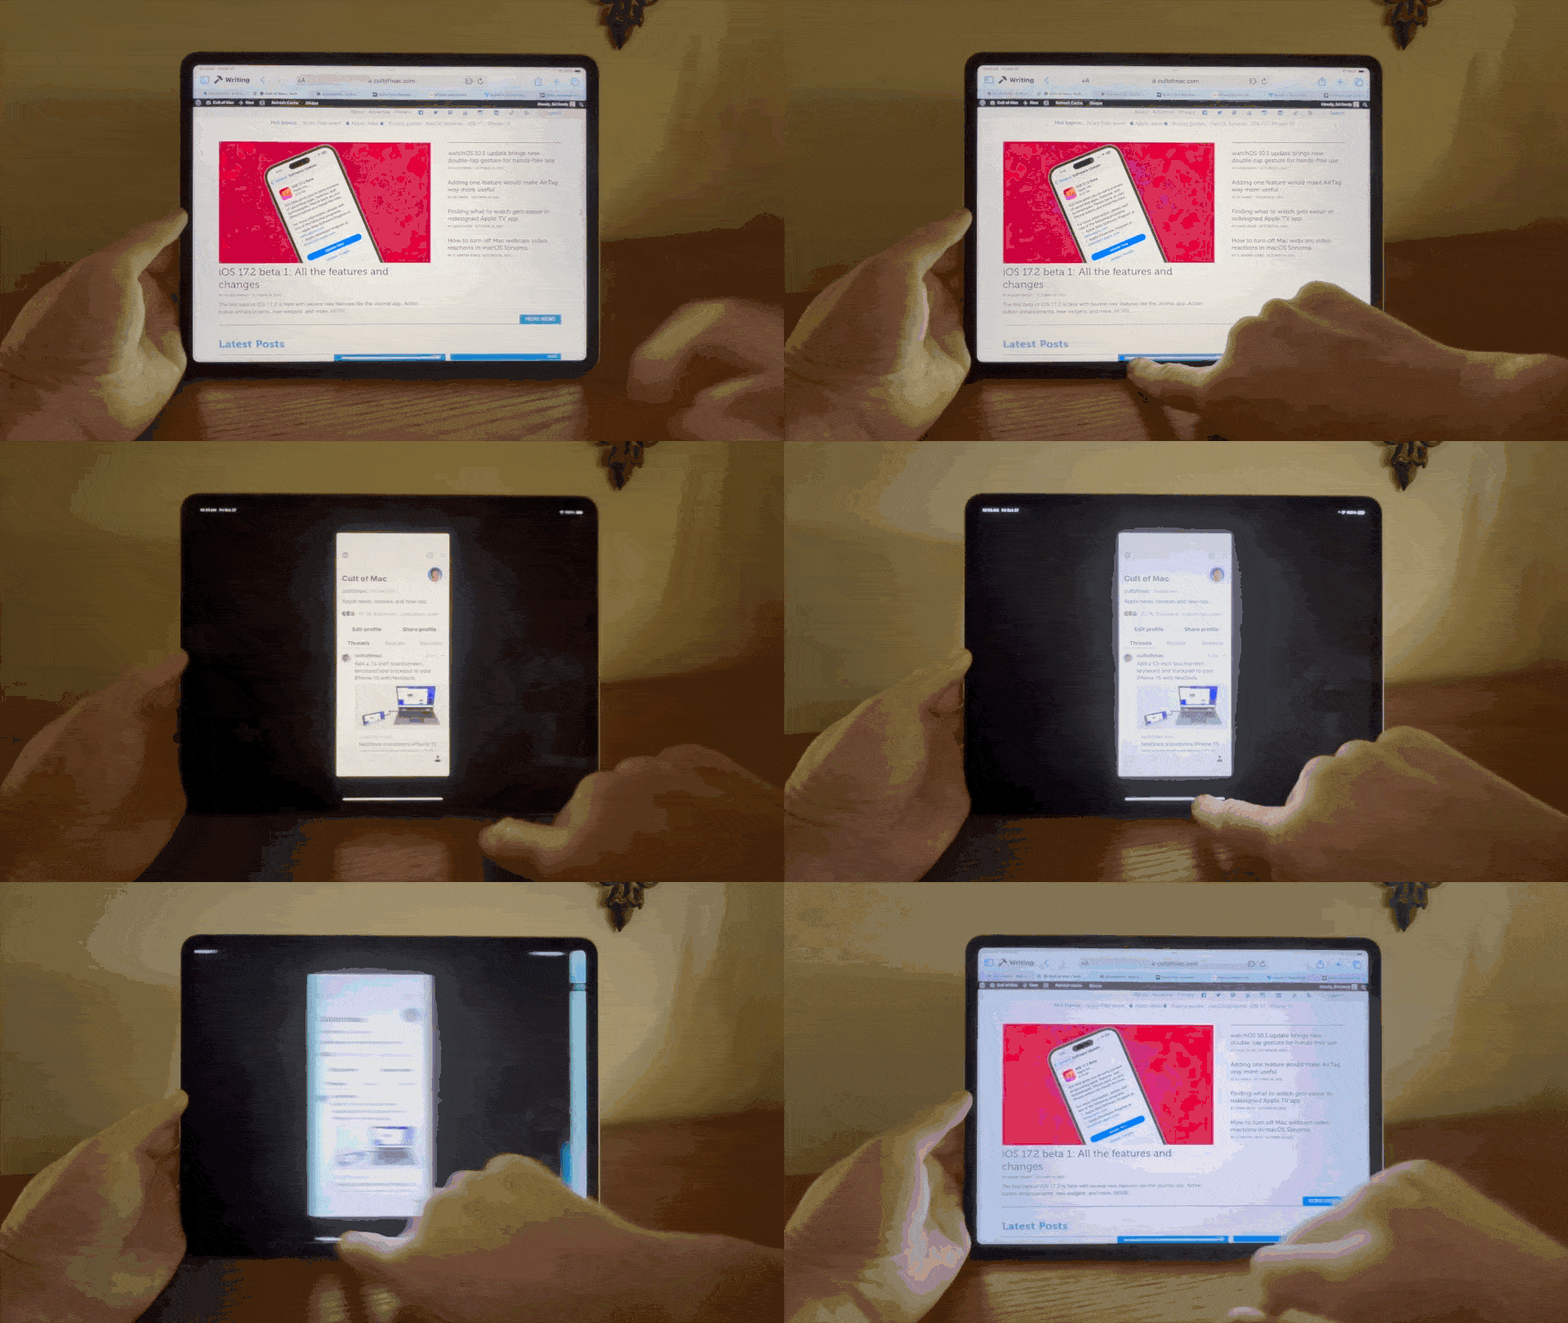
Swipe left and right to switch between recent apps
GIF: Ed Hardy/Cult of Mac
Swipe left on the Home Bar to switch to the next app over. If you’re quick enough, you can swipe right on the Home Bar to go back. This is much faster than bringing up the app switcher and tapping on another one.
You can also swipe left and right with five fingers if you have Four & Five Finger Gestures enabled. Again, go to Settings > Multitasking & Gestures.
Swipe up a little bit to show the Dock
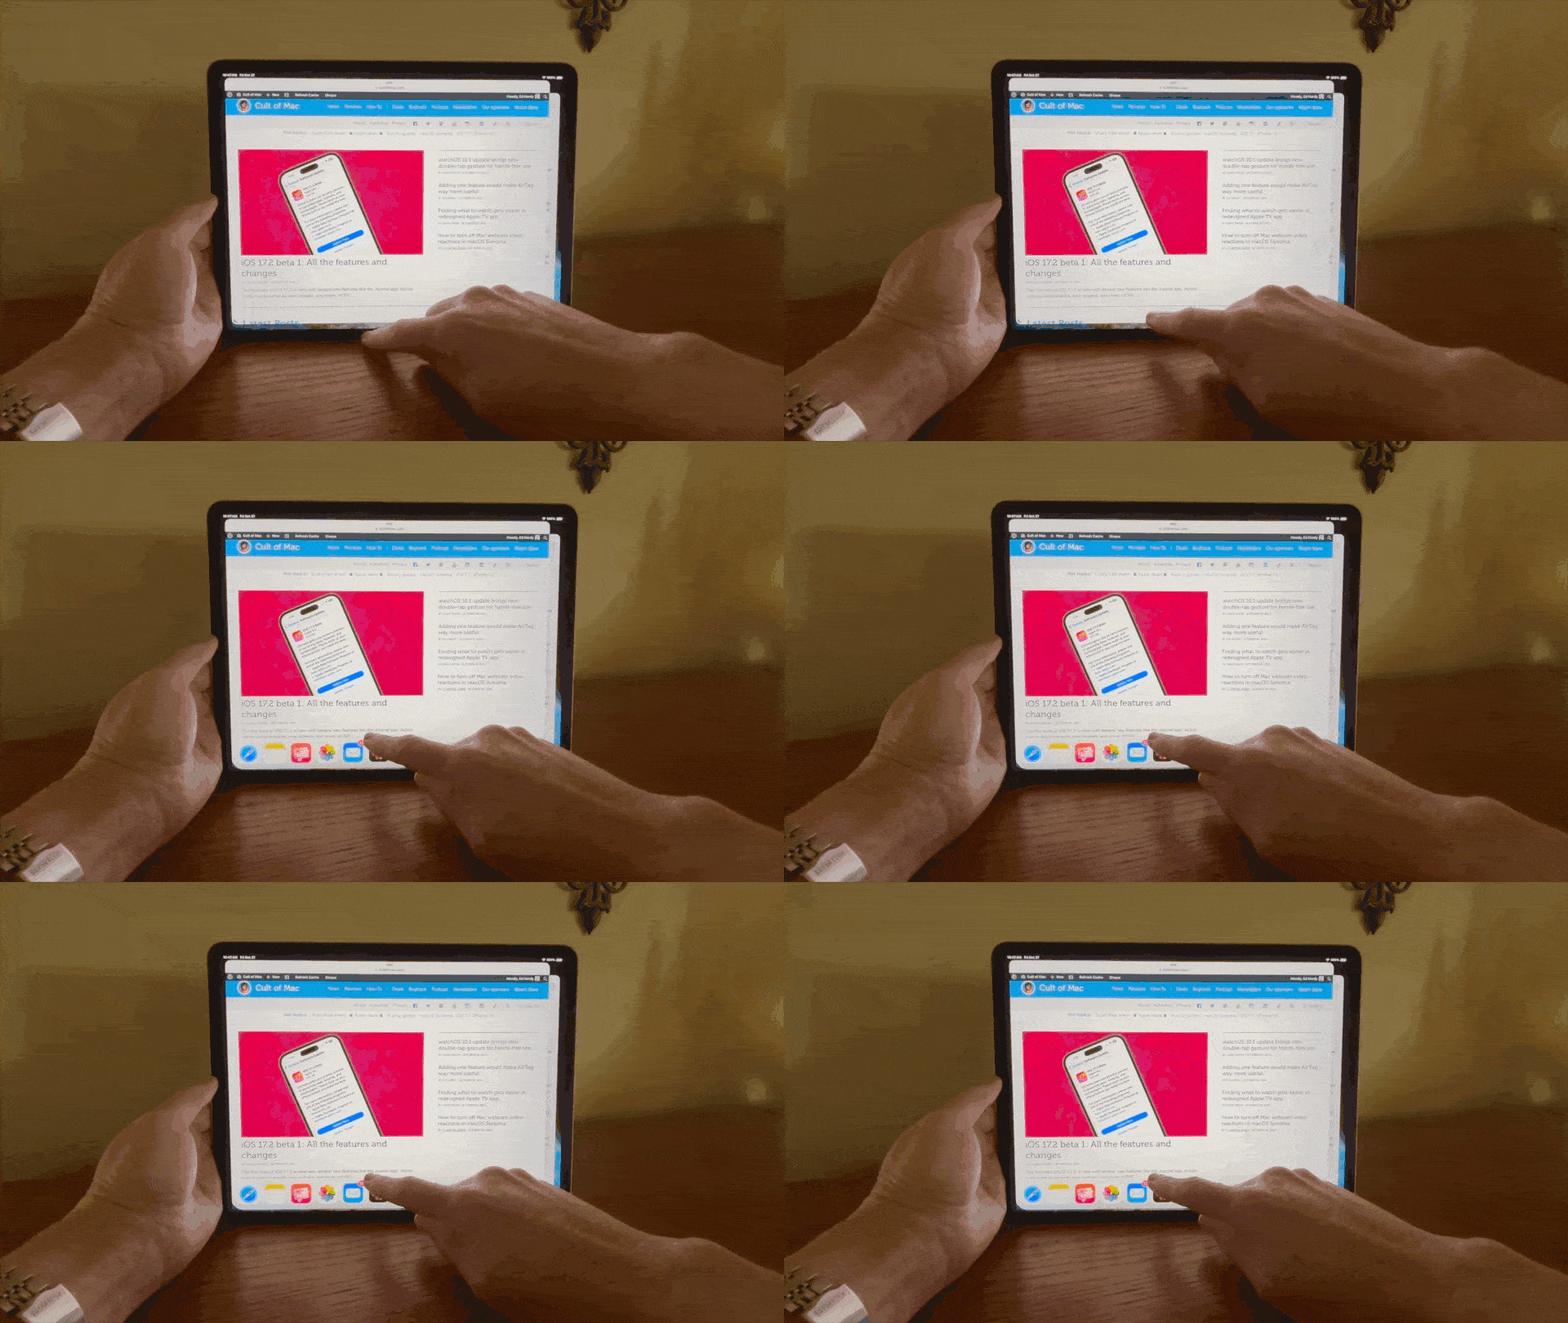
GIF: Ed Hardy/Cult of Mac
Just like before, swipe up on the Home Bar and pause, letting go as soon as you see the Dock. The Dock will stay on screen for you to tap on another app. This way, you don’t have to go all the way back to the Home Screen.
Drag an app out to open it in Slide Over
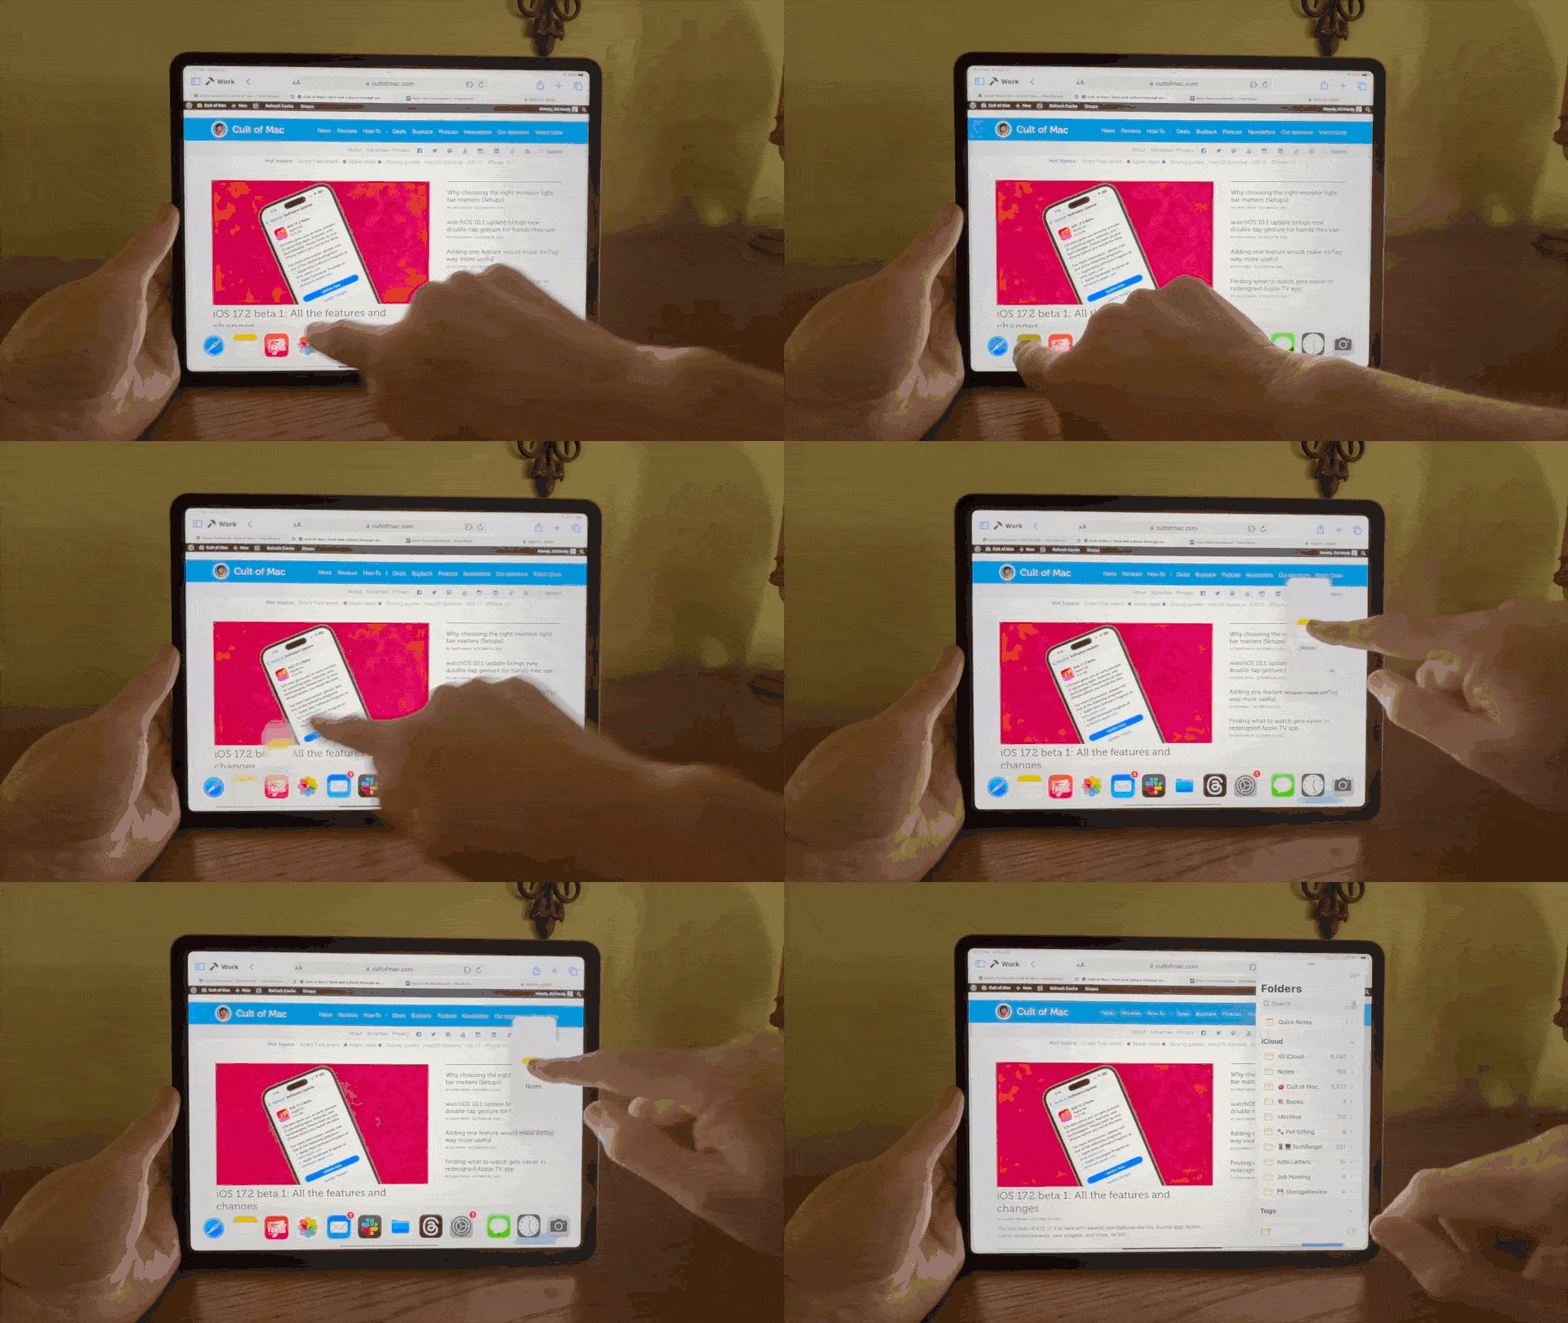
GIF: Ed Hardy/Cult of Mac
While you’re inside another app, bring up the Dock, drag an app icon out of the Dock and drop the icon in the middle of the screen to keep it in a floating window. You can also drag an app out from Spotlight search.
If you’re watching a boring TV show on your iPad, you don’t have to get out your phone — you can distract yourself on the same screen!
Swipe left and right to switch between apps in Slide Over
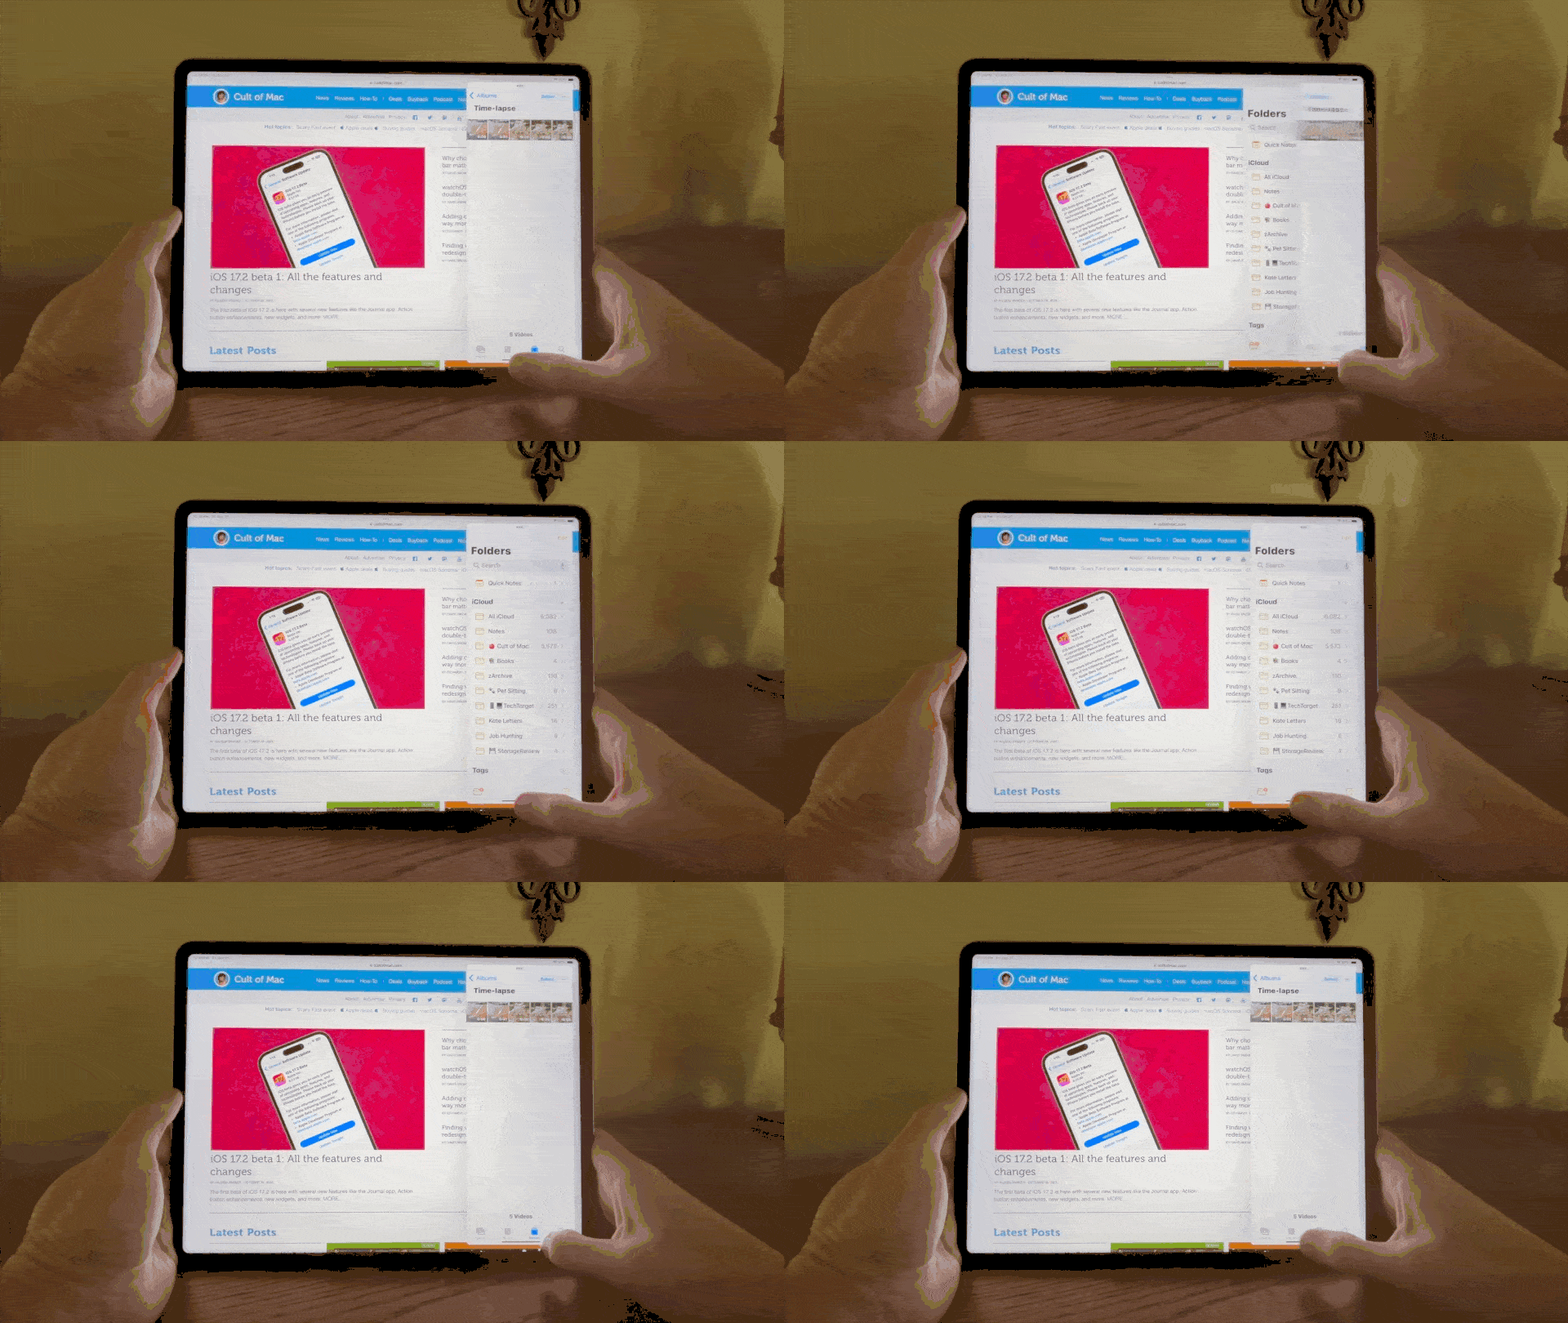
GIF: Ed Hardy/Cult of Mac
The app running in Slide Over has its own Home Bar — you can swipe left and right on that to switch between apps there, too.
Drag an app out to open it side-by-side
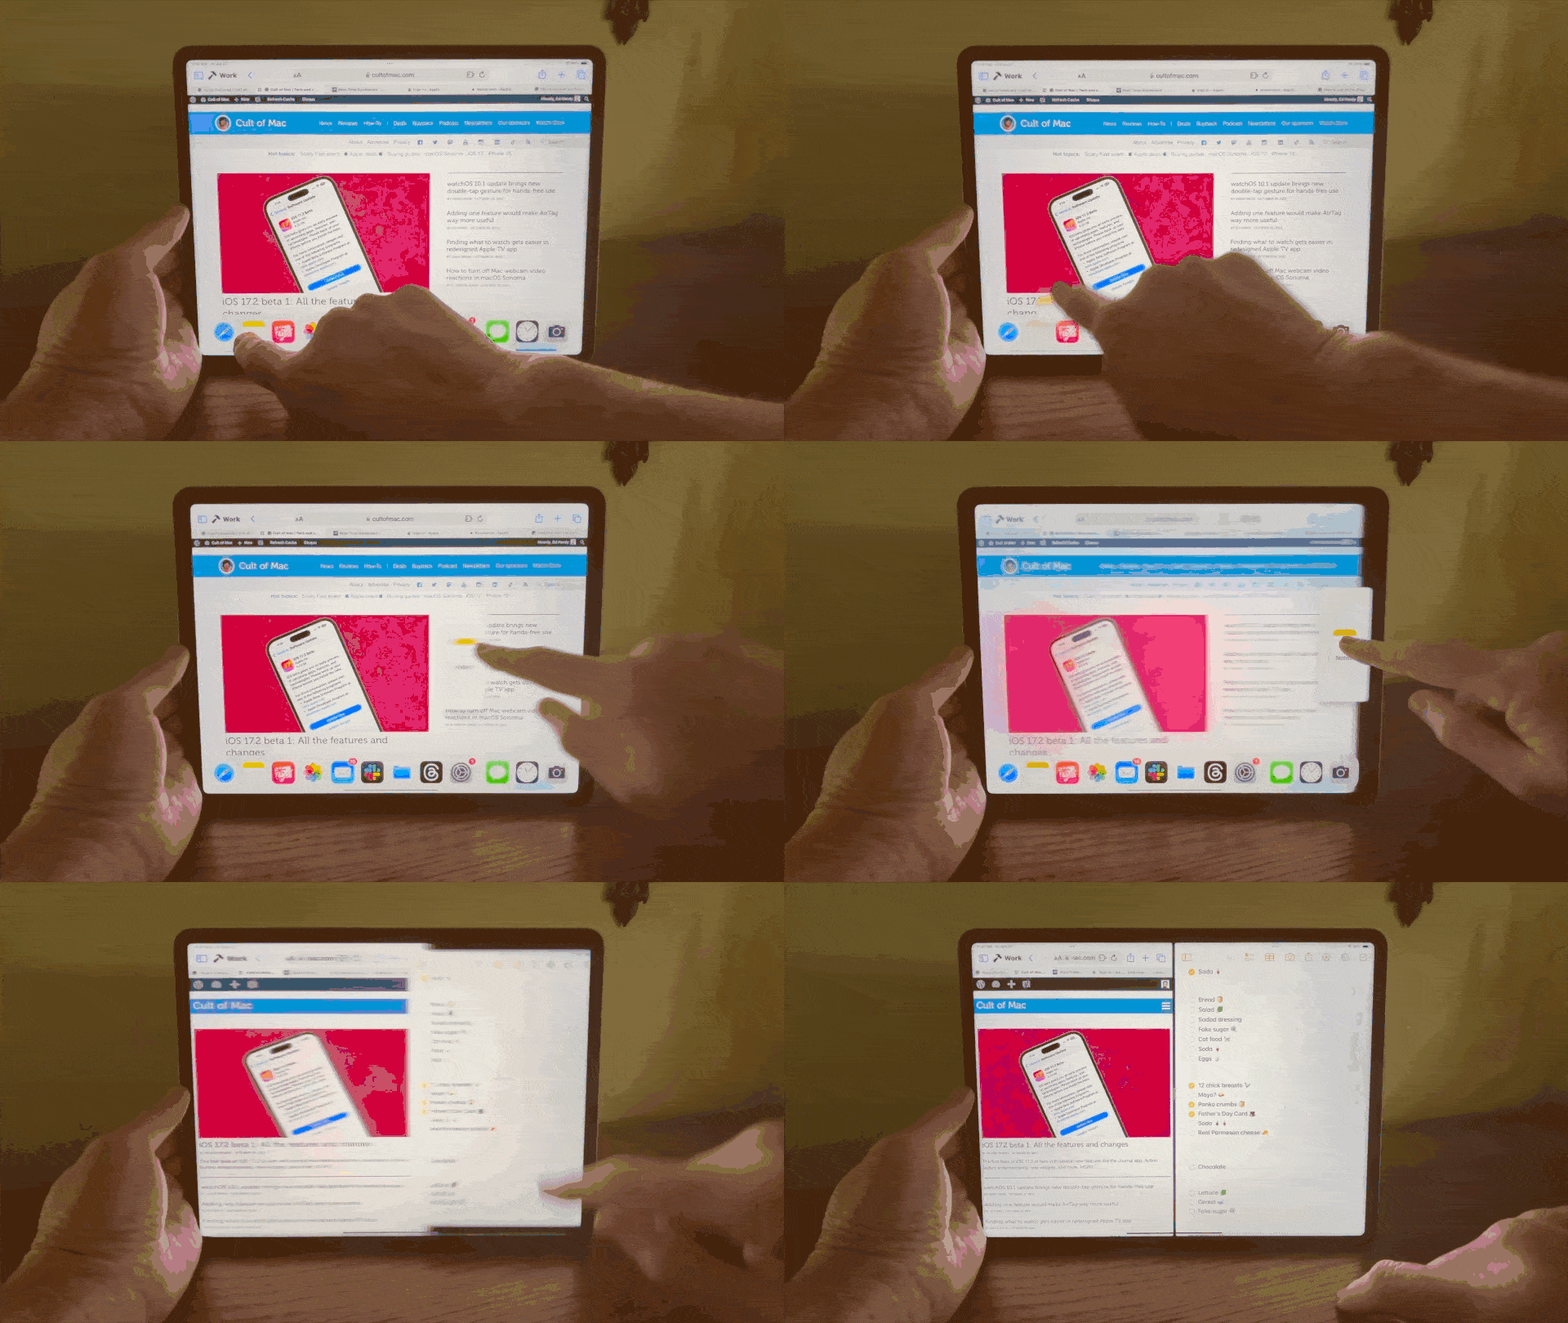
GIF: Ed Hardy/Cult of Mac
Drag an app icon out of the Dock and hold it against the right side of the screen. You should see the app resize to the left half. Let go, and both apps will be open side-by-side.
You can also drag an app out from Spotlight search.
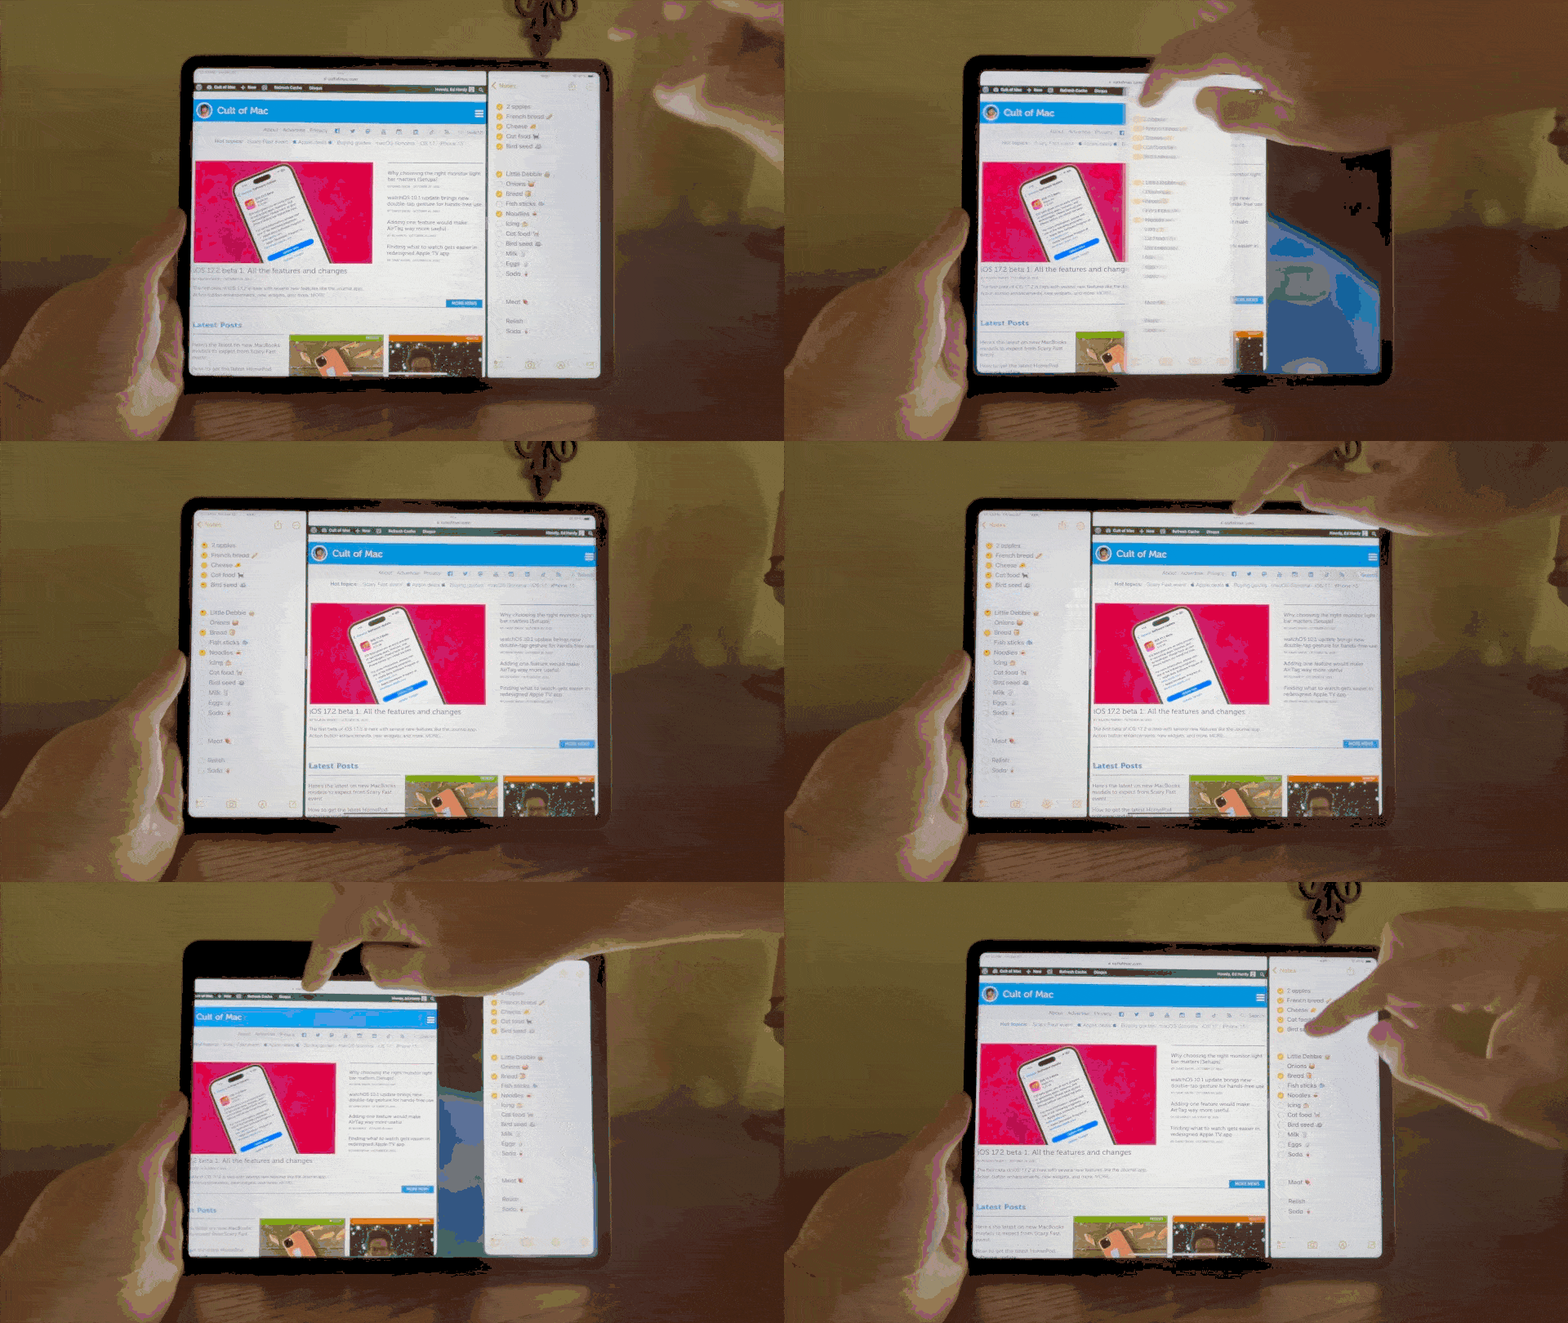
Drag an app by the three dots to move it around
GIF: Ed Hardy/Cult of Mac
On the top of the screen, each app has a little three-dot icon. That’s a grabber you can use to drag apps around. Drag the right app over to the left to switch sides; drag either one to the top center to make it full-screen again.
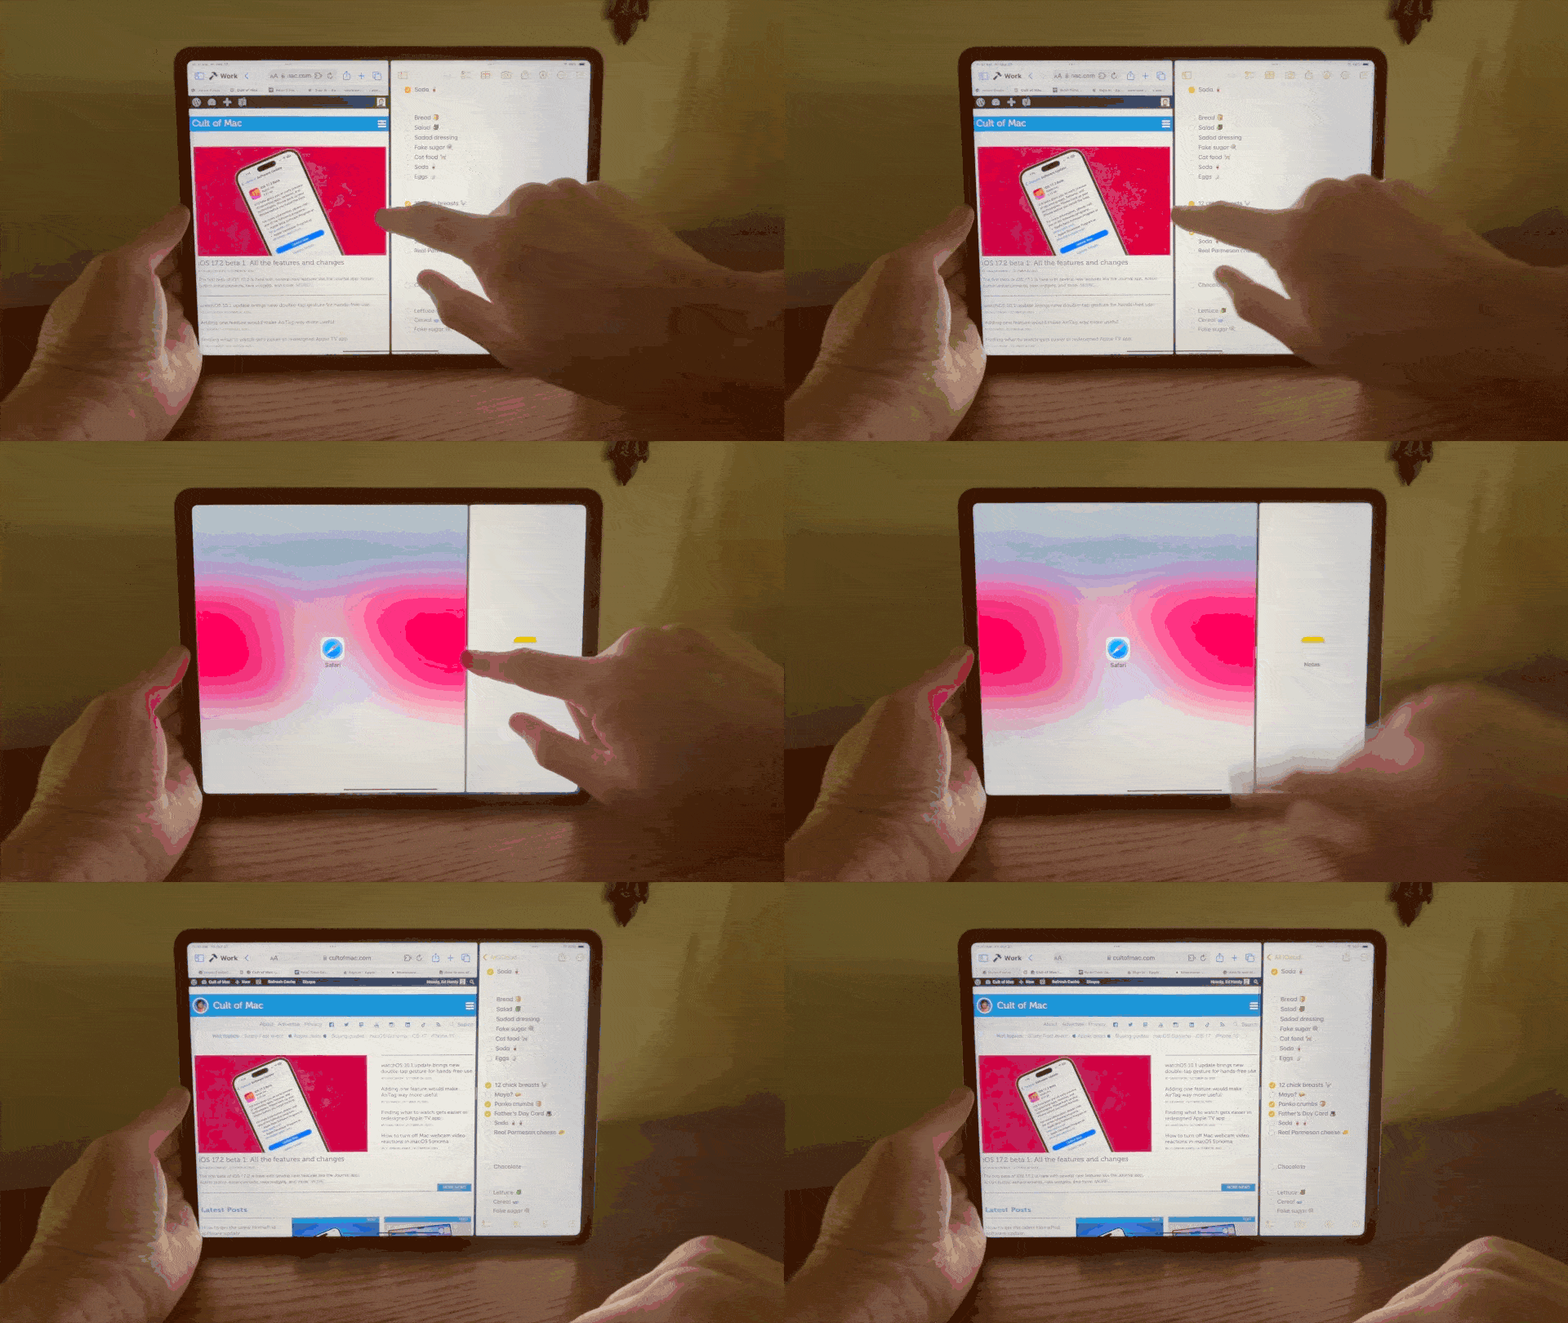
Resize the split view
GIF: Ed Hardy/Cult of Mac
Tap and hold on the black bar in the middle of the screen to resize the split view. You can adjust between a 30/70, 50/50 or 70/30 split.
Maybe you want a big Safari window and a skinny Notes window, for studying or research. You can have a big YouTube window and a small Messages window, for keeping an eye on texts while you watch.
Close an app
If you have two apps running in split view, drag the black bar in the middle all the way to the edge of the screen to put it away. If you have an app in Slide Over, drag it off-screen.
Stage Manager Gestures
Stage Manager is a separate mode on the iPad that uses free-floating app windows. If you use your iPad for serious work, it’s a great way to juggle between a bunch of tasks and apps simultaneously. On newer iPads, you can even take it a step further with an external display, keyboard and mouse for a full desktop experience.
Stage Manager is a totally different approach to multitasking, so a few of the gestures described above work a little differently — there’s no Slide Over, Split View nor Quick Note when you’re in Stage Manager.
I recommend you try out both modes and decide which one you want to stick with.
It’s only available on the higher-end models: iPad Air (5th-generation and newer), 11-inch iPad Pro, 12.9-inch iPad Pro (3rd generation and newer).
To turn on Stage Manager, open Control Center and tap the Stage Manager button (a square with three dots next to it).
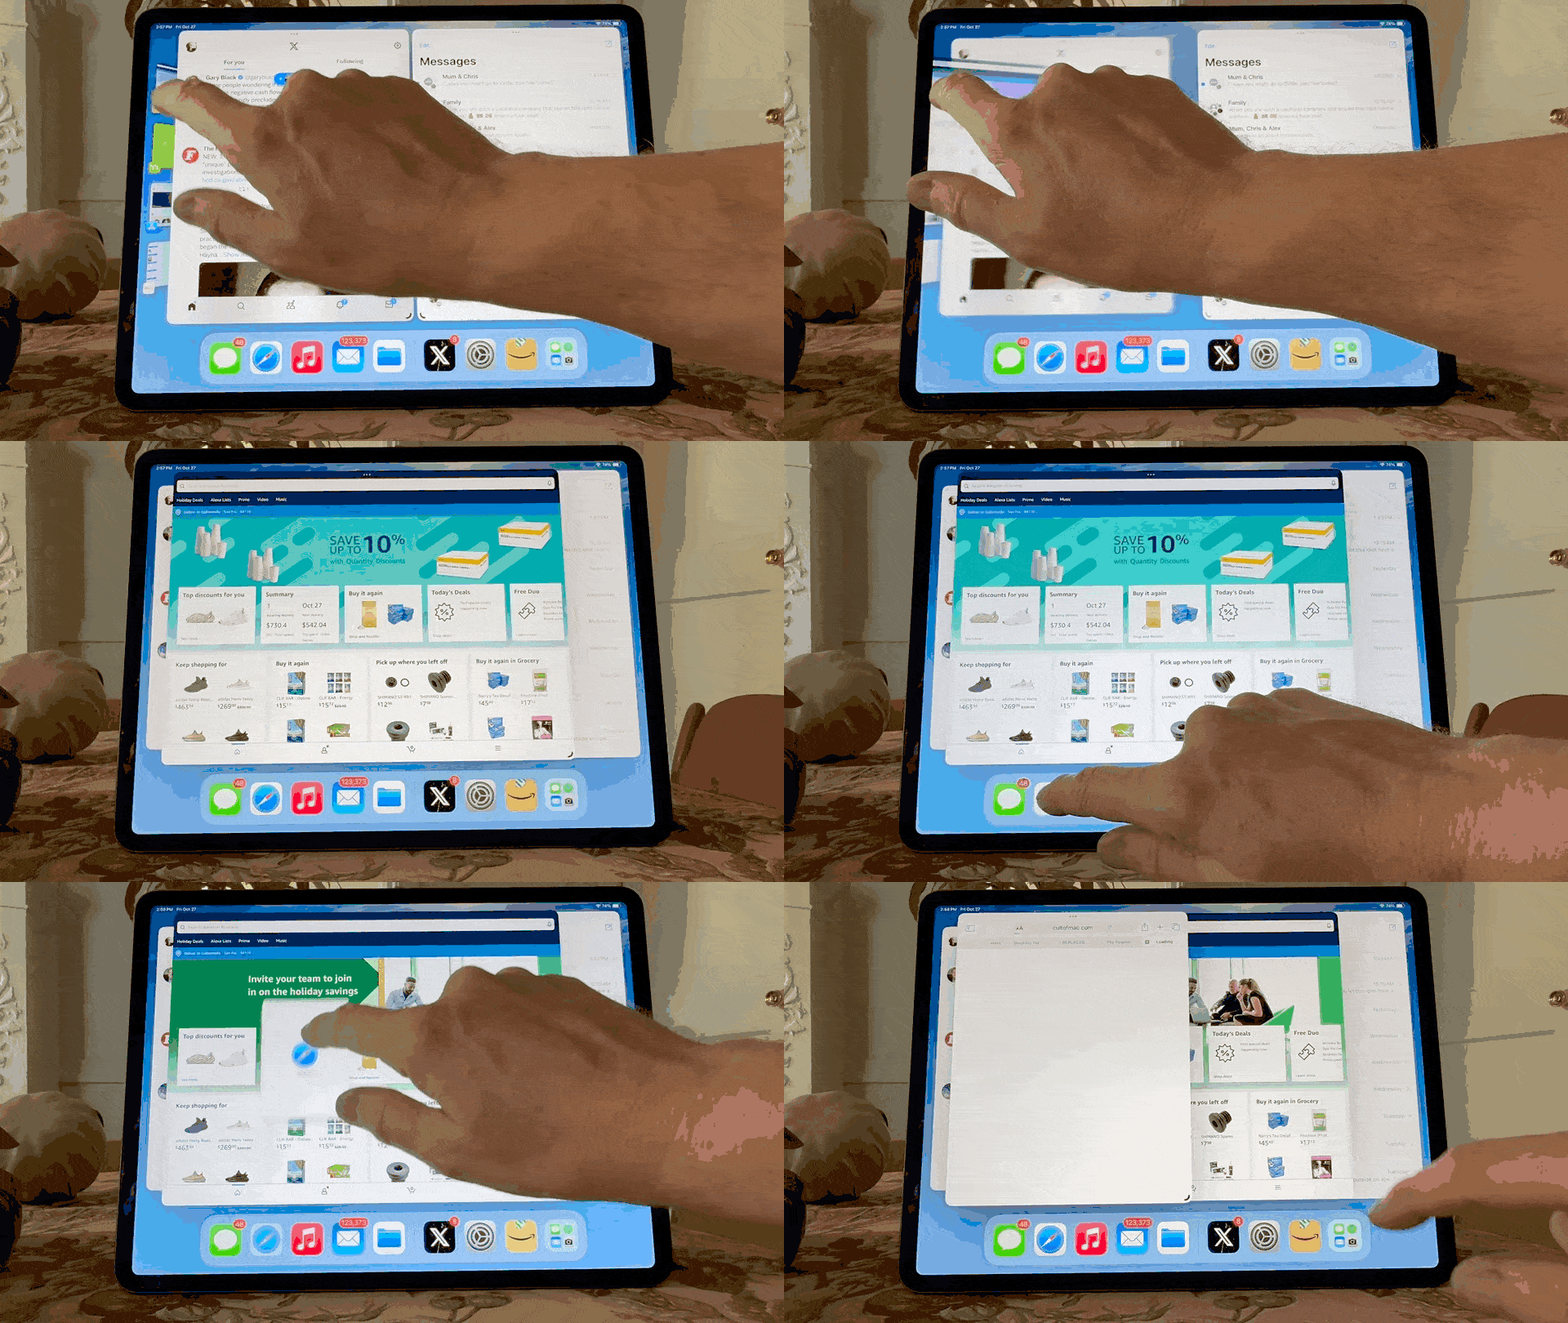
Add an app to the group
GIF: Leander Kahney/Cult of Mac
With Stage Manager, you can group multiple windows together. Add another window to the group by dragging a window from the stack on the left or dragging an icon in from the Dock.
You can also go to the app switcher and hold on a window to add it to the group.
If you have a hard time getting the gesture to work, you can also tap the ⋯ menu in the top and hit Add Another Window. You can just pick one.
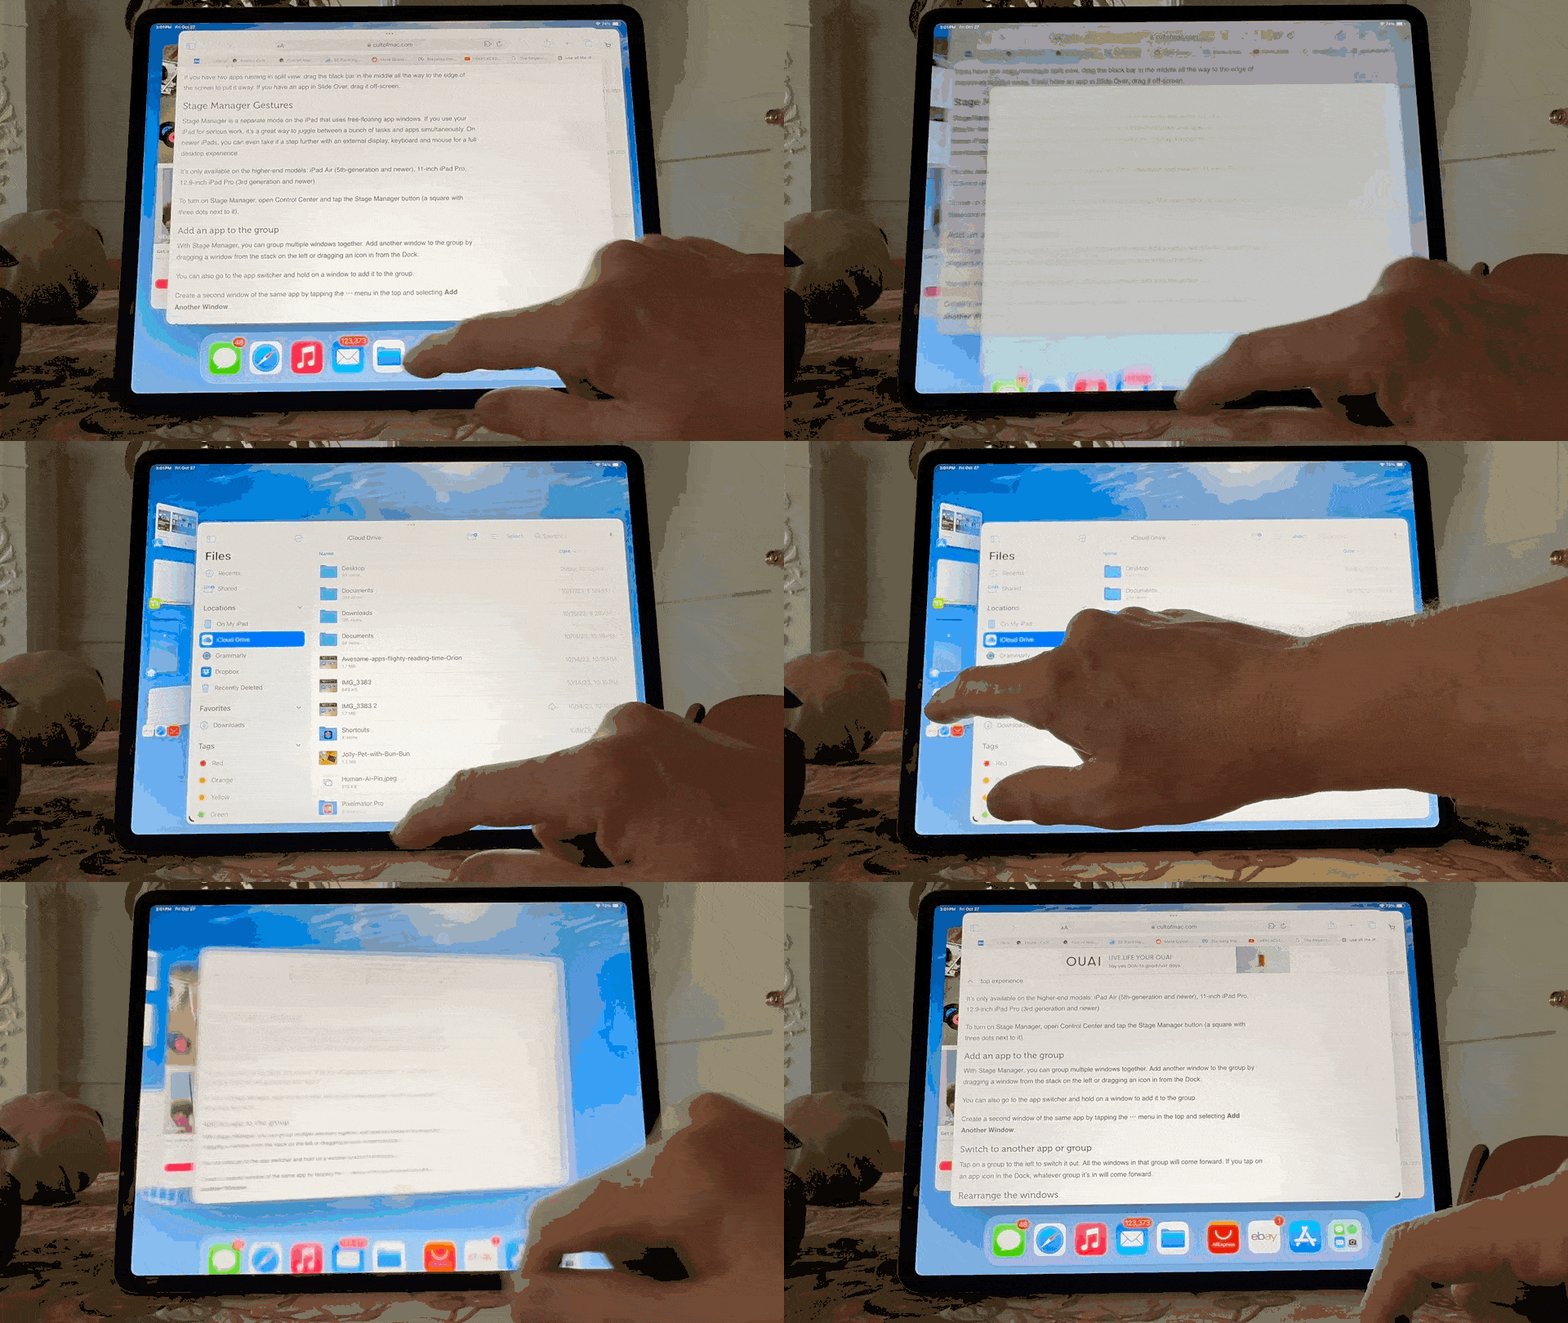
Switch to another app or group
GIF: Leander Kahney/Cult of Mac
Tap on a group to the left to switch it out. All the windows in that group will come forward. If you tap on an app icon in the Dock, whatever group it’s in will come forward.
Rearrange the windows
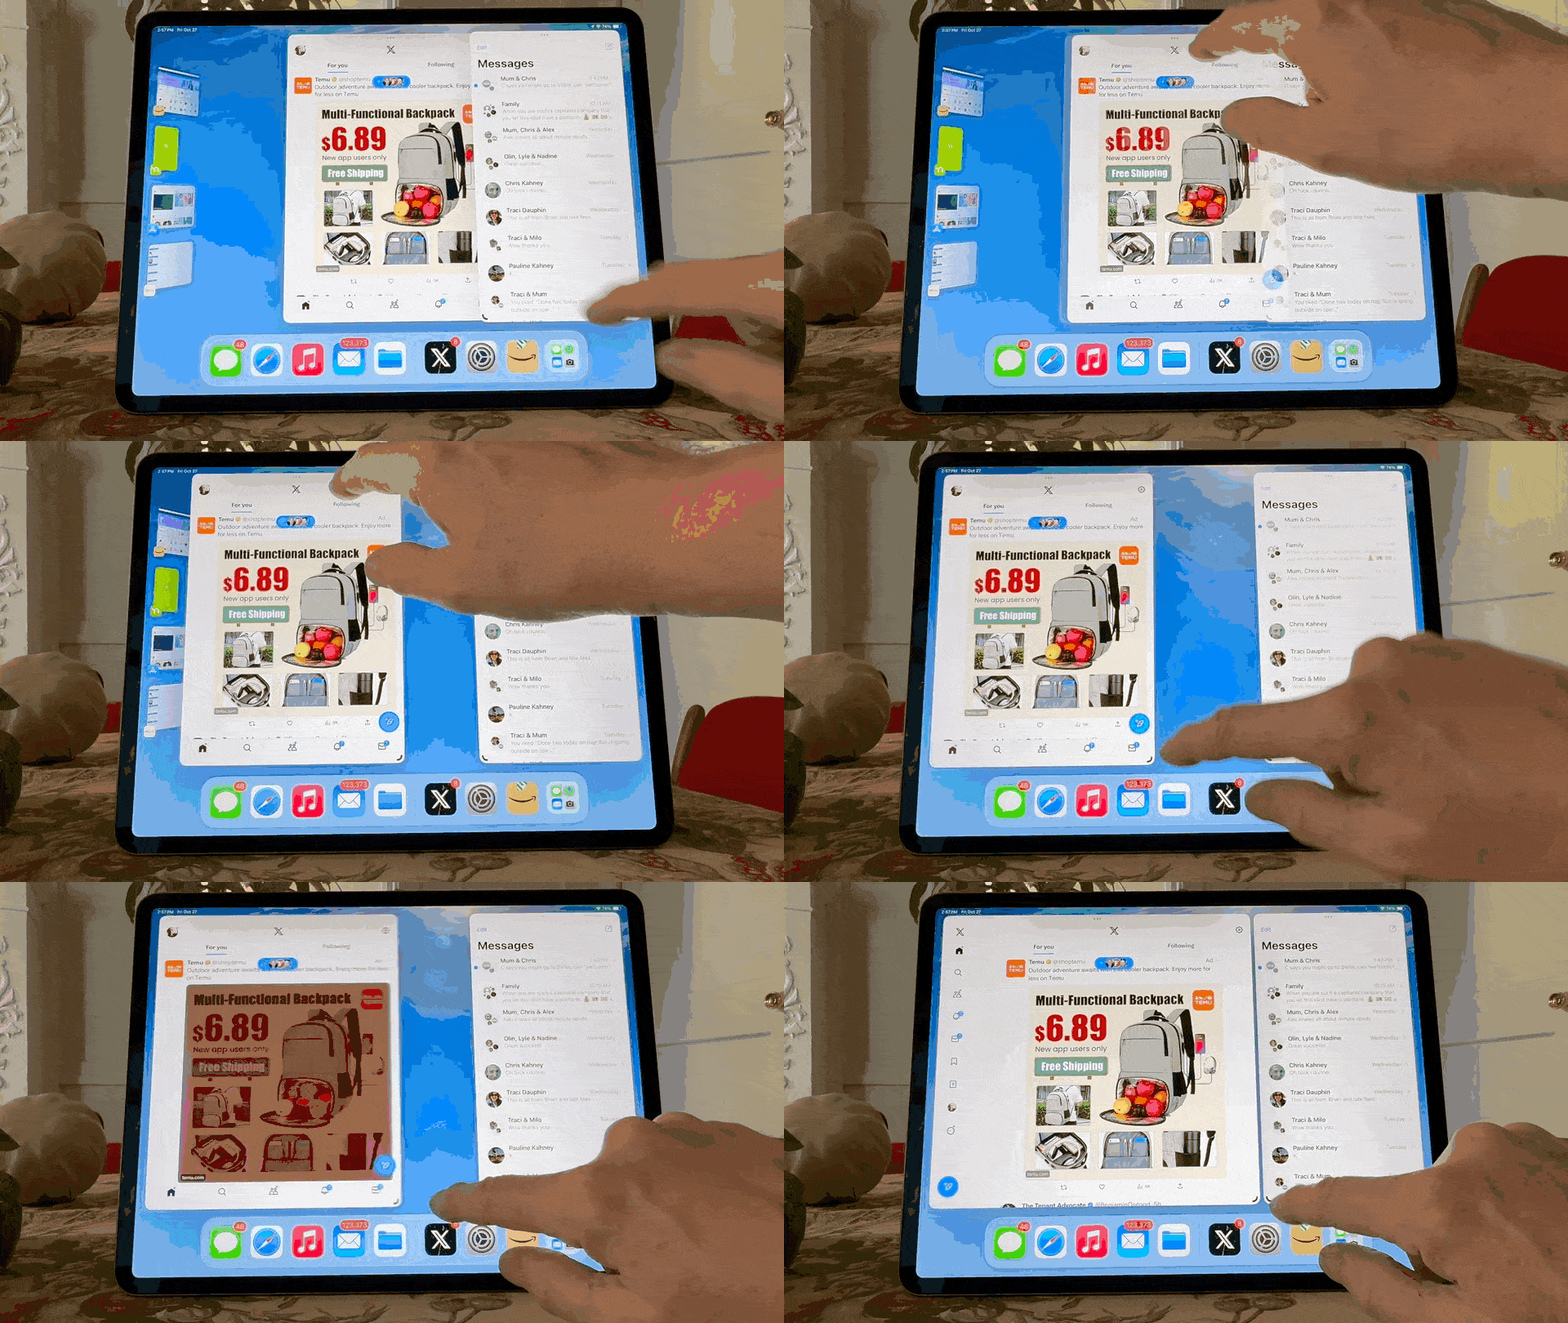
GIF: Leander Kahney/Cult of Mac
Tap and drag an app by the top titlebar to move it around. Other apps on-screen may shuffle around so that they aren’t ever totally hidden.
Resize a window
Drag the bottom corner of an app (whichever side has the rounded grab handle on it) to resize it.
If an app is covering up the Dock or the stacks of windows to the left, you can always drag in from the edge of the screen to show them again.
Get more out of your iPad
Be sure to check out our other articles on power features on your iPad:

