Quick Links
- 4 Ways to Get Rid of Windows 11’s Tips and Suggestions Notifications
Key Takeaways
- To turn off Tips and Suggestions notifications, open the Settings menu and navigate to Notification > Tips and Suggestions. Then, uncheck the box next to “Get tips and suggestions when using Windows.”
Tips and Suggestions notifications offer suggestions and guidance to improve your overall experience on a Windows 11 PC. However, if they keep popping constantly, it may interrupt your workflow. Here’s how you can turn off Tips and Suggestions notifications.
4 Ways to Get Rid of Windows 11’s Tips and Suggestions Notifications
If your Windows 11 PC is hindering your workflow by regularly sending different tips and notifications, here are four ways to disable it.
1. Using System Settings
The easiest way to disable the Tips and Suggestions notifications is through the Settings app.
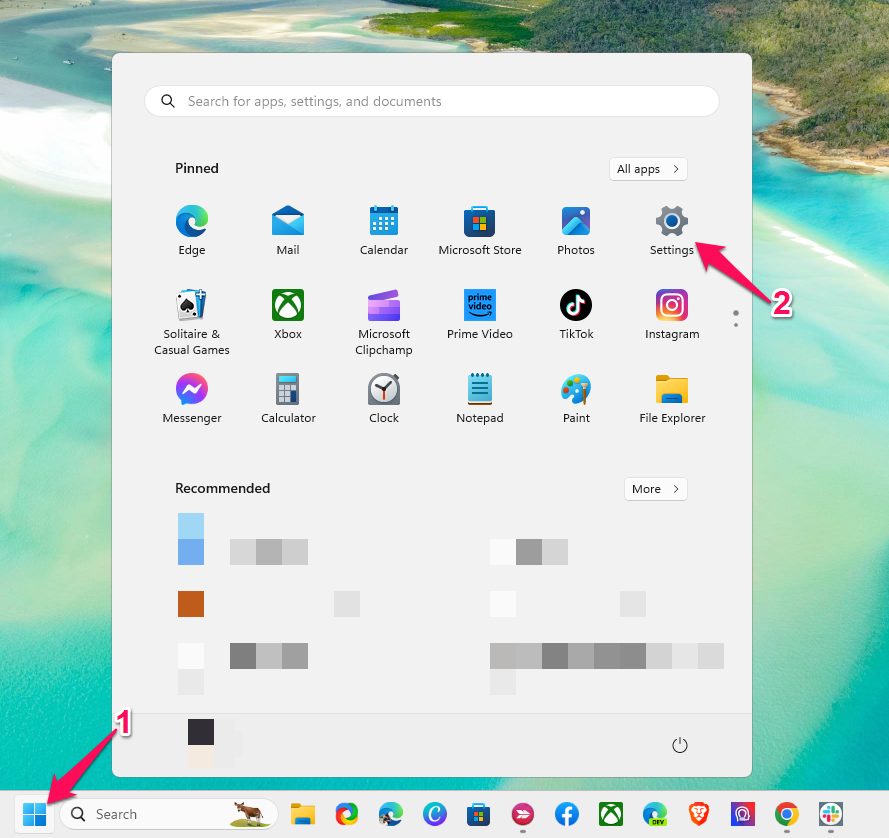
Press the “Start” button and click on the “Settings” icon, or simply click the Windows+i key combination to open the Settings app.
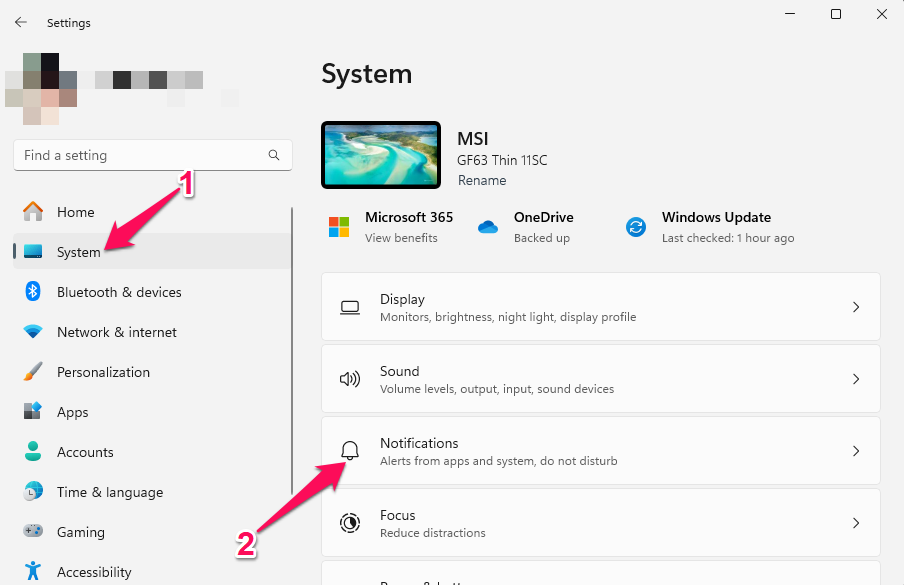
Choose “System” from the left sidebar and select “Notifications” in the right pane.
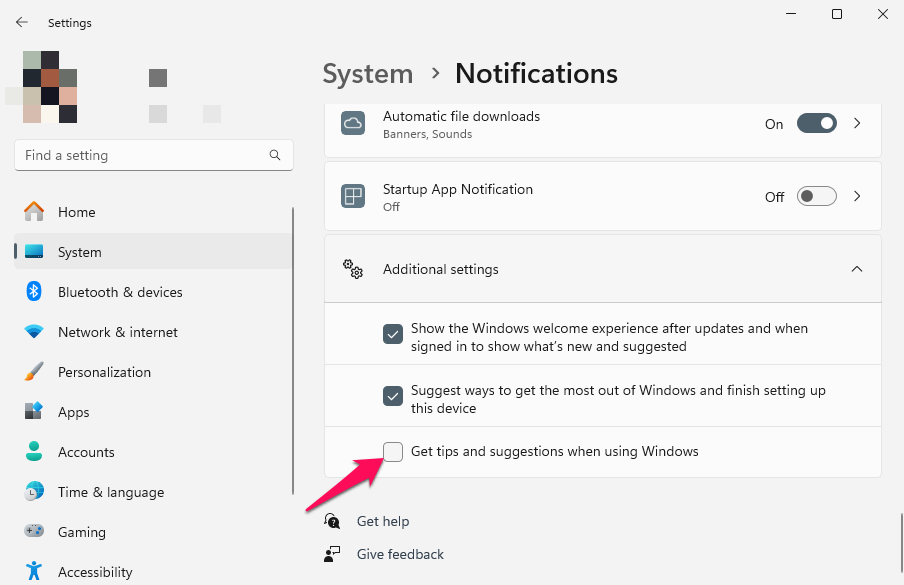
Then, scroll down and expand the “Additional settings” section.
Here, uncheck the box beside “Get tips and suggestions when using Windows.”
Tips and Suggestions will now be disabled on your Windows PC. To re-enable this feature, follow the same steps and check the option beside the Get tips and suggestions when using Windows box.
2. Using the Group Policy Editor
If disabling Tips and Suggestions using the Settings app didn’t work, you can try doing it by making some changes in the Group Policy Editor. Here are the steps to do it.
To do so, press the Windows+R key combination to open Run tool box, type “gpedit.msc” and hit “Enter.”
In the Registry Editor, navigate to the following path:
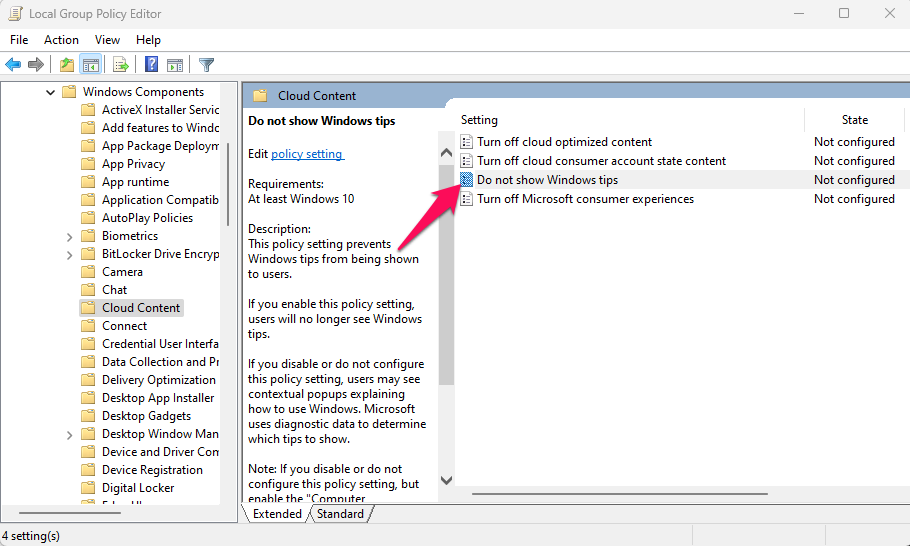
Computer Configuration > Administrative Templates > Windows Components > Cloud Content
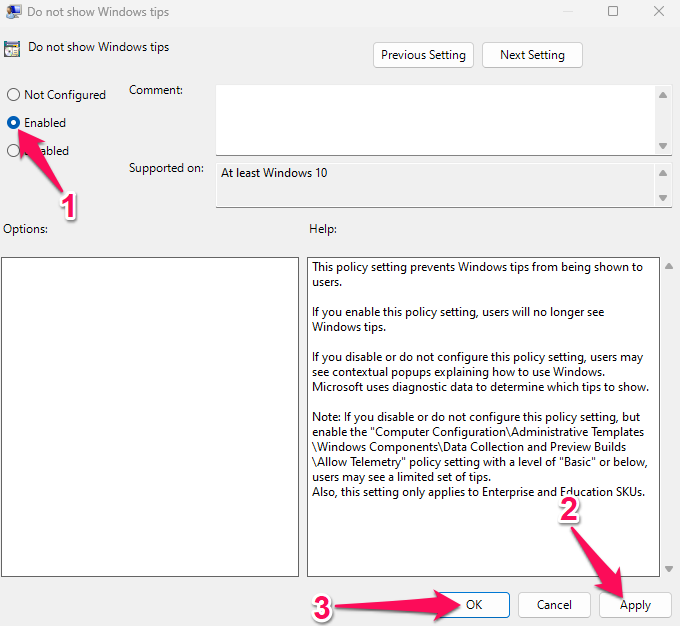
In the right pane, double-click on the “Do not show Windows tips” policy.
Choose “Enabled” from the Do Not Show Windows Tips properties window that pops up. Lastly, click on “Apply” and then “OK” to save the changes.
Do note that you’ll need to restart your device for the changes to finally kick in. To revert the changes, follow the same steps and select Disabled.
3. Using the Registry Editor
You can also permanently disable the Tips and Suggestions feature by making some modifications in the Windows Registry Editor.
This method is slightly more technical than the others. Therefore, make sure you create a restore point before editing the registries. This is because a small mistake with the registries can end up crashing your device. By creating a restore point, you’ll be able to restore Windows settings if things go wrong.
To proceed, press Windows+R to open Run tool box, type “regedit” and hit “Enter.”
Click “Yes” to the User Account Control that appears.
Now, in the Registry Editor, navigate to the following path:
HKEY_LOCAL_MACHINE\SOFTWARE\Policies\Microsoft\Windows\CloudContent
If the CloudContent key isn’t present, you’ll have to create a new one. To do so, right-click on the “Windows” folder, select New > Key and name it “CloudContent.”
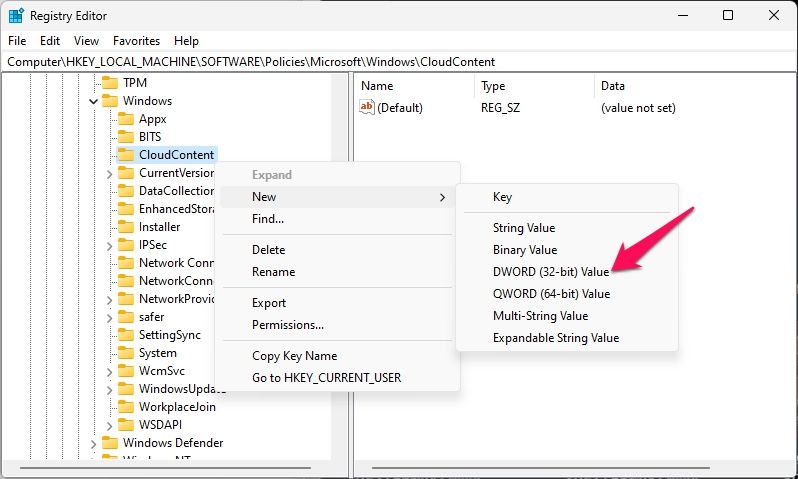
Next, select the “CloudContent” folder, right-click on the empty space in the right pane, and select New > DWORD (32-bit) Value.
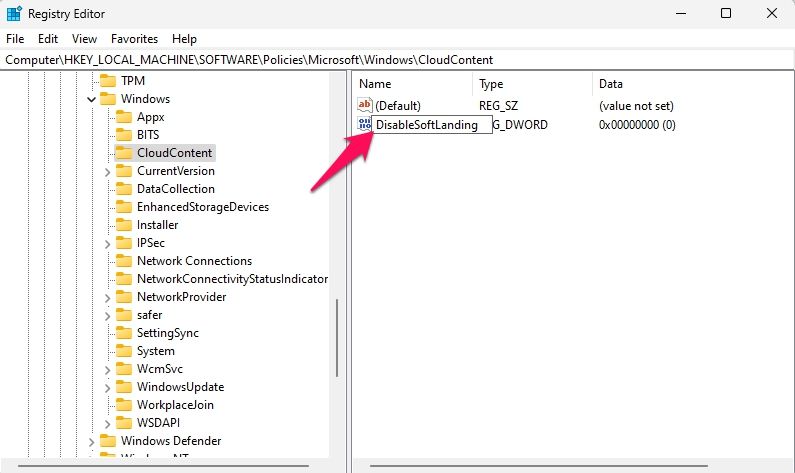
Name the newly created DWORD value as “DisableSoftLanding” and hit “Enter” to confirm.
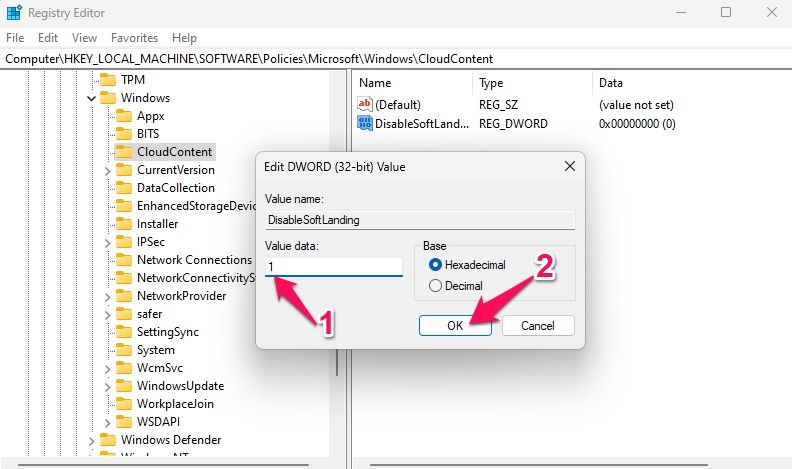
Double-click the “DisableSoftLanding” value, type “1” under Value data, and click on “OK.”
Close the Registry Editor and restart your device for the changes to take place.
Once your device reboots, Tips and Suggestions Notifications will be disabled on your Windows 11 device. To re-enable it, set the Value data to 0.
4. Using a REG File
If editing the Registry Editor is too technical for you, try disabling the Tips and Suggestions notifications by creating a Windows REG file. A REG file, also known as a Windows Registry File, is a text-based file created by exporting values from the Registry. This file can also be used to add or change values in the Registry.
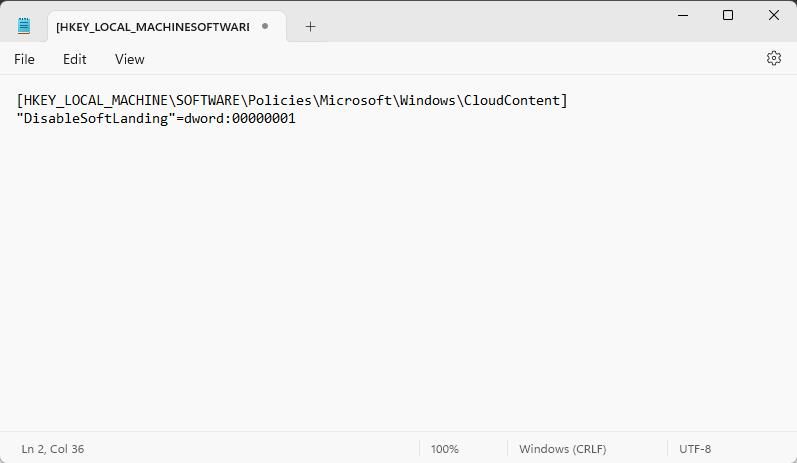
To do so, open a new Notepad document. Paste the following code into the file:
 [HKEY_LOCAL_MACHINE\SOFTWARE\Policies\Microsoft\Windows\CloudContent]
"DisableSoftLanding"=dword:00000001
Press Ctrl+Shift+S and save the file with a “.reg” extension.
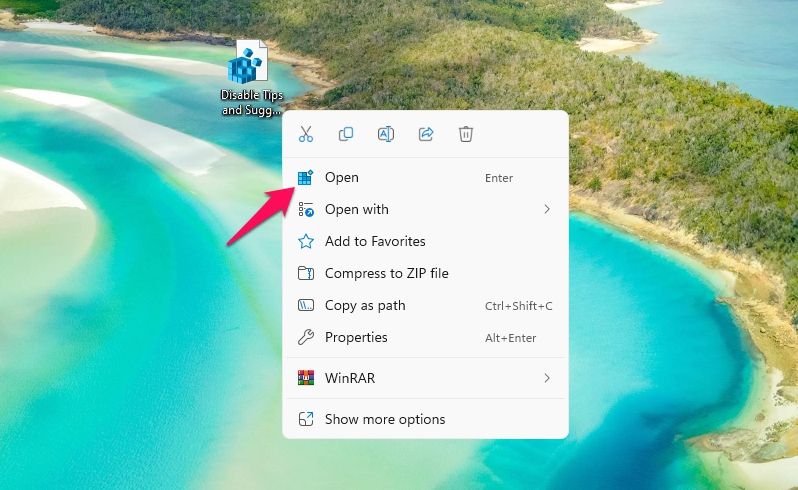
Right-click on the reg file, select “Open” and click “Yes” to the UAC prompt that pops up.
Running the file will disable Tips and Suggestions Notifications on Windows devices. However, you may need to restart your device in some cases.
Congratulations on getting rid of Tips and Suggestions notifications on your Windows 11 device! Now, they won’t hinder your workflow and concentration. To further declutter your desktop PC, learn how to disable Bing in the Start menu. It’s one of many annoying Windows 11 features from which you can free yourself.

