Key Takeaways
- GPU is the most critical component for playing PC games, and a powerful GPU is necessary for newer games or higher graphical settings.
- Windows Task Manager, System Information, PowerShell, and DxDiag are built-in tools to check your GPU on Windows.
- Third-party tools like HWiNFO64 offer more detailed and real-time information about your GPU, including temperatures and clock speeds.
Why Does Your GPU Matter?
All computers have graphics hardware that handles everything from displaying your desktop and decoding videos to rendering demanding PC games. Most modern PCs have graphics processing units (GPUs) made by Intel, NVIDIA, or AMD, but remembering which model you have installed can be difficult.
While your computer’s CPU and RAM are also important, the GPU is usually the most critical component when it comes to playing PC games. If you don’t have a powerful enough GPU, you can’t play newer PC games — or you may have to play them with lower graphical settings.
Some computers have low-power “onboard” or “integrated” graphics, while others have powerful “dedicated” or “discrete” graphics cards (sometimes called video cards.) Here’s how to see what graphics hardware is in your Windows PC.
Check Your GPU in Windows with the Task Manager
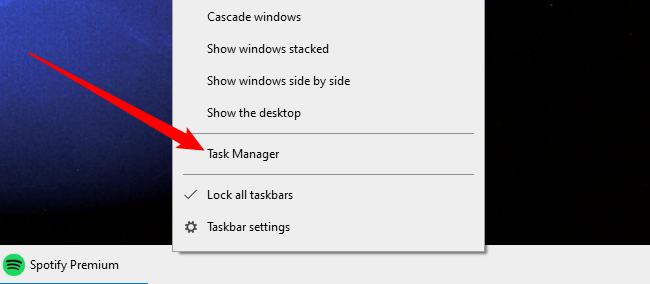
On Windows 10 and Windows 11, you can check your GPU information and usage details right from the Task Manager. Right-click the taskbar from the bottom of your screen and select “Task Manager” or press Ctrl+Shift+Esc to open the task manager.
On Windows 11, you can also press Ctrl+Shift+Esc or right-click the Start button and choose “Task Manager.”
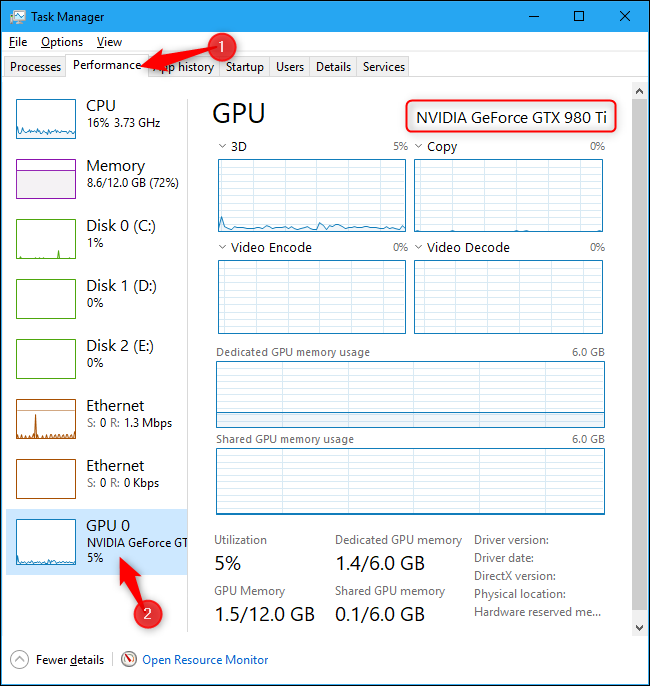
From there, select the “Performance” tab at the top of the window — if you don’t see the tabs, click “More Details.” Choose “GPU 0” in the sidebar. The GPU’s manufacturer and model name are displayed in the top-right corner of the window.
You’ll also see other information, such as the amount of dedicated memory on your GPU, in this window. Windows 10’s Task Manager displays your GPU usage here, and you can also view GPU usage by application.
If your system has multiple GPUs, you’ll also see “GPU 1” and so on here. Each represents a different physical GPU.
If you have multiple GPUs in your system — for example, as in a laptop with a low-power Intel GPU for use on battery power and a high-power NVIDIA GPU for use while plugged in and gaming — you can control which GPU a game uses from Windows 10’s Settings app. These controls are also built into the NVIDIA Control Panel.
Check Your GPU with System Information
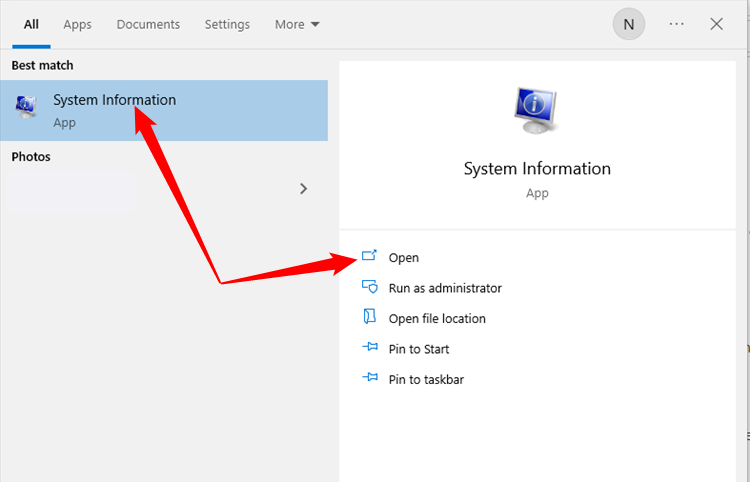
The System Information window will display almost anything you could ever want to know about your PC’s hardware. Click the Start button, search for “msinfo,” then click “System Information.”
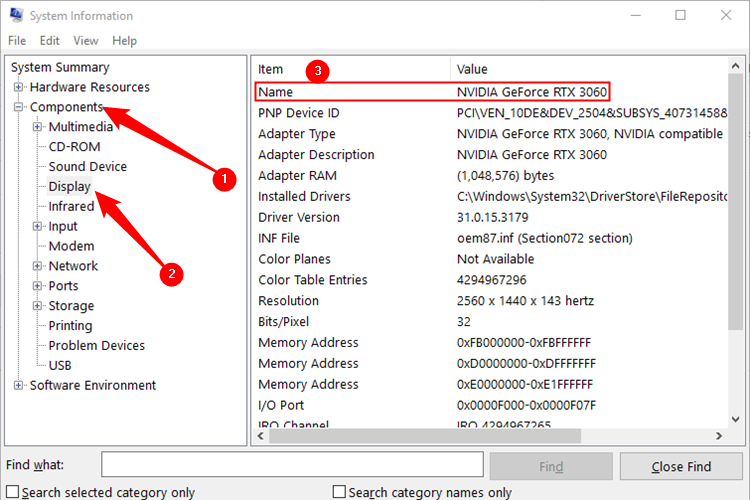
Navigate to Components > Display, and you’ll see the name of your GPU displayed at the very top.
Check Your GPU with PowerShell
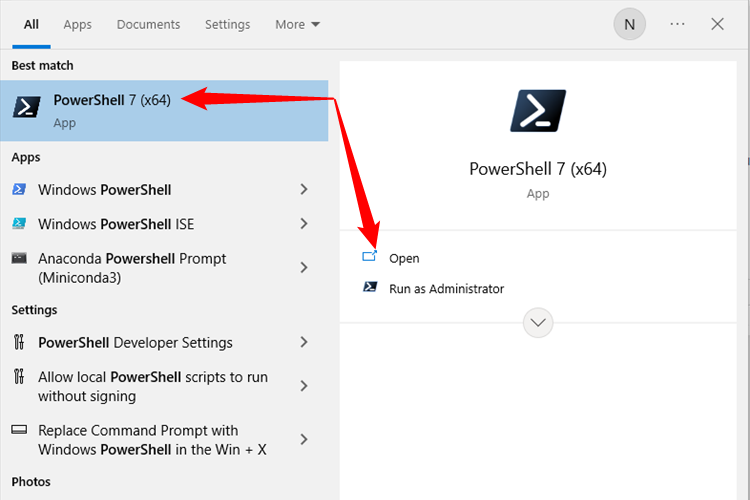
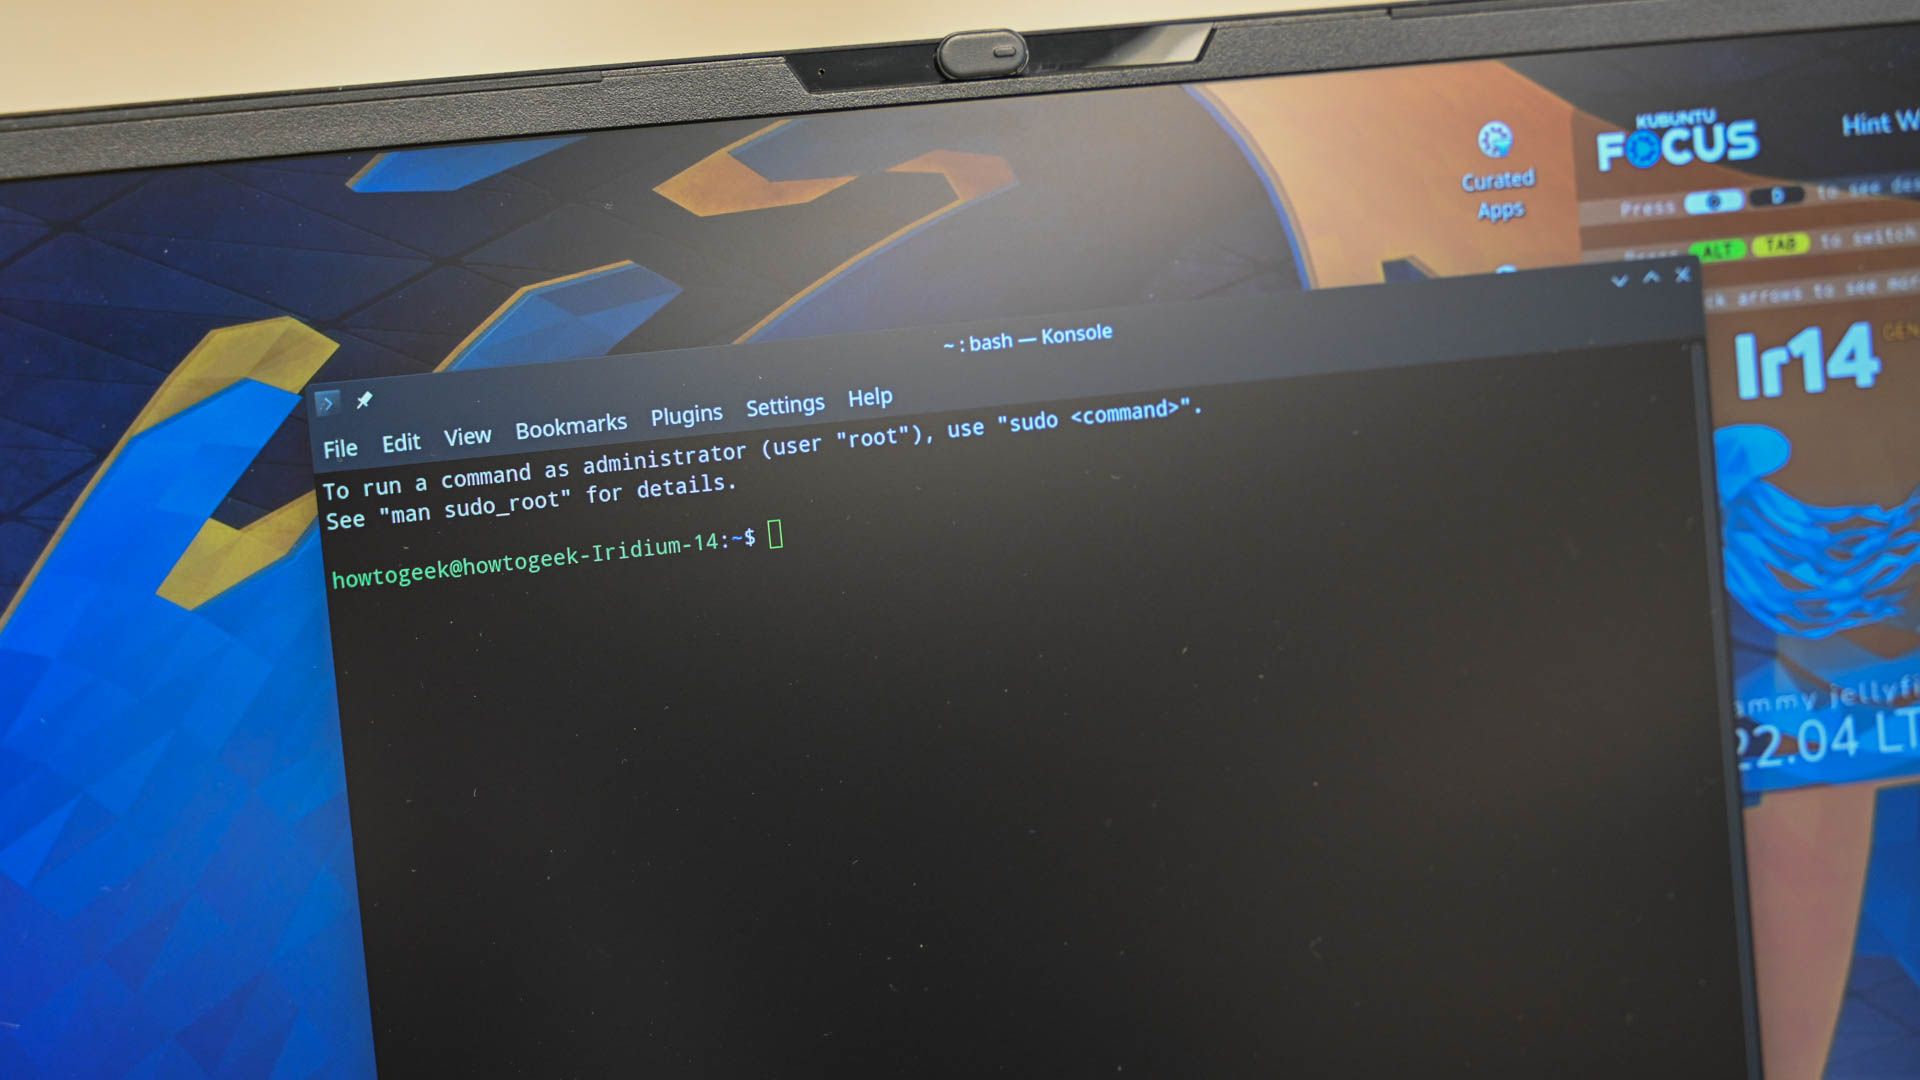
If you want to check what GPU you have with PowerShell on Windows 10 or Windows 11, you can. Click the Start button, search “PowerShell,” and then pick “PowerShell” from the list or click “Open.” It doesn’t need to be run as administrator, but there is no harm in running it as admin either.
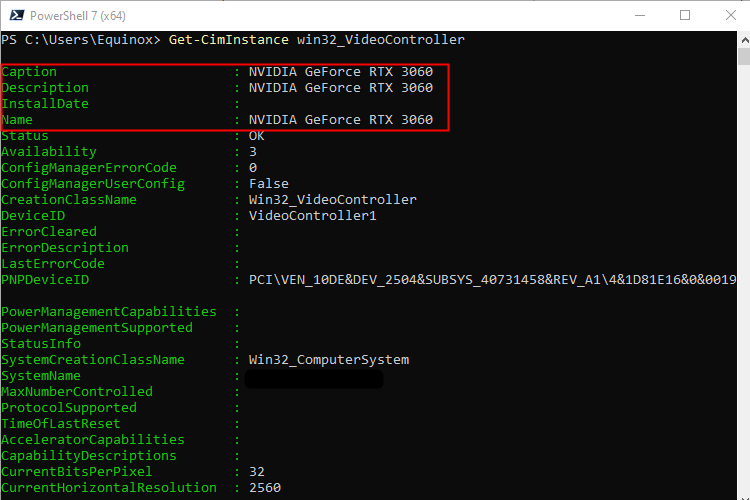
Type or paste the following command into PowerShell:
Get-CimInstance win32_VideoController
You’ll see a whole bunch of information about your graphics card. The bit we want in this case, the GPU name, is at the very top.
Check Your GPU with DxDiag
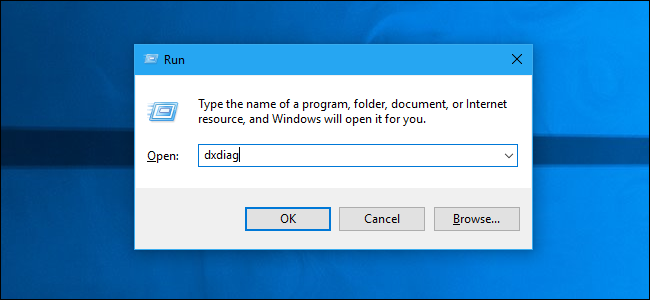
You can also find information about your GPU in the DirectX Diagnostic Tool. DxDiag was particularly useful in older versions of Windows (think Windows 7 or older), but it is present in both Windows 10 and Windows 11. To open it, press Windows+R, type “dxdiag” into the Run dialog that appears, and press Enter.
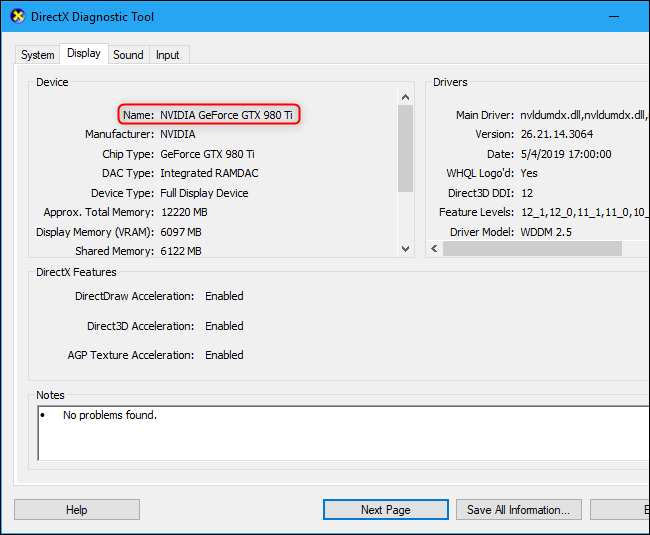
Click the “Display” tab and look at the “Name” field in the “Device” section. Other statistics, such as the amount of video memory (VRAM) built into your GPU, are also listed here.
So far, we’ve only covered ways to check your GPU that are built-in Windows utilities. You can use third-party tools, however, and they may actually be superior in some ways. We like HWiNFO64, but there are plenty of great options out there. HWiNFO64 is lightweight, portable (which means it doesn’t need to be installed), can provide real-time information about your system including temperatures, clock speeds, and more.
When you first launch HWiNFO, you can choose to launch in Summary-Only mode, Sensors-Only, or just click “Start” to open both.
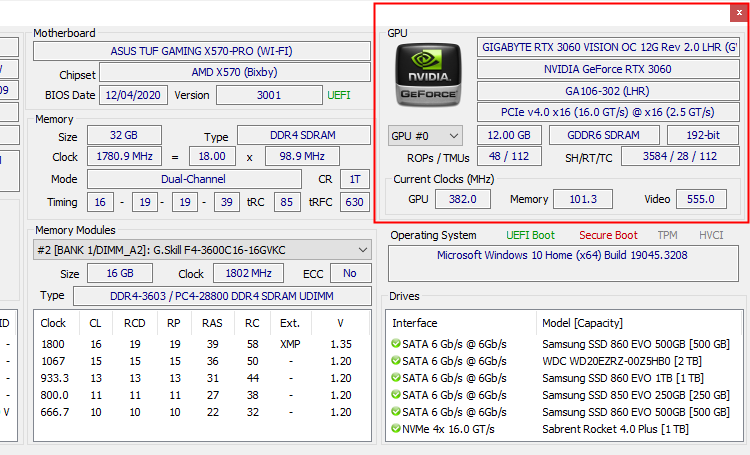
If you pick “Summary-only” or just click “Start,” you’ll be presented with a wide, dense display with all of your PC hardware specs listed. GPU information is in the upper-right corner of the Window.
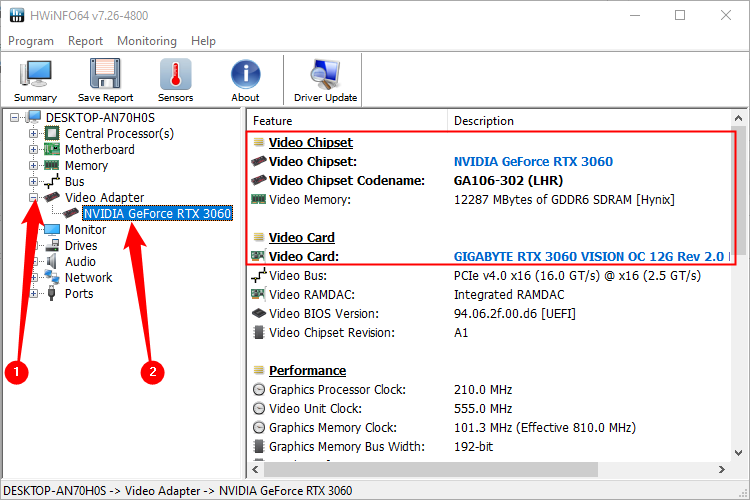
If you pick “Sensors-only” or click “Start,” you’ll see a window pretty similar to the System Information page that comes with Windows. Navigate to Video Adapter > (Your GPU). You’ll see the model, manufacturer, and other information about your GPU displayed on the right-hand side.
If you find that your GPU is not meeting your needs because it is old or underpowered, it is pretty easy to install a new GPU. You just need the graphics card, a small set of screwdrivers, and a bit of patience.

