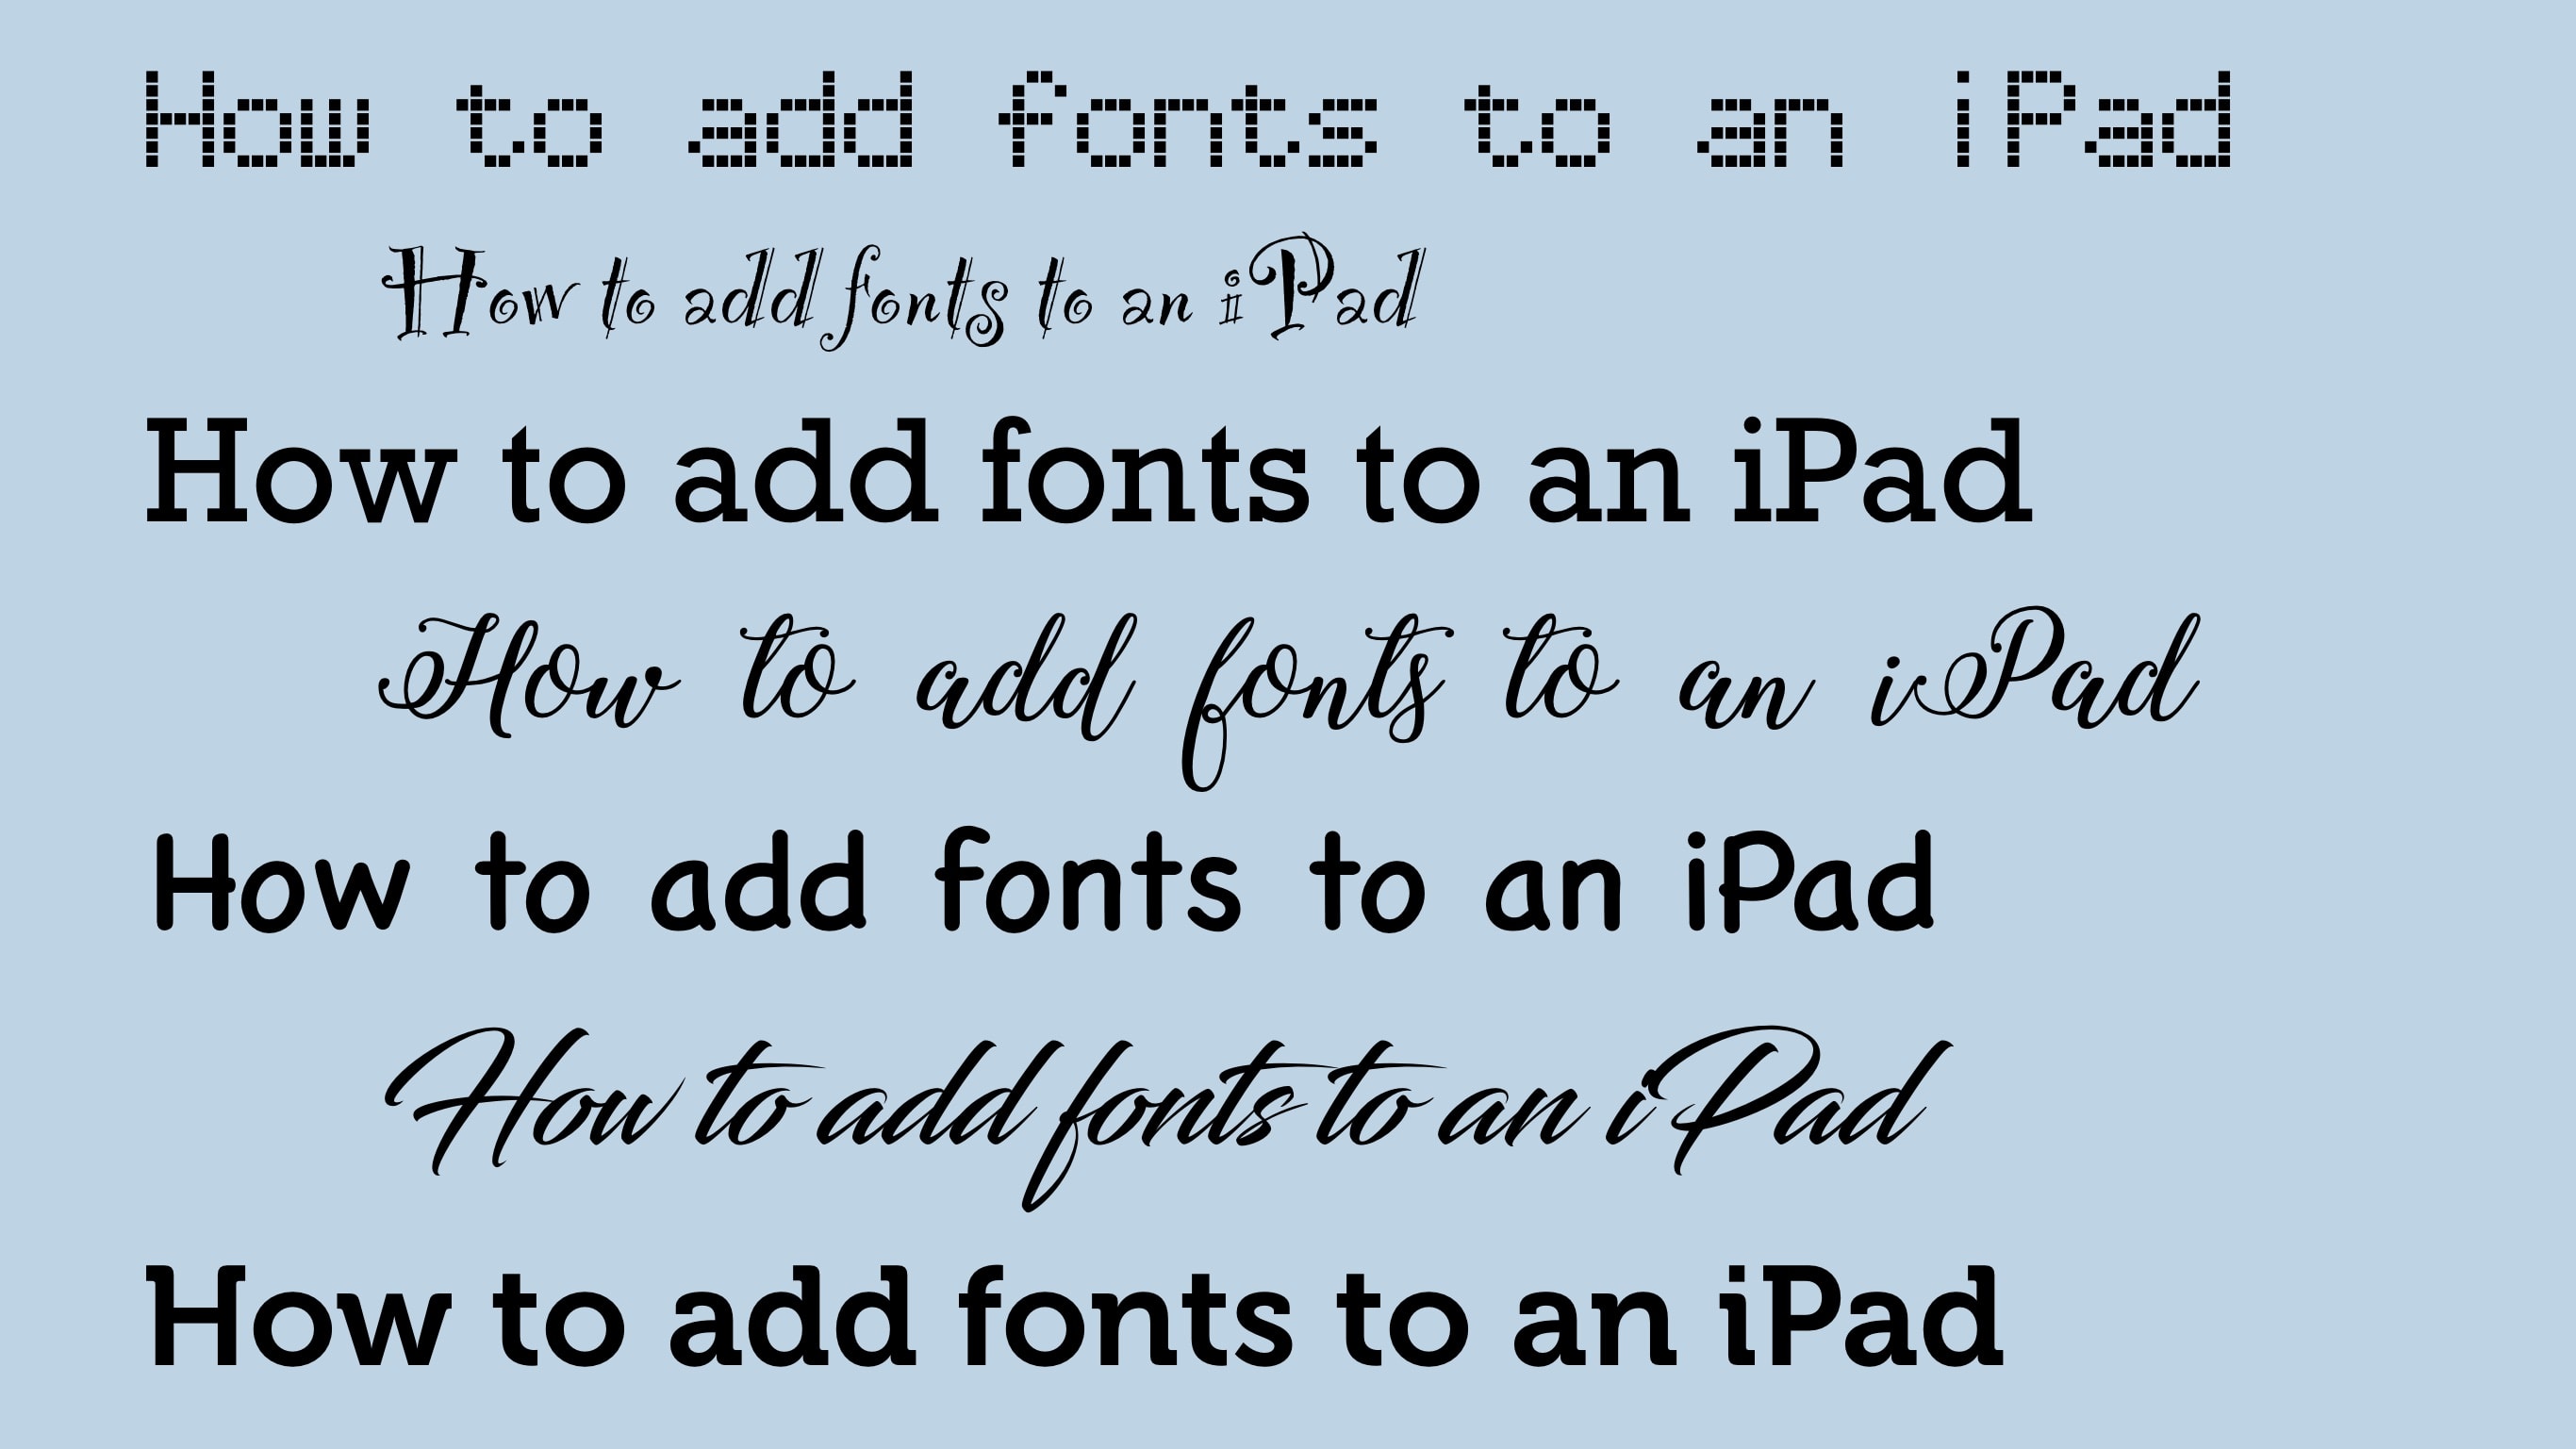
Anyone getting real work done on an iPad might need to add a font to their word processor or image creation app. The process is more complicated than it should be, but you can bring the huge numbers of fonts available for Mac or Windows to your tablet, too … if you know how.
I’ll walk you step-by-step through the installation.
Fonts are our friends
Fonts are important. Sarah Hyndman, author of Why Fonts Matter, says, “You may not believe it, but fonts can change the meanings of words right before your very eyes, alter the taste of your food, evoke emotional responses and reveal their users’ personalities.”
iPads come with a wide array of typefaces preinstalled, but if the one you need is absent, you can add it to your tablet.
How to install a font onto an iPad
Adding a font to an iPad isn’t a simple process. It’s not too hard, either, but there are more steps than is really ideal.
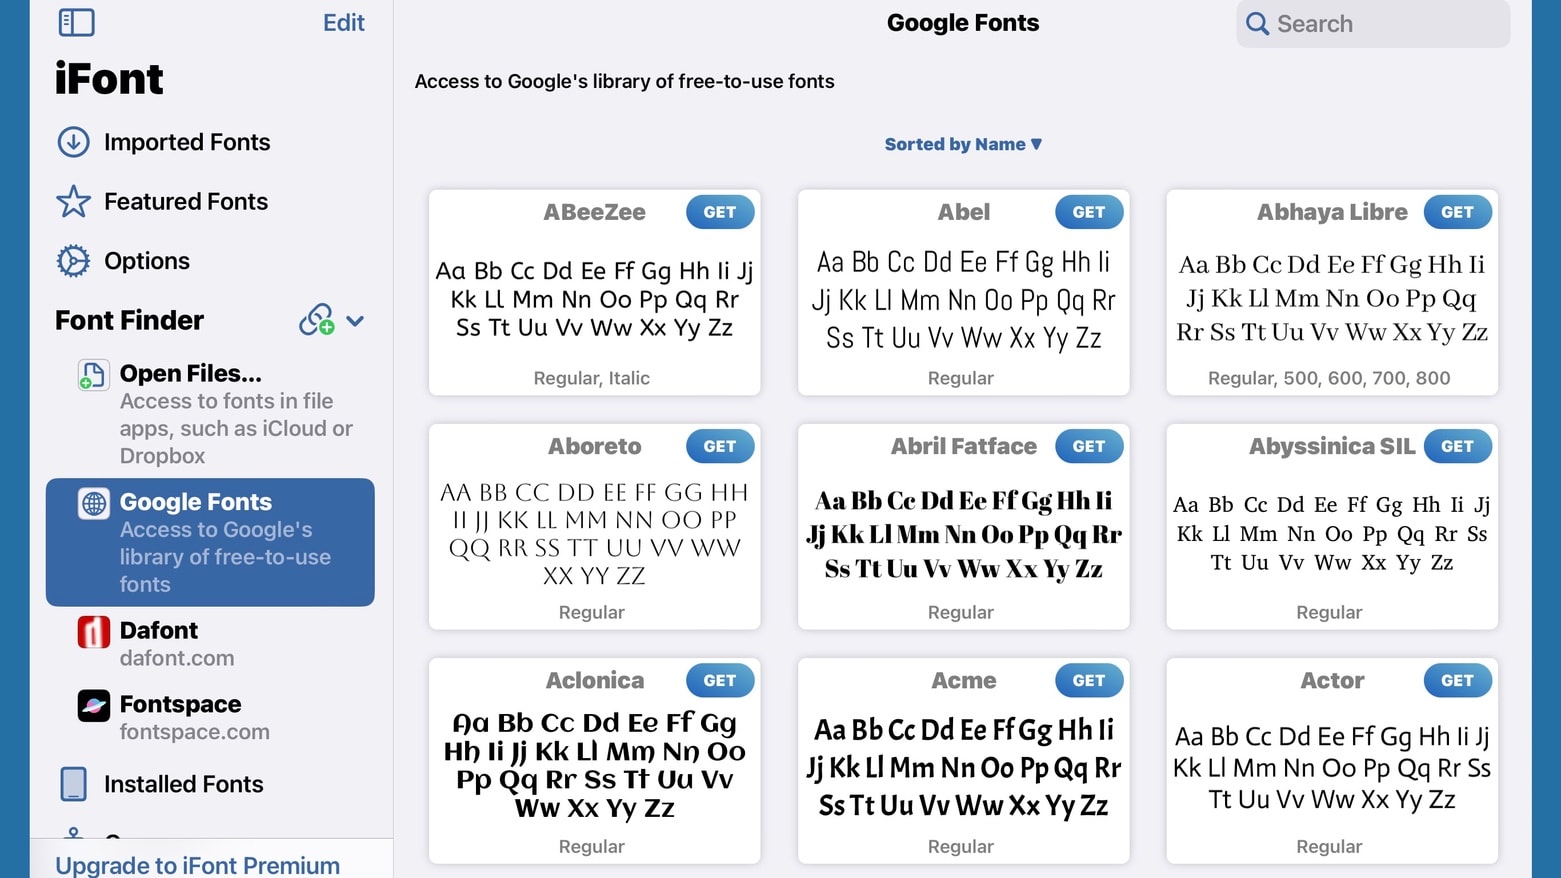
It all starts with needing a third-party application. This isn’t optional — you can’t add a font without it. I recommend iFont, which I’ve used for years. It’s free and can install fonts pulled from a variety of sources.
Screenshot: Coding Corner LLP
iFont comes with built-in links to Google Fonts, Defont and Fontspace. Use these to search for the font(s) you want. If you find one you like, tap on the Get button, then skip down to Importing a font to your iPad.
Alternatively, iFont can import typefaces you downloaded from the web, which gives you a vastly larger selection. Do a search for the font name and download it. There are huge numbers available for free or for pay.
Then find the file you just downloaded with the iPad’s Files application. It’ll be in your Downloads folder, either on the iPad or on iCloud.
Screenshot: Ed Hardy/Cult of Mac
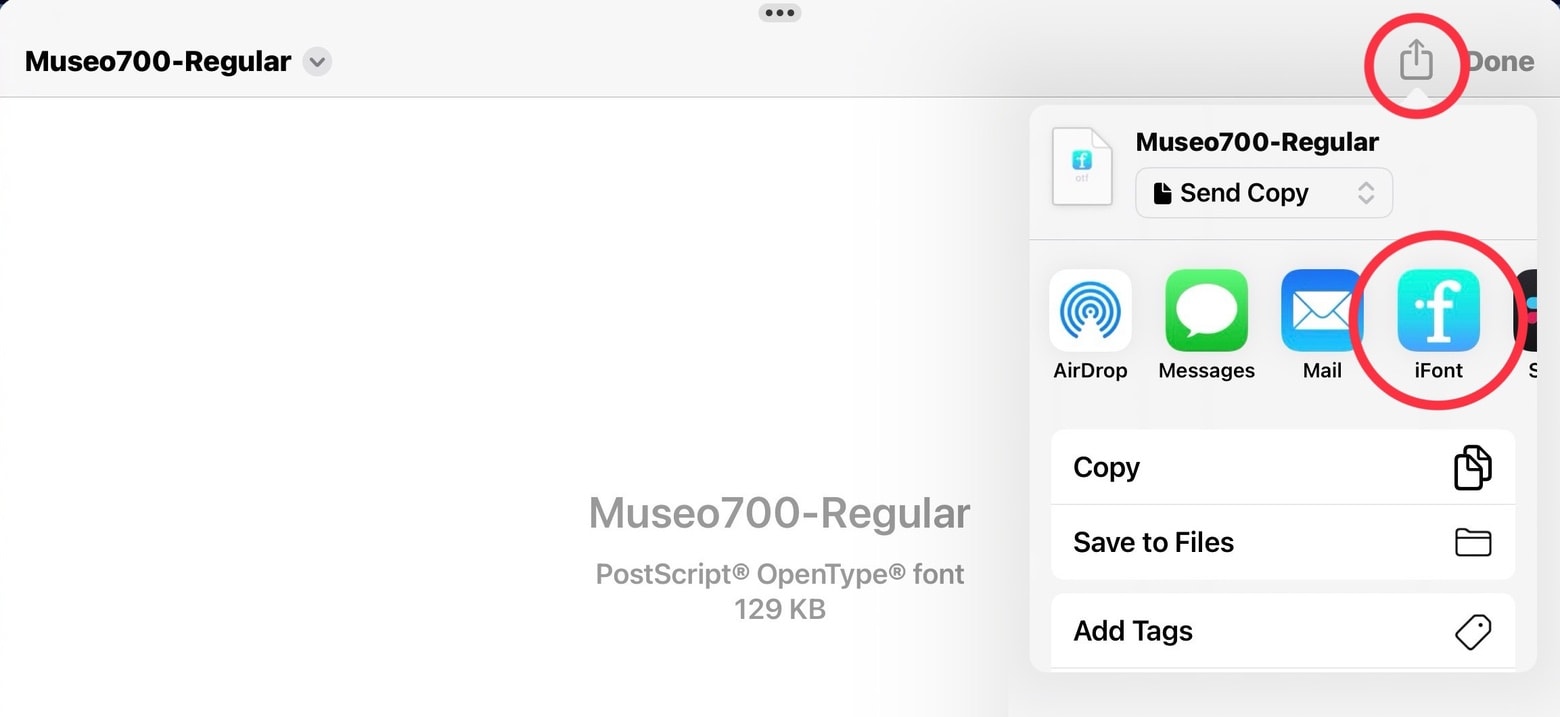
Tap on the downloaded font file to open it, then tap on the Action button (box with an arrow) at the top of the iPad screen. This opens a window that will let you export the font to iFont.
Importing a font to your iPad
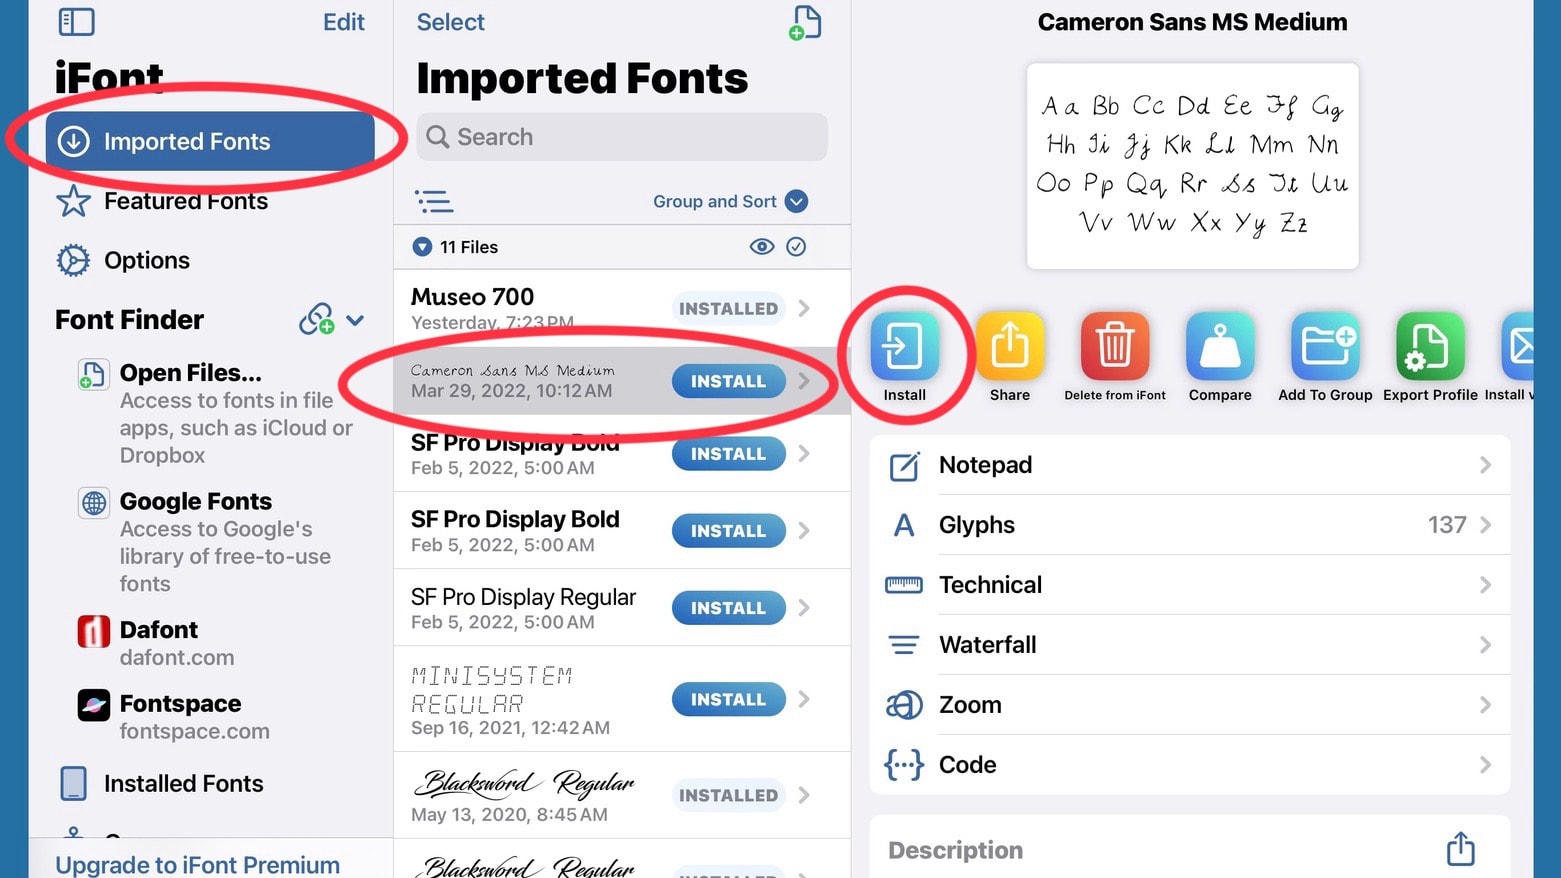
In iFont, click on Imported Fonts in the left column. The one you just added should be on this list. Tap on it.
Screenshot: Ed Hardy/Cult of Mac
This displays the details of the font, including a small notepad that lets you type a bit so you can see whether you really like the look.
When you’re ready, tap on the Install button. This opens a window that says, “This website is trying to download a configuration profile. Do you want to allow this?” Yes, Allow it.
Screenshot: Ed Hardy/Cult of Mac
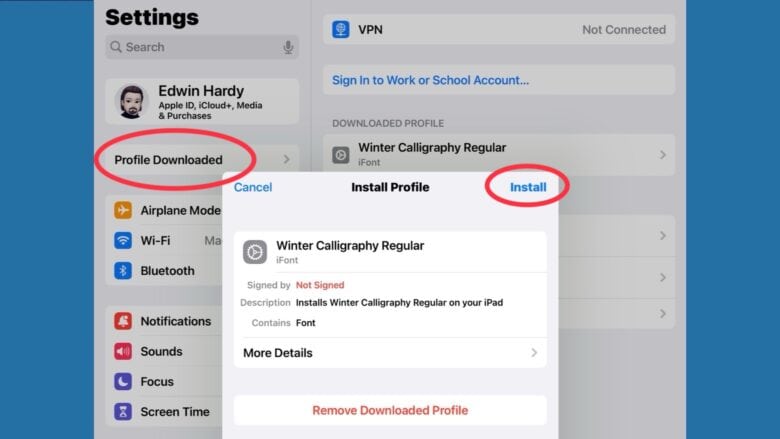
Now go to the iPad’s Settings application. In the left column, you will see a new entry: Profile Downloaded. Tap on it.
That opens a window with the option to install the Font. Tap on Install. You’ll need to enter your iPad’s passcode to continue. Next, there’s a warning saying it’s not signed — that doesn’t matter, so tap Install. Tap Install one last time on the final popup and you’re done.
Go to the iPad application you want to use the new font in and check. It should be there ready to use. There’s no doubt this installation process is complex, but at least it’s universal. Every app on your iPad that supports fonts should have access to the one(s) you just added.
If you go to Settings > General > VPN & Device Management, you’ll see the typefaces you previously installed. You can tell them from other configuration profiles because they’re labeled “iFont.” From here, you can delete a font by tapping on it, then selecting Remove Profile.

