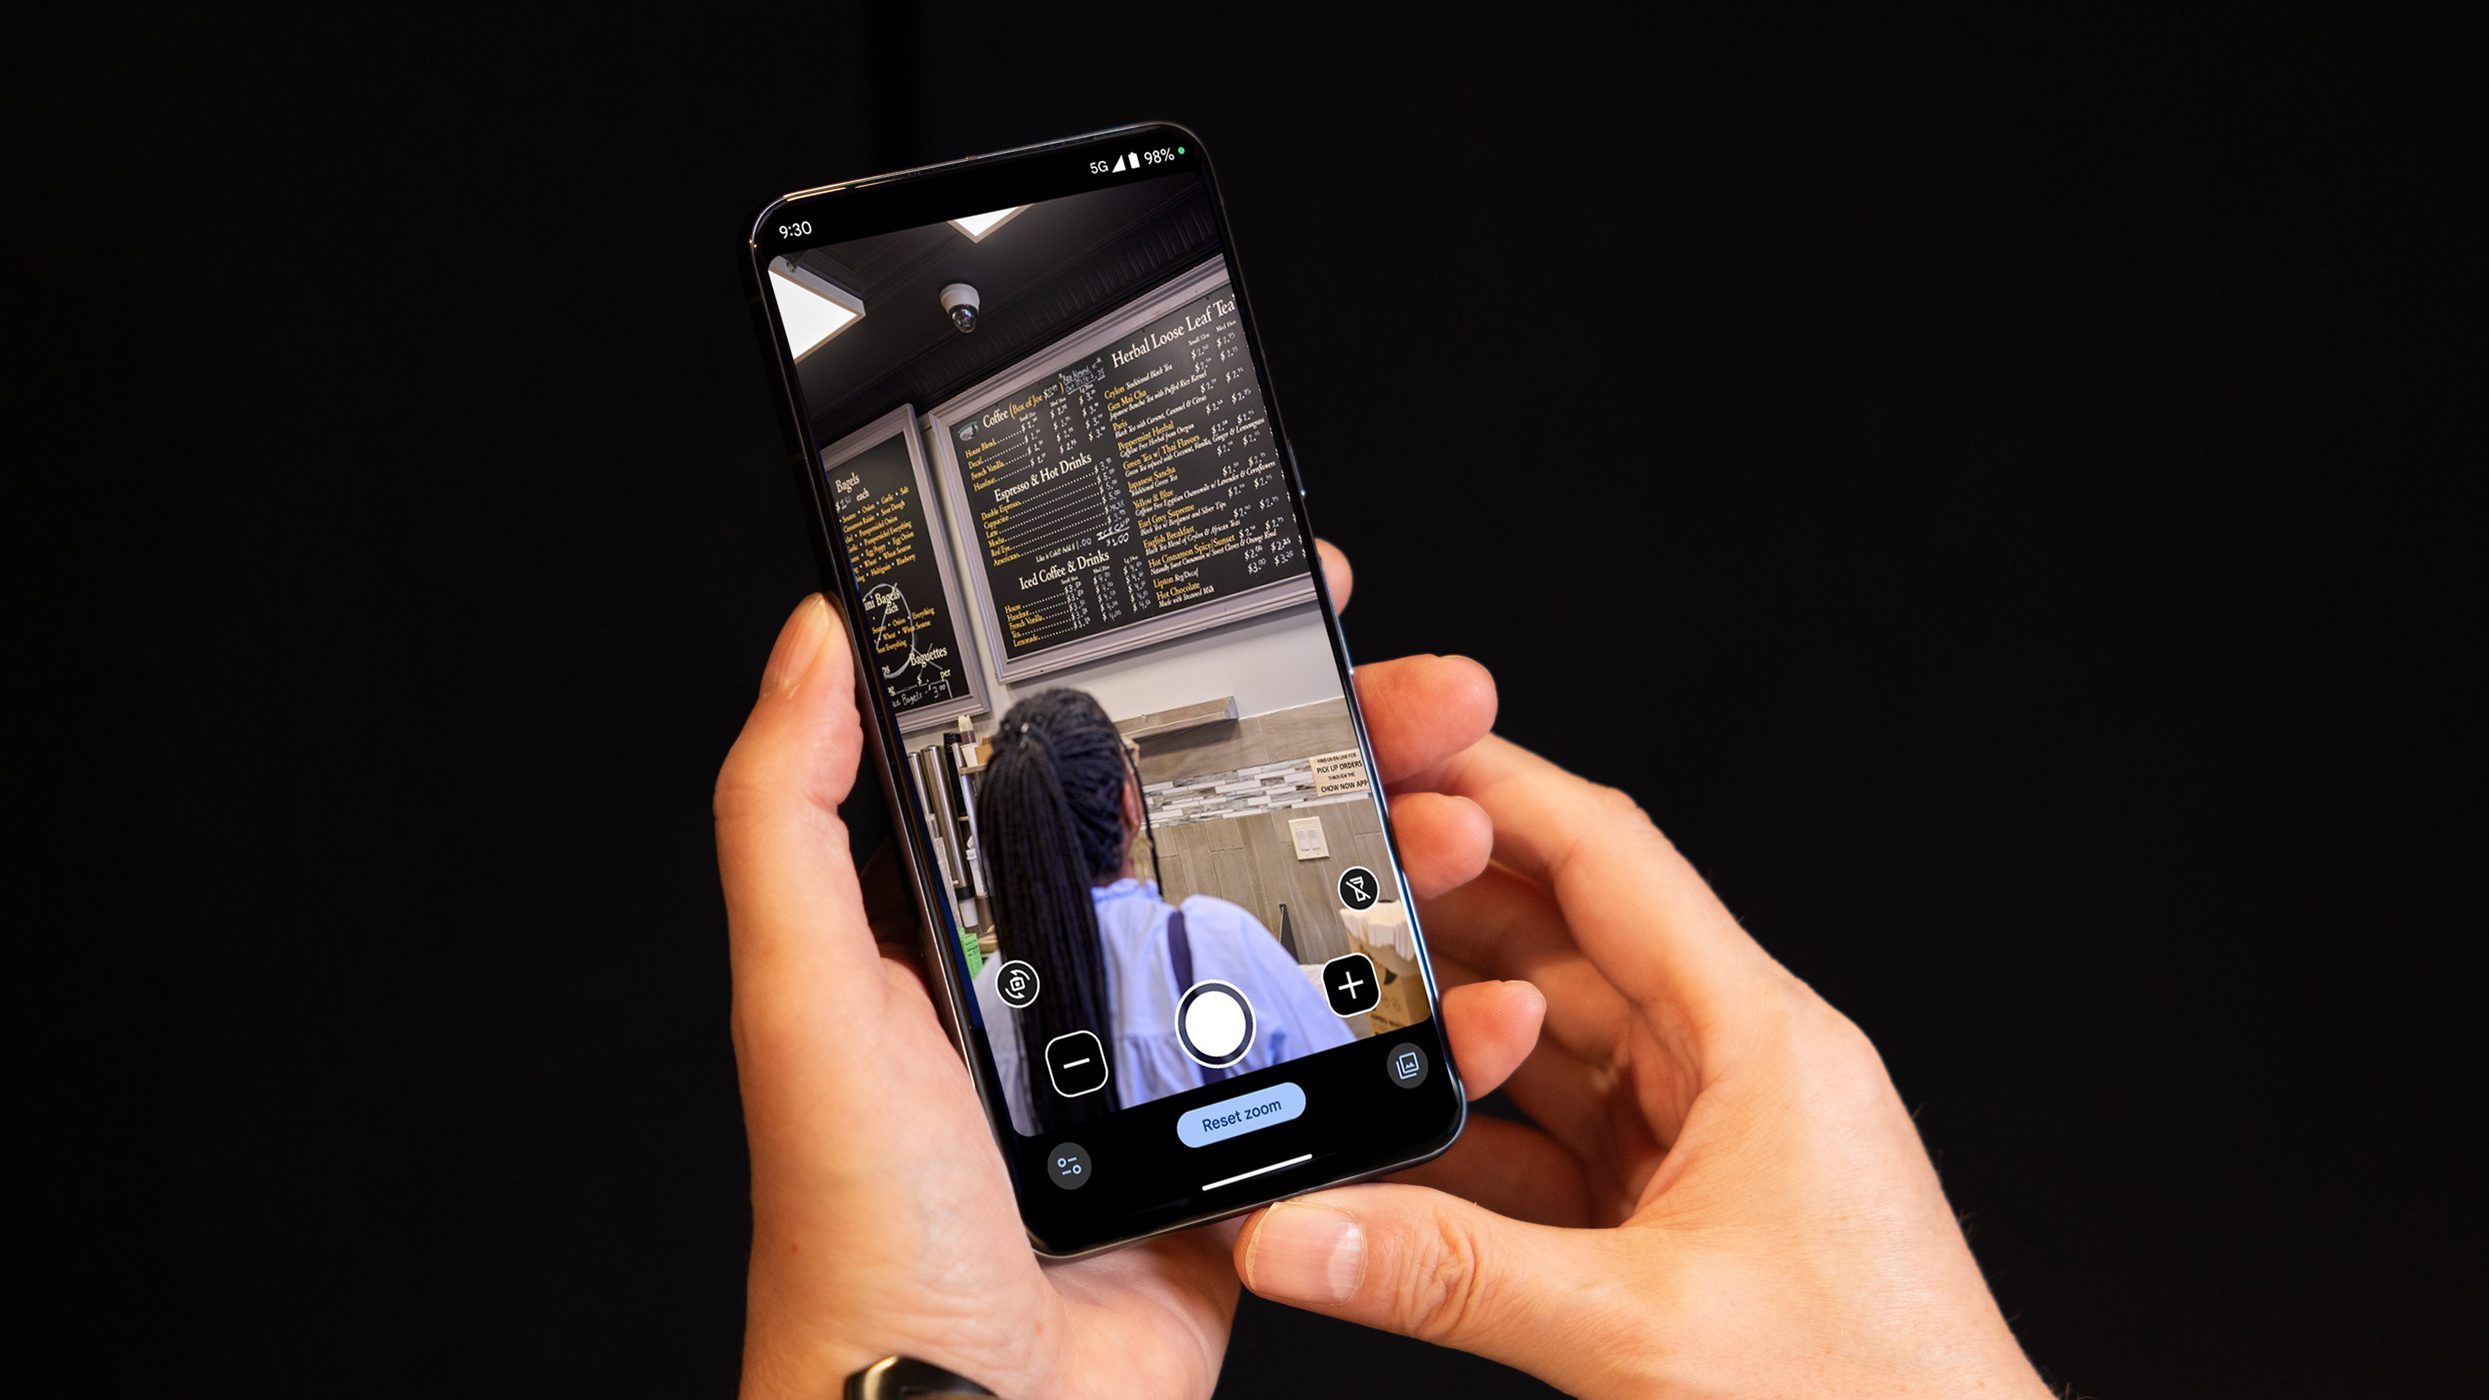
Along with the launch of the Pixel 8 (review) and Pixel 8 Pro (review), Google debuted the Magnifier app, which is a new visual-enhancing accessibility tool. The app is currently exclusive to some Pixel smartphones. nextpits tells you the best ways and tips on how to use the app effectively.
What is Google’s Magnifier app for Pixel?
The Magnifier is Google’s new app that functions as a standalone magnifying glass on smartphones. Primarily designed to assist users with vision impairments such as myopia (nearsightedness) and hyperopia (farsightedness), it is also beneficial for other users in various situations.
The app operates by utilizing the cameras on Pixel smartphones, enhanced by AI for image processing, and is presented in an easy-to-use interface. This feature allows users to magnify or zoom into distant or tiny texts and details on signage, labels, and menus. Additionally, users can apply optional effects to further enhance the texts.
Currently, the app does not offer transcription or translation capabilities. For these functions, users will need to utilize Google Lens, which is integrated with the app and allows for copying and pasting of texts. For iPhone users, Apple provides a comparable app called Visual Look Up, which identifies objects in photos and videos, but does not magnify texts.
How to use Google’s Magnifier app for Pixel
While the app comes preloaded on the new Pixel 8 series, older compatible Pixel camera phones need to download Magnifier from the Play Store before using it. The app is straightforward to use with intuitive controls and functions and without the clutter of a regular Pixel camera app, making it convenient for users the tool is really designed for.
Below is a step-by-step guide on how to use the basic Magnifier zoom feature
- Open the Magnifier app from your device.
- Point the camera to the text or signage you need to read.
- Use the zoom in (+) or out (-) to adjust the size of the subjects to be visible on the screen.
- Tap the shutter button (circle) at the bottom center to take an image.
- Images are not saved automatically, but you can keep copies of them by selecting the Save icon on top.
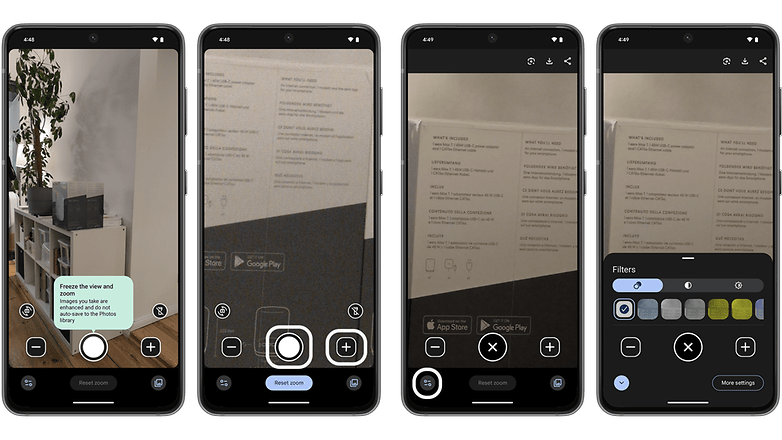
Applying additional effects, switching cameras, and using a flashlight
There are also controls to easily switch cameras or enable flashlight besides the shutter button. For the latter, it supports an adjustable slider for the intensity, which is a nice addition.
The other control is to access visual effects where you can apply or adjust image parameters like brightness, contrast, and colors. Here’s how to perform editing on images:
- After capturing an image, press the settings icon in the bottom-left corner.
- Select the parameter you want to adjust.
- Use the slider to adjust the level.
- Tap the Save button to store the image, or tap the X to end applying effects.
Which Google Pixel smartphones are compatible with the Magnifier app?
Google’s Magnifier app is available for download for the Google Pixel 5 and later models. But for Pixel 8 and Pixel 8 Pro, they are already built-in. Currently, the app is not supported with the Pixel Tablet (review) and Pixel Fold (review). But they are likely to be added later.
- Google Pixel 5
- Google Pixel 5a
- Google Pixel 6
- Google Pixel 6 Pro
- Google Pixel 6a
- Google Pixel 7
- Google Pixel 7 Pro
- Google Pixel 7a
- Google Pixel 8
- Google Pixel 8 Pro
How would use the Magnifier app on your Google Pixel smartphone? Do you think the zooming feature would be helpful in your case? Please let us know if you want to see more Pixel related how to and guides, like the new thermometer on the Pixel 8 Pro.


