When Apple unveiled its first-ever smartwatch back in 2014, it’s fair to say that the world wasn’t exactly sure what it was for… and neither was Apple. In those early days, along with the fitness elements which would remain an enduring part of the product’s appeal, the company talked enthusiastically about sharing taps, sketches, and heartbeats with friends, which would not. It took time for users and third-party developers to teach Apple what they wanted from a smartwatch, and for the company to take that on board.
Today, the Apple Watch is a mature and versatile product. It’s so versatile, indeed, that you may not be aware of some of its most useful capabilities. In this article, we’re going to catch you up.
Take better iPhone photos
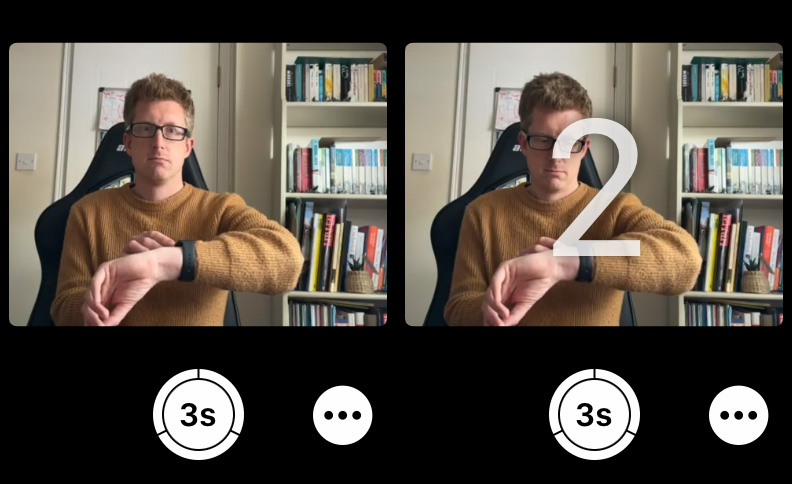
This was a superb piece of lateral thinking. There have always been situations where it’s difficult or impossible to trigger a camera because it needs to be out of reach, or out of sight, of the person taking the picture: when you’re trying to photograph the ports around the back of your Mac, for example, or when setting up a formal group photo that everyone wants to be in. Timers used to be the main solution, but often resulted in a mad scramble to place the camera correctly and get back in time before the time ran out. But the Apple Watch offers something better.
Open the Camera Remote app on your watch, and it will simultaneously open the Camera app on the paired iPhone. Whatever the iPhone’s camera can see, you can now see on your watch; you can switch between the front and rear cameras (and toggle some other settings) using the options button at the bottom right. Once you’re happy, hit the three-second timer button, look up and smile, and enjoy your perfect photo.

Foundry
Unlock other Apple devices
An Apple Watch, once you’ve unlocked it with a single passcode input, remains unlocked as long as it stays on your wrist. It can thus act as a handy digital key that’s on you at all times, unlocking your Mac and iPhone by proximity alone.
On iPhone, open the Settings app and go to Face ID & Passcode (or Touch ID & Passcode on older devices), then scroll down and tap the toggle under Unlock With Apple Watch. On Mac, open System Settings and go to Touch ID & Password and click the toggle next to your Apple Watch.
Play games
As small as the Apple Watch’s screen may be, it can still support some fun games; they just need to be designed with that limitation in mind. You need to be selective. We’d recommend Deep Golf and Lifeline, both of which make perfect sense in this format, but there are some more excellent suggestions here.
Talk to ChatGPT
You probably have your own thoughts on the ethics of AI, but it’s hard to deny that ChatGPT is fun to play with. Thanks to the Petey app, you can now have those conversations on Apple Watch. Tap the ‘Ask me Anything’ button then type in a query (or better still, use the dictation button and save your tapping finger) and you’ll soon hear what our future AI overlord thinks of the matter. There’s even a complication, which means Petey is never more than a tap away.

Foundry
Control navigation with air gestures
The standard control method for Apple Watch involves having the device on one wrist, and then tapping the screen and pressing and rotating the buttons and dials with the other hand. But there are situations where you need to control the watch with the same hand it’s on. And this is possible, thanks to AssistiveTouch, one of Apple’s handy accessibility features.
Open the Watch app on the paired iPhone. (Alternatively, you can set the feature up in the Apple Watch’s own Settings app, but I found this fiddly.) In the My Watch tab, select Accessibility, then scroll down until you see AssistiveTouch. Tap this, then tap the toggle at the top of the next screen to turn it on.
By default, doing a pinch gesture with the watch-bearing hand will take you forwards in menus, while double-pinching (pinching twice, rather than pinching once with two fingers) will take you back; clenching your fist will act as a tap, while double-clenching will open a menu of actions, which takes a little getting used to. In fact, the whole thing has a learning curve, but practice makes perfect, and you can change the actions tied to each gesture.
Tell the time without looking
If for whatever reason you are unable to look at your Apple Watch but you’d still like to know the time, Speak Time is the lesser-known feature for you. To set it up, open the Settings app on the watch and go to Clock, scroll down until you see Speak Time, then tap to turn it on. (Again, this can also be done in the Watch app on a paired iPhone; again, go to Clock then hit Speak Time.) Now you need only hold two fingers on the watch face for a second or so and it will tell you the time out loud.
Conversely, if you’d like to know the time silently without looking at the screen, consider Taptic Time. (You can turn this on in the Watch app by going to Clock > Taptic Time, or following a similar route in the Apple Watch’s Settings app.) There are various options but I find the Digits format easiest: this would for example give one long tap, followed by four short taps, followed by three long taps, followed by six short taps, to give you the time 14:36.
Quickly reply to messages
The Apple Watch probably doesn’t seem like the optimal device for writing out messages, but watchOS has been cleverly designed to help. Tap a notification of an incoming message (or open the Messages app on your Apple Watch and tap a message there) and you’ll see the option to reply. This is easier than it sounds.
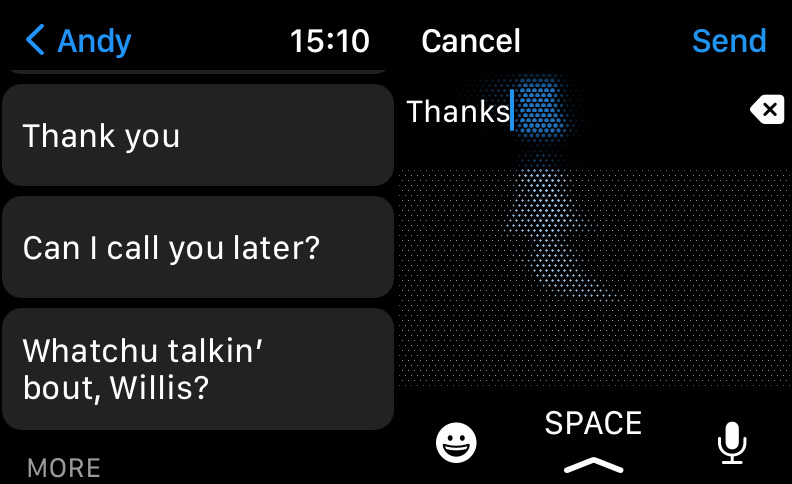
The easiest method is to select one of the pre-written replies, such as yes, no, and “Can I call you later?” One tap and the canned reply is winging its way to the recipient: easy. And if these replies seem too limited, write some of your own by opening the Watch app on your paired iPhone and going to Messages > Default Replies.

Foundry
If you’d rather be spontaneous, you can type out a reply on your wrist in the onscreen keyboard, but we’d recommend that you instead swipe up and select the Scribble keyboard instead: this has you scrawl a letter at a time using the entire screen, which is much easier than hitting tiny keys. Or best of all, tap the dictation button and speak your thoughts out loud.
Make your battery last much longer
Hardly anyone seems to know that the Apple Watch now has a Low Power mode–perhaps because it already had a Power Reserve mode, which was far more drastic and made the watch basically unusable. But Low Power, finally added in watchOS 9 in 2022, is much closer to the equivalent iPhone feature, simply cutting back on features and settings to eke out a little more battery life.
To turn on Low Power mode, open Control Center by swiping up from the clock face, then tap the battery percentage. Just below the Battery Remaining figure, you’ll see a toggle labeled Low Power Mode. (Note that in watchOS 10, Control Center is instead accessed by pressing the side button.)
Preserve your privacy
The always-on screen offered on the Series 5 onwards has many good qualities, but you might be worried that it means personal data may be visible to other people. Fortunately, you can adjust the settings so that sensitive complications and notifications only appear when your wrist is raised.
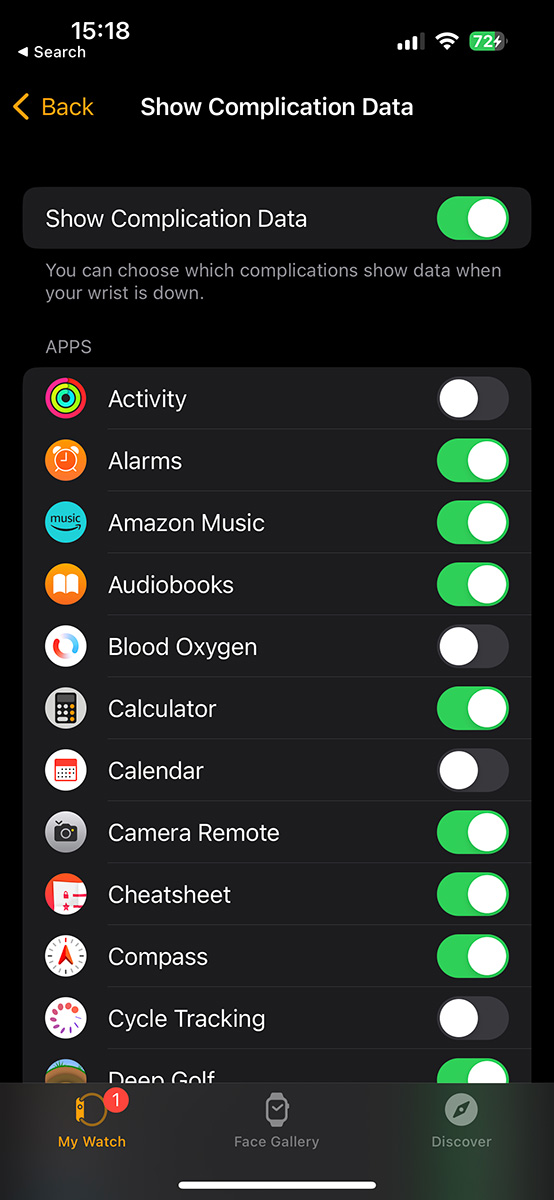
Let’s start with complications, which could display personal data such as calendar appointments or health information. Open the Watch app on your paired iPhone. From the My Watch tab, go to Display & Brightness > Always On > Show Complications Data. From here you can pick and choose which complications are allowed to display their data when the always-on screen is in dimmed mode.

Foundry
Similarly, if you go to Display & Brightness > Always On > Show Notifications you can fine-tune the notifications which appear in dimmed mode, and which are only allowed to reveal their information when you’ve raised your wrist.
Get discreet directions
When you’re lost in a new city, the last thing you want to do is advertise the fact that you’re a tourist (or indeed the fact that you’ve got an expensive smartwatch on your wrist and an expensive smartphone in your pocket). For this reason, it’s desirable to have Maps advise you of turnings in a way that’s discreet and doesn’t require that you look at the screen of your Apple Watch or iPhone.
While you’re still somewhere safe, open Maps on your iPhone and select a destination and the type of directions you want. Start the journey, and make sure you turn off the sound alerts by tapping the mute/unmute button on the right-hand side. Tuck the iPhone away in a pocket.
Now, as you walk along, the Apple Watch will alert you to left turns by giving you three sets of two short buzzes and signal right turns with a rapid and even series of 10 to 12 haptic taps. (You don’t need to count them, it’s the rhythm that gives it away.) When you reach your destination you get a long vibration.


